BCG Building Generator — User Guide

Version 1.3.0 · Unity 6 · Built-in Render Pipeline, URP and HDRP
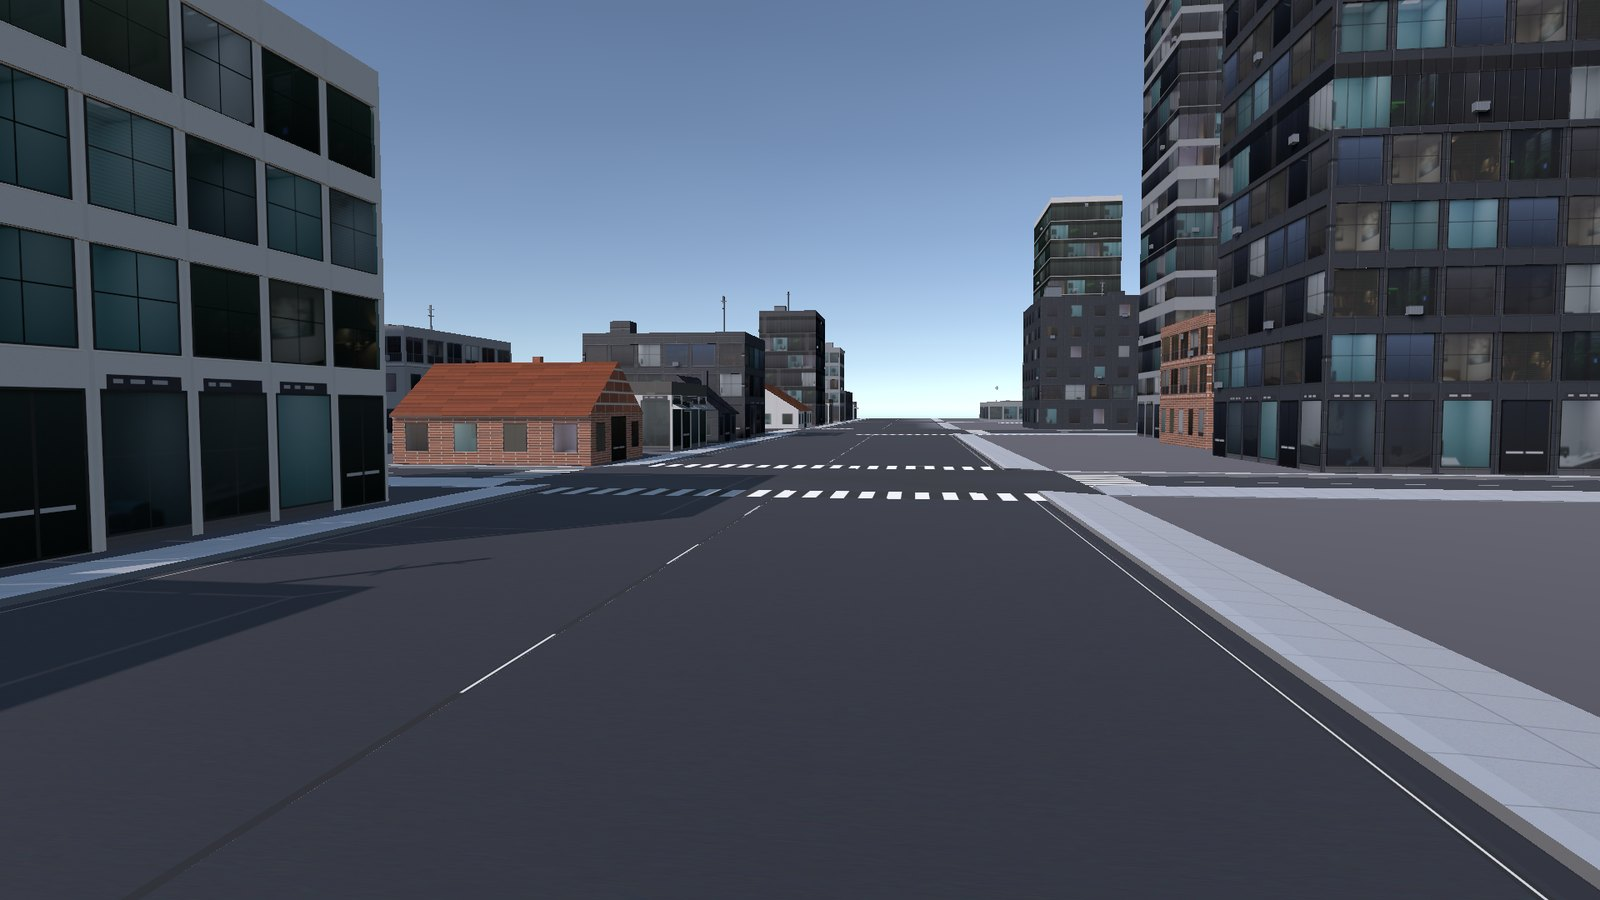
BCG Building Generator is a procedural building tool for city-filler geometry: low-cost, one-draw-call-per-building background buildings for driving, open-world, and mobile games. Mesh and prefab assets are generated at editor time; the pure geometry engine also ships in the Runtime assembly (BCG_BuildingMeshCore + BCG_RuntimeBuildingFactory), so games can generate buildings at runtime too (see Runtime generation). The runtime components carry no editor dependencies: the geometry core, the factory, BCG_BuildingZone (an optional district marker on BoxCollider zones), BCG_GenerationPreset assets, and a hidden BCG_BuildingMarker stamped on every generated building.


Contents

  1. Installation · Playable demo scene
  2. Opening the window
  3. Workflow A — Single building · Paint in Scene
  4. Workflow B — Variation Row
  5. Workflow C — Street Scatter · Along Path
  6. Workflow D — Populate Zones · City Blocks · District Presets
  7. Manage zone — inventory & health
  8. BCG_BuildingZone district component
  9. Archetype reference
  10. Detail Levels · Simple / Standard / Detailed
  11. Facade Extras
  12. Fake Interiors
  13. Advanced fields
  14. Regenerate All
  15. Fix Materials (Active Pipeline)
  16. Bake UVs (Existing)
  17. Save As Prefab Assets
  18. Pipeline notes
  19. Managing generated output · Obstacle Layers · Ground snapping · LODs · Rooftop Props
  20. Runtime generation API
  21. Deterministic seed contract
  22. Package contents

1. Installation

Import the package. All shipped scripts, textures, and the demo scene land under Assets/BCG/BuildingGen/. Generated meshes, prefabs, and materials are written to Assets/BCG/BuildingGen/Generated/ the first time you generate a building.

Playable demo scene

Open Demo/BuildingGen_Demo.unity and press Play — the demo city is explorable with a collision-aware fly camera (it slides along buildings instead of clipping through them):

Input Action
Click Lock the cursor for mouse-look / select the building under the crosshair
WASD + mouse Move / look
Space / E · Ctrl / Q Fly up · down
Shift Fast
N Day / night (swaps the facades to their _Night variants and darkens the sky)
Esc Release the cursor / deselect
H or F1 Toggle the controls overlay

Clicking a building highlights it and opens an info card with its generated facts — archetype, variant, seed, footprint, and mesh vertex / triangle counts — read straight from its BCG_BuildingMarker. The demo scripts live in Demo/Scripts/ (their own BCG_BuildingGen.Demo assembly, runtime-only) and support both the legacy Input Manager and the new Input System, so the scene plays out of the box in any project configuration. The same scene is what the store's playable WebGL demo is built from.


2. Opening the window

Tools > BoneCracker Games > Building Generator > Building Generator

The same submenu also holds Welcome Window — a quick-start panel that opens automatically the first time the asset is imported.

The window is a single docked panel built with UI Toolkit. Minimum size is 418 × 480 px, and a subtitle under the title always shows where generated assets are written (Output: Assets/BCG/BuildingGen/Generated/Prefabs). There is no Play-Mode dependency — everything runs in the Editor.

Window layout — Build | Manage

A Build | Manage segmented strip at the top splits the window into two zones. The zone you last used is remembered per-user (BCG.BuildingGen.WindowZone).

Build zone — everything that creates buildings. A second strip below it selects the sub-mode: Single | Street | Zones.

Each sub-mode shows its own controls, then two shared blocks used by all three:

Manage zone — read-only inventory of the buildings already in the open scene plus the material maintenance tools (§7). It does not generate anything. Its Materials panel holds the Fix Materials button (§15) and the global Night Lights dial (§15, Night Lights); the pipeline / material-health status lives on the pinned action bar's badge, which stays visible in both zones.

Pinned action bar

A single action bar is pinned to the bottom of the window in the Build zone (it stays put while the body scrolls). It carries:

The action bar reflows on a narrow window (down to the 418 px minimum) so the Generate button is never clipped.

The Frame on generate toggle (in the Tools ▾ menu, persisted per-user) controls whether each generate action also frames the new building(s) in the Scene view; selection happens either way.


3. Workflow A — Single building

Single sub-mode — archetype, massing, advanced fields, live preview, and the pinned action bar.
  1. Choose an Archetype (Tower / Shop / Apartment / House). Switching archetype applies sensible size presets; all fields remain editable.
  2. Choose a Texture Variant (A – D palette: Light Gray / Brick / Graphite Curtain / White Plaster).
  3. Set Cells X, Cells Z, Floors, and Seed. - Width = Cells X × Cell Width; Depth = Cells Z × Cell Width. - The live Footprint readout below the fields shows the resulting dimensions.
  4. Click Generate Building in the pinned action bar.

The generator writes a mesh asset and a prefab under Generated/ (GUID-stable overwrites), then instantiates the prefab at the scene-view pivot dropped to y = 0. The instance is registered with Undo. (When Save As Prefab Assets is off, the building is placed straight into the scene with no asset written — see §17.)

If that spot would overlap a building you generated earlier, the new building is moved clear automatically — see §19, Managing generated output. In an open area it is placed exactly where you asked.


Paint in Scene (building brush)

The Paint in Scene toggle (in the Single sub-mode's controls) turns the Scene view into a building brush:


4. Workflow B — Variation Row

A helper inside the Single sub-mode. Generates five seeded size/seed variations of the current parameters placed in a row, spaced 8 m apart.

All five instances share a single Undo entry.


5. Workflow C — Street Scatter

The Street sub-mode. Fills one or both sides of a road with seeded buildings facing the street.

Street mode — road settings, weighted archetype mix, and variant mix.
Field Default Notes
Scatter Seed 12345 Drives every plot: archetype, size, variant, gap.
Road Length (m) 120 Plots fill +X until this length is reached.
Both Sides on Line the opposite side of the road as well.
Road Width (m) 16 Clear carriageway between the two rows.
Gap Range (m) 4 – 10 Random spacing between neighbouring plots.
Tower / Shop / Apartment / House weights 0.35 / 0.30 / 0.35 / 0.25 Relative archetype probability.
Variant Mix (A / B / C / D) all on Palettes eligible for this scatter.

Click Generate Street Row in the action bar. All instances parent under BCG_StreetRow_{seed} (one Undo).


Along Path (curved streets)

The Street sub-mode's Straight | Along Path toolbar switches between the classic straight row and buildings following a BCG_StreetPath polyline — ideal for lining a curved road or track:

  1. Pick Along Path, then click Create Street Path (or select an existing path object). A 3-point path drops at the scene-view pivot.
  2. Shape it: drag the per-point position handles in the Scene view, or use the inspector's point list (+ inserts, deletes, Add Point extends the tail). Road Width and Both Sides live on the path component.
  3. Click Generate Along Path. Buildings walk the path by arc length, facing the carriageway, under a parent named BCG_StreetPathRow_{pathName}_{seed}.

Notes:


6. Workflow D — Populate Zones

The Zones sub-mode. Fills BoxCollider-bounded areas with a seeded block of buildings in alternating rows (front-facing, then back-to-back pairs, like a real city block).

Zones mode — the Zone Fill settings and the Populate / Create Zone Marker actions.

Quick start

  1. In the scene, create a GameObject with a BoxCollider sized over the area to fill. - Or click Create Zone Marker in the Zones controls; this drops a 40 × 4 × 30 m marker at the scene-view pivot, already carrying a BCG_BuildingZone component.
  2. Select the marker object(s).
  3. Set Zone Seed (or leave 0 to auto-assign), Edge Margin, and Row Gap range.
  4. Click Populate Selected Zones in the action bar.
Field Default Notes
Zone Seed 24680 Per-zone seeds derive from this. A non-zero seed on the district component overrides it.
Edge Margin (m) 1 Buildings keep this distance from zone bounds.
Row Gap (m) 6 – 10 Random alley/street width between building rows.
Markers After Disable What happens to each zone marker once its area is filled (the buildings live in their own object either way). Disable keeps the marker but switches off its BoxCollider, so the bounds stay readable and a repopulate / Clear Output still works. Delete removes the marker GameObject entirely.

Each populated zone creates a parent GameObject named BCG_Zone_{markerName}_{seed}. District-component zones store a reference to this parent in lastPopulated; a repopulate replaces the old output automatically.

Populate runs asynchronously — one building per frame — so a large zone does not freeze the editor. A cancelable progress bar is shown while the job runs (the same job also powers the BCG_BuildingZone inspector's Populate button, so big districts never freeze from there either). The job keeps running if the window is closed; the progress bar's Cancel button stops it, and partial output stays in the scene and can be removed with a single Undo.

City Blocks — one-click city

The collapsible City Blocks section (bottom of the Zones tab) composes everything above into a single action: a blocksX × blocksZ grid of district zones separated by streets (every Nth widened to an avenue), styled by presets, with a skyline that peaks downtown, populated by the standard cancelable job.

District Presets

The District Presets section (above Zone Fill) saves and recalls complete district styles as BCG_GenerationPreset assets:

A preset captures the archetype mix, texture variants, edge margin, gap and row-gap ranges, obstacle layers, height falloff curve, and ground-snapping settings — never the zone's seed, so an already-stabilized zone reproduces its exact layout under the new style.

Four presets ship with the asset:

Preset Style
BCG_Preset_Downtown Dense high-rise core — towers and graphite curtain glass, tight plots, wide avenues, skyline peaking at the zone center.
BCG_Preset_Suburbs Residential sprawl — gabled houses with corner shops, roomy plots.
BCG_Preset_OldTown Historic quarter — mid-rise brick and plaster apartments over shops, narrow alleys.
BCG_Preset_CommercialStrip Roadside retail — low storefront boxes with wide parking gaps.

The Preset dropdown displays these without the BCG_Preset_ prefix (e.g. Downtown); the asset files keep their full names.


7. Manage zone — inventory & health

The Manage zone (the right half of the top Build | Manage strip) opens on a read-only inventory of every generated building in the open scene — buildings carrying the hidden BCG_BuildingMarker (§19). It does not generate anything; it lets you audit, find, isolate, and clean up what is already placed, and it holds the Materials panel (Fix Materials + Night Lights, §15). If the scene has no generated buildings, the dashboard shows a hint and a Refresh button.

Manage zone — overview stats, filter toolbar, district-grouped building list, and bulk-action row.

The inventory is scanned once and cached; it is rebuilt automatically only when the scene hierarchy changes (or when you press the toolbar Refresh button), never on every repaint.

Overview stats

The header summarises the whole scene:

Toolbar (filtering & sorting)

Control Effect
Search field Matches a building's GameObject name or its seed.
Type filter All / Tower / Shop / Apartment / House (archetype).
Palette filter All / A / B / C / D (texture variant).
Refresh Rescans the open scene.
Flat toggle Off = grouped by district (default); on = a single flat list.
Sort (Flat only) Sort the flat list by Tris, Floors, Name, or Footprint.

When any filter is active, a showing X of N line appears above the list.

The list

Health flags

Each building is checked for the following problems; the row's warning tooltip lists every one that applies:

Flag Meaning
Missing mesh No MeshFilter, or a null shared mesh.
Missing / magenta material No renderer, a null material/shader, or Unity's magenta error shader.
Pipeline mismatch The facade shader does not match the active render pipeline (the pink-under-URP trap). Fix with Fix Materials (§15).
Not marked static The Batching Static flag is cleared, so the building loses static batching.
Overlapping The building's gap-padded footprint clips another building's (the same test the placement guard uses — §19).

Bulk actions

The dashboard's own action row (distinct from the pinned action bar) acts on the list:

When at least one building is flagged, a Fix: row appears above these actions with three one-click repair buttons (each shows its live count and acts on every flagged building in the scene, not just the filtered list):


8. BCG_BuildingZone district component

BCG_BuildingZone is a Runtime MonoBehaviour that gives a BoxCollider marker its own per-zone archetype mix, variant allowlist, and layout settings. It requires a BoxCollider on the same GameObject and carries no generation logic, so it is safe in a build.

Serialized fields

District Mix

Field Type Default Description
towerWeight float [0–1] 0.35 Relative chance a plot becomes a Tower.
shopWeight float [0–1] 0.30 Relative chance a plot becomes a Shop.
apartmentWeight float [0–1] 0.35 Relative chance a plot becomes an Apartment.
houseWeight float [0–1] 0.25 Relative chance a plot becomes a gabled House.

Weights are relative (normalized internally); setting all four to 1.0 gives an even mix.

Texture Variants

Field Type Default Description
variantA bool true Allow the A – Light Gray palette.
variantB bool true Allow the B – Brick palette.
variantC bool true Allow the C – Graphite Curtain palette.
variantD bool true Allow the D – White Plaster palette.

Layout

Field Type Default Description
seed int 0 0 = auto; the tool writes a stable seed on first populate. Same seed + same bounds → same block.
edgeMargin float [0–8] 1 Distance (m) buildings keep from zone bounds.
gapMin float 4 Minimum random spacing (m) between plots along a row.
gapMax float 10 Maximum random spacing (m) between plots along a row.
rowGapMin float 6 Minimum random alley/street width (m) between rows.
rowGapMax float 10 Maximum random alley/street width (m) between rows.
obstacleLayers LayerMask Nothing Physics layers treated as obstacles for this zone (see Obstacle Layers). Nothing = off.
heightFalloff AnimationCurve flat 1 Skyline falloff: X = normalized distance from the zone center (0 = center, 1 = edge, rectangular rings), Y = floor multiplier. Slope it down (e.g. 1 → 0.3) to peak the skyline at the district core. Buildings never drop below 1 floor or rise above their drawn height. The default flat curve changes nothing.

lastPopulated is hidden in the Inspector and managed by the tool.

Gizmo colors

The component draws an always-visible wire cube over the BoxCollider bounds in local space:

State Color
Empty (not yet populated) Cyan — RGB (0.2, 0.9, 1.0)
Populated (lastPopulated set) Green — RGB (0.3, 1.0, 0.4)

When selected, a translucent solid fill (8 % alpha of the same color) is drawn behind the wire cube.


9. Archetype reference

Archetype Typical height Massing models Parapet Facade styles Roof
Tower 7–16 floors Slab / Setback / Podium / L-plan (seeded, tall footprints only) Concrete parapet OfficeDark, OfficeLit, Ribbon, Mullion Flat gravel + roof clutter (HVAC boxes, bulkheads)
Shop 1–2 floors Slab only Dark fascia strip Punched, OfficeDark Flat gravel
Apartment 3–8 floors Slab only Concrete parapet (0.7 m) Punched, Balcony, OfficeDark Flat gravel
House 1–2 floors Slab only None (parapet fields ignored) Punched (biased), OfficeDark Pitched shingle roof (32–40° pitch), eaves, optional chimney

Massing applies only to Tower when floors ≥ 7, cellsX ≥ 6, and cellsZ ≥ 5. All other combinations produce a single Slab regardless of archetype.

Geometric relief (window recession, 0.12 m inset depth): OfficeDark, OfficeLit, and Balcony styles. Ribbon, Mullion, and Punched stay flush.

House pitched roof: pitch is a pure function of seed (32 + |seed| % 9 degrees, range 32–40°). The ridge runs along the longer horizontal axis. A chimney appears with 70 % probability; its position and slope side are seeded.


10. Detail Levels

The Detail dropdown (Building section, above Rooftop Props) picks the geometry tier for new buildings:

Level UI label What it is
Simple Simple Flat far-distance shells — flush facades, no relief, no clutter tail, no props/extras. A strict prefix of the same seed's stream, so the silhouette matches at a glance.
Full Standard The classic v1.0/1.1 look — everything this guide described before v1.2.0. Byte-identical to earlier versions when Facade Extras is off.
Detailed Detailed New in v1.2.0 — zero-draw facade elaborations on top of the Standard geometry (below). Same seed ⇒ same building at every tier; Detailed never changes which building you get, only how much geometry represents it.

What Detailed adds

All of the following consume zero extra random draws — they're either always-present geometry or pure functions of the seed, so switching a building between Standard and Detailed never desyncs the rest of the seeded stream:

Vertex budgets (pinned reference seeds)

Building Standard Detailed Multiplier
Tower 7×5, 9 floors (seed 4242) ~1,100 6,044 ~5.5×
Tower 8×6, 12 floors (seed 314159) ~1,380 5,096 ~3.7×
Shop 5×3, 2 floors (seed 777) ~310 1,000 ~3.2×
Apartment 6×4, 6 floors (seed 1234) — balcony-heavy ~1,100 9,948 ~9×
House 4×3, 2 floors (seed 7) ~470 1,208 ~2.6×

These counts are with Rooftop Props off; props add their usual fixed geometry on top at either tier. Apartment is the outlier because a balcony-eligible building fills many cells with full slab+rail geometry — expect the multiplier to track how balcony-heavy a given seed rolls.

Guidance:


11. Facade Extras

The Facade Extras toggle (Building section, below Detail) adds small seeded set-dressing to non-House buildings' walls: AC units under seeded window cells and wall vents. It is independent of Detail level — it works the same at Standard and Detailed (Simple truncates it, like the clutter tail).


12. Fake Interiors

Fake Interiors (Generation Settings ▸ Materials group, in any Build sub-mode) is the headline feature of v1.2.0: parallax room interiors rendered behind window glass, using the BCG/BuildingGen/FacadeInterior shader. It is a global material toggle (like Night Lights), not a per-building or per-zone option — flipping it rebuilds the shared facade materials in place.

Setup

  1. Open the Building Generator window (Build zone) and expand Generation Settings ▸ Materials, then check Fake Interiors.
  2. Click Fix Materials (§15) — this is what actually rebuilds the 12 GUID-stable facade materials (BCG_Building_Facade_{A..D} × plain/_Day/_Night) with the interior shader. Scene references are untouched (same GUIDs); every building using a stock facade material picks up interiors immediately, still with one material / one draw call per building.
  3. Toggling it back off and running Fix Materials again restores stock Lit/Standard/URP-Lit materials.

How it looks

Unmasked texels (the wall) render like a normal Lit surface — albedo, normal map, emission. Texels inside the window mask (BCG_Facade_WindowMask.png, a shared 1024×2048 mask aligned to the same band layout as the albedo atlas) instead ray-box-intersect into a virtual room derived from the window's UV cell, sampling a pre-baked room from the interior atlas (BCG_InteriorAtlas.png) — so rooms auto-align on every building regardless of its cell width, floor height, or ground-floor height; the shared materials carry no per-building parameters. A per-cell hash (from the UV cell index) seeds which room variant shows, its tint, and whether it reads lit or dark at night — integrated with the existing Night Lights emission dial, so a lit window at night shows a warm room glow instead of a flat emissive texel.

SpecGloss atlases

Facades also ship SpecGloss atlases (BCG_Facade_Specular_A..D): RGB is the specular color and the alpha channel is per-texel smoothness, so glass panes catch highlights while walls stay dull. Fix Materials binds them automatically; if you remove the textures, run Fix Materials again so the shader returns to its built-in smoothness values.

Glass and visibility

Interiors are composited behind the tinted window glass, not instead of it: the glass keeps its dark tint and specular, a view-angle (Fresnel) term fades the room out at grazing angles, and every window rolls a stable per-window "openness" — by default about 30% of windows read as blinds-drawn, the rest vary in clarity. Daytime interiors are a subtle hint; at night the lit-room glow (Night Lights dial) shines through clearly, including on curtained windows (they read as sheer curtains).

Two material properties control the look (set on the facade materials by Fix Materials; tweak them on the 12 BCG_Building_Facade_* materials if you want a different balance):

Property Default Effect
Interior Visibility (day) 0.45 Master daytime interior strength. 1.0 + Curtained Window Fraction 0 ≈ fully clear rooms.
Curtained Window Fraction 0.30 Fraction of windows that read as blinds-drawn dark glass.

Pipeline support

Pipeline Behaviour
Built-in Full support — facade materials use the BCG_FacadeInterior shader's Built-in SubShader.
URP Full support — the same shader file's SRP-Batcher-compliant URP SubShader.
HDRP Not supported — graceful fallback. The Fake Interiors toggle is disabled with a notice; facade materials stay stock HDRP/Lit. If the interior shader ever fails to resolve/compile on a supported pipeline, CreateFacadeMaterial falls back to stock Lit rather than going magenta (the same never-magenta philosophy as everywhere else in the tool).

Performance

Interior mapping costs a few extra ALU ops per masked (glass) fragment — fine on mid-range desktop and up. On mobile targets, leave Fake Interiors off (the default) or test on-device before shipping it; it is not part of the "low-cost city filler" default look.

Re-baking the room atlas

The room atlas is generated by an Editor-only utility with no menu item — BCG_InteriorRoomBaker.BakeAtlas() — deterministic parametric box-rooms rendered off-scene (purely algorithmic, no external imagery; only the baked PNG ships). Call it via execute_code / a temporary menu item if you want to change the room look; it overwrites Assets/BCG/BuildingGen/Textures/BCG_InteriorAtlas.png in place, so no further wiring is needed — the shader already references that path.


13. Advanced fields

Expand the Advanced foldout in the Single sub-mode.

Field Range Default Notes
Cell Width (m) 2 – 5 3.0 Meters per window cell. Drives both width and depth: Width = cellsX × cellWidth.
Floor Height (m) 2.4 – 5 3.2 Height of all floors above the ground floor.
Ground Floor Height (m) 2.8 – 6 4.0 Taller ground floor for storefronts.
Parapet Height (m) 0.2 – 2 0.9 Outer parapet wall height. Ignored for House.
Parapet Thickness (m) 0.15 – 1 0.35 Inward thickness of the parapet cap. Ignored for House.

The archetype presets set sensible defaults (e.g., Shop sets ground floor height to 4.2 m, parapet height to 1.0 m; House sets floor height to 2.8 m, ground floor height to 3.0 m).


14. Regenerate All

The Tools ▾ menu's Regenerate All action (in the pinned action bar) rebuilds every generated prefab in place — mesh and prefab assets are overwritten at their existing paths so GUIDs (and therefore all existing scene references) are preserved.

Every content option is preserved as authored, read back from the asset itself: rooftop props (marker stamp), LODs (LODGroup presence) and lightmap UVs (UV2 on the current mesh). A library generated without lightmap UVs is rebuilt without the expensive unwrap and keeps Contribute GI off.

Use this after upgrading the package to pick up geometry or UV improvements without losing scene placements.

A confirmation dialog is shown before the operation starts. The operation cannot be undone.


15. Fix Materials (Active Pipeline)

The Fix Materials button — in the Manage zone's Materials panel, and also in the Tools ▾ menu — rebuilds all four facade materials (BCG_Building_Facade_A/B/C/D.mat) — plus the demo-ground material and any _Day / _Night facade variants present in Generated/ (their authored emission colour is preserved) — for the currently active render pipeline, overwriting them in place (GUID-stable).

All pipelines set the smoothness/glossiness to 0.12 and enable emission from the matching BCG_Facade_Emission_{A..D}.png atlas. Running Fix Materials also refreshes the action bar's material-health badge to green (§2). It also refreshes the shared facade materials to the current Fake Interiors state (§12) and normal-map bind (§11).

Night Lights

The Night Lights dial lives in the Manage zone's Materials panel, directly below the Fix Materials button. It sets a single global window-glow look for all buildings. It tints the shared facade materials, so the one-material / one-draw-call-per-building guarantee is preserved. (A Night Lights & Materials → Manage shortcut in each Build sub-mode's Generation Settings ▸ Materials group jumps straight to it.)

The setting is stored per-user and is honoured by Fix Materials and pipeline switches, so your night look survives a material rebuild. Slider / colour edits mark the four materials dirty (persisted on the next project save); the preset buttons save immediately.


16. Bake UVs (Existing)

The Tools ▾ menu's Bake UVs (Existing) action adds lightmap UVs and GI contribution to buildings that were already generated — without rebuilding their geometry.

By default, generation skips the per-building lightmap-UV unwrap (the Bake Lightmap UVs toggle in Generation Settings ▸ Saving is off), because city-filler background buildings rarely contribute to a baked GI bake and the unwrap is the single biggest per-building cost. If you later decide some or all of those buildings should be lit by baked GI, use this Tools-menu action instead of regenerating everything:

The per-building flag changes can be reverted with Undo. The mesh-asset UV write is an asset modification and cannot be undone (the same as Regenerate All).


17. Save As Prefab Assets

The Save As Prefab Assets toggle (default on) controls whether the four "keep" spawn paths — Single, Variation Row, Street Scatter, and window-driven Populate Zones — write a GUID-stable mesh and prefab asset to Generated/ for each building, or place it in the scene without touching the project on disk.

Setting Behaviour
On (default) Each building is saved as a reusable prefab + mesh asset under Generated/, then instantiated into the scene. Identical to previous behaviour.
Off Buildings are placed directly in the scene with no assets written. Generated/ is not touched. Useful for one-off city-filler geometry where you do not need reusable prefab assets.

When to turn it off — if you are filling a large open-world scene with background geometry that you never need to re-use or re-seed, turning this off keeps Generated/ clean and avoids accumulating hundreds of mesh assets for buildings you will never reference again.

Save-the-scene caveat — scene-only buildings live in the scene file, not in any asset. A domain reload triggered by a script recompile or an editor restart will destroy un-saved scene objects. Save the scene immediately after generating scene-only buildings, or they will be lost.

Note: the Preview In Scene button always builds a no-asset throwaway instance regardless of this toggle — it is an audition view, not a keep path.

This toggle is persisted in EditorPrefs and applies per-user. Changing it has no effect on buildings already in the scene; it only affects the next generation.


18. Pipeline notes

Buildings look pink (magenta) when the facade material references a shader that is not included in the active pipeline. This happens if you:

The action-bar status badge flags this state (… · materials need Fix, amber dot), and the Manage zone flags each affected building with a Pipeline mismatch warning (§7). Fake Interiors (§12) is a valid Built-in/URP match too — only a genuinely stock-Lit-under-the-wrong-pipeline material trips this flag.

Fix: open Tools > BoneCracker Games > Building Generator > Building Generator and click Fix Materials in the Manage zone's Materials panel (also in the Tools ▾ menu). All four material assets are rebuilt for whichever pipeline is currently active; existing prefab references survive the rebuild because the material GUIDs do not change.

Mesh geometry and UV layout are pipeline-agnostic; only the facade materials are pipeline-coupled.

HDRP note — HDRP support is code-level and shader-verified. Under HDRP's physically-based exposure the Night Lights intensity may need a higher value than under Built-in/URP to read the same on screen.


19. Managing generated output

Every building the generator places carries a hidden, data-only BCG_BuildingMarker component — kept out of the Add-Component menu and the Inspector. It records the building's archetype, variant, seed, and footprint, and lets the tool find, select, and clean up generated output. The Manage zone (§7) is the browsable view of everything that carries this marker. The Detail Level, Facade Extras, and Fake Interiors sections below (§10§12) cover the other content options that change what gets generated.

Automatic clip-avoidance

All four placement workflows (Single building, Variation Row, Street Scatter, Populate Zones) avoid overlapping existing generated buildings. Before each building is placed, its footprint is tested against every BCG_BuildingMarker already in the scene; if the intended spot would clip one, the building is moved to the nearest free spot via an outward ring search. A building that fits where intended is left exactly there, so layouts are unchanged in open areas. The console logs how many buildings were relocated.

Obstacle Layers

By default the generator only avoids its own buildings — to also keep buildings off your own scenery (roads, props, rails), point an Obstacle Layers mask at the physics layers that scenery lives on:

A building spot overlapping any collider on a masked layer is rejected: the building relocates to the nearest clear spot, and when nothing nearby is clear it is skipped (the console reports how many were skipped). Skips never shift the rest of the layout — the same seed keeps every other building exactly where it was.

Notes:

Reuse Existing Assets & Mesh Variety

Two Output-section knobs make repeat fills near-instant and keep Generated/ small:

Generate LODs

The Generate LODs toggle in the Output section (default OFF) builds a simplified LOD1 mesh next to every full-detail building and wires both into a LODGroup:

Detailed-tier buildings get a three-level chain instead — LOD0 Detailed / LOD1 Standard (Full) / LOD2 Simple, transitioning at 0.55 / 0.20 / 0.01 screen height (…_LOD1.asset + …_LOD2.asset, both GUID-stable). This is why pairing Detail = Detailed with Generate LODs is the recommended setup (§10) — without it a Detailed building never drops its ~3–9× triangle cost at distance. Standard/Simple buildings keep the two-level chain above.

Rooftop Props

The Rooftop Props toggle in the Output section (default ON) adds seed-appended silhouette props to every generated building:

The same seed always yields the same props. Turning the toggle OFF reproduces the pre-props geometry exactly; with it ON, the roof-clutter of the same seed differs from pre-1.1 output (the props draw from the same random stream). Regenerate All Prefabs keeps each existing asset as it was authored — props on or off; assets generated before props existed count as authored props-OFF and stay untouched. To add props to a pre-1.1 library, re-fill with Rooftop Props ON: the reuse gate detects the missing props and rebuilds those buildings (their props-on meshes land in new _P-tagged assets, leaving the original meshes intact).

Ground snapping (terrain)

By default buildings sit on a flat plane. Turn on Snap To Ground (the World section for the Single / Row / Street workflows and plain zones; the per-zone snapToGround field for district zones) to place each building on the ground surface under its spot:

Select All / Destroy All

Two Tools ▾ menu actions (in the pinned action bar) act on every generated building in the open scene:

(For finer control — filtering, isolating, or deleting only part of the scene — use the Manage zone's bulk actions, §7.)

Clean Unused Assets

Destroy All removes buildings from the scene; Clean Unused… reclaims the asset files they leave behind on disk. Every building generated with Save As Prefab Assets on writes a mesh (and prefab) under Assets/BCG/BuildingGen/Generated/. Over time, regenerating or deleting buildings can leave mesh/prefab assets that no scene uses any more. The Clean Unused… action (in the Tools ▾ menu) finds and removes them safely:

  1. Choose Clean Unused… from the Tools ▾ menu. You'll be prompted to save any unsaved scenes first (so the scan sees the current state).
  2. The tool scans every scene in your project — open and closed — and lists the generated meshes and prefabs that no scene references, with the total disk space you can reclaim.
  3. Review the list (everything is checked by default; use Select None / the per-item checkboxes to keep anything), then click Delete Selected and confirm.

Safe by design: any mesh or prefab used by a building placed in any scene — including the demo scene — is kept. A prefab kept only in your Project window but never placed in a scene is treated as unused; uncheck it in the list if you want to keep it. Deletion is permanent (not undoable), which is why the preview and confirm steps are there. Facade and ground materials are never touched.


Runtime generation API

The geometry engine lives in the Runtime assembly, so buildings can be generated in-game — for endless runners, streaming worlds, or roguelike cities:

using BoneCrackerGames.BuildingGen;

public class CitySpawner : MonoBehaviour {

    //  Assign one of the shipped facade materials (Generated/BCG_Building_Facade_A..D.mat)
    //  in the Inspector — runtime code cannot create pipeline-aware materials itself.
    public Material facadeMaterial;

    void Start() {

        var p = new BCG_BuildingParams {
            archetype = BCG_BuildingArchetype.Tower,
            cellsX = 7, cellsZ = 5, floors = 12, seed = 4242
        };

        GameObject building = BCG_RuntimeBuildingFactory.Build(p, facadeMaterial);
        building.transform.position = new Vector3(30f, 0f, 0f);

    }

}

21. Deterministic seed contract

Every building is built from a single System.Random(p.seed) stream, consumed in a fixed order. This appendix documents that order for anyone extending the engine or auditing determinism claims. Do not reorder these steps — it is the load-bearing invariant behind "same seed = same building."

  1. Massing plan — archetype/setback/podium/L-plan picks (Tower only, when eligible). House short-circuits to a slab without consuming any rolls — its roof pitch is a pure function of seed, not a draw.
  2. Facade style pair — primary + secondary style rolled from the archetype's style pool.
  3. Per block, in plan order — per-side U offsets (4 ints), then one per-floor band/style roll per floor.
  4. Rooftop / storefront props (gated by rooftopProps, non-House only) — fixed draw counts depending only on (archetype, floors), drawn before the clutter tail so a Simple/LOD build can truncate without desyncing props. rooftopProps = false skips this step entirely — the stream is then byte-identical to the pre-props (v1.0.x) contract.
  5. Tail — either: - 5a NON-House — per-top-block roof clutter (box count, then per-box size/pos/bulkhead); or - 5b House — chimney presence/side/position rolls (always 3 draws, regardless of outcome). A Simple build consumes identical draws through step 4 and truncates from here — Simple is a strict prefix of the Standard/Detailed stream, never a different roll sequence.
  6. Facade Extras (gated by facadeExtras, non-House only, new in v1.2.0) — appended after the step-5 tail so Simple truncation is unaffected. Per side (0–3), always 3 draws — presence, density, phase (12 draws total, fixed regardless of outcome). Geometry placement within a side is a pure function of those rolls plus cell indices — no further draws. facadeExtras = false skips this step entirely — byte-identical to the pre-extras stream.

Detailed-tier content adds nothing to this list — every Detailed-only geometry change (relief on all styles, sills, mullion bars, real balconies, cornices, pilasters, coping, storefront depth, House shutters/canopy/porch/chimney cap, richer clutter) is either always-present geometry or a pure function of p.seed, consuming zero RNG draws. Standard and Detailed are therefore byte-identical through steps 1–6; only the vertex/triangle count differs.

Mesh-name content tags

Generated mesh assets are name-tagged whenever their geometry deviates from the untagged v1.0.x stream, so an option flip can never silently overwrite a shared mesh in place. Tags compose in a fixed order:

Tag Meaning Applies when
_P Rooftop / storefront props rooftopProps == true (every detail tier)
_D Detailed geometry tier detail == Detailed
_S Simple geometry tier detail == Simple (Simple flattens relief, so it must split from the untagged Full/Standard mesh at the same baseId)
_X Facade extras facadeExtras == true and detail != Simple (extras are suppressed at Simple, so a Simple+extras-on build is byte-identical to Simple+extras-off — tagging it _X would create a spurious duplicate of the same geometry)
_LOD1 First LOD child mesh Generate LODs on — Standard tier's LOD1, or Detailed tier's mid LOD (Standard-equivalent geometry)
_LOD2 Second LOD child mesh Generate LODs on and detail == Detailed — the Simple-equivalent tail of the three-level chain

A mesh's full name is BCG_BuildingMesh_{baseId}{tags} where {tags} is the ordered composition above (e.g. a Detailed building with props and extras on: ..._P_D_X). Any future geometry-changing content toggle must extend this same tag scheme alongside PrefabMatchesCurrentOptions, or a flip risks clobbering a different option combination's shared mesh.


22. Package contents

The following folders are shipped with the asset:

Folder Contents
Assets/BCG/BuildingGen/Editor/ Generator window (incl. the Manage zone), mesh builder, zone populator, zone inspector, anti-clipping placement guard, scene-inventory + asset-cleanup cores, onboarding, UI Toolkit theme (BCG_BuildingGen_Dark.uss + BCG_UITheme.cs + BCG_UI.cs), BCG_InteriorRoomBaker (dev utility)
Assets/BCG/BuildingGen/Runtime/ BCG_BuildingZone (district marker), BCG_BuildingMarker (per-building tag), BCG_BuildingArchetype (enum), BCG_BuildingDetail (enum), BuildingGen_Version
Assets/BCG/BuildingGen/Shaders/ BCG_FacadeInterior.shader (Built-in + URP SubShaders) and its BCG_InteriorMapping.hlsl include
Assets/BCG/BuildingGen/Textures/ BCG_Facade_Albedo_{A,B,C,D}.png, BCG_Facade_Emission_{A,B,C,D}.png, BCG_Facade_Normal_{A,B,C,D}.png, BCG_Facade_WindowMask.png, BCG_InteriorAtlas.png
Assets/BCG/BuildingGen/Demo/ BuildingGen_Demo.unity sample scene
Assets/BCG/BuildingGen/Documentation/ This guide and BuildingGen_AtlasLayout.md

The following are not shipped: