Materials and Lighting
Almost everything about how a generated city looks — as opposed to how it is shaped — lives in 3 Dress. This page covers the render-pipeline material fix, the night look, the fake window interiors, light probes and baked lighting.
Fix Materials: the one button that solves pink
If your buildings render pink (magenta), the fix takes one click. Nothing is broken.
Meshes and UVs are pipeline-agnostic; the materials are not. A material built for Built-in
references the Standard shader, which does not exist in a URP or HDRP project — so Unity falls
back to its magenta error shader. This happens when you import into a URP/HDRP project, or switch
pipeline after importing.
The fix, any of these three:
- Click the [Fix] button that appears beside the material badge in the City Ledger whenever it is needed.
- Press Apply Materials — the primary button on 3 Dress ▸ Mood.
- Run
Tools ▸ BoneCracker Games ▸ Building Generator ▸ Fix Materials (Active Pipeline), which works with no window open.
All three do the same thing: rebuild the facade materials for whichever pipeline is currently active, overwriting them in place. Because the material GUIDs do not change, every existing prefab and scene reference survives the rebuild — nothing needs reassigning.
| Active pipeline | Shader used | Key properties |
|---|---|---|
| Built-in | Standard |
_MainTex, _Glossiness |
| URP | Universal Render Pipeline/Lit |
_BaseMap, _BaseColor, _Smoothness |
| HDRP | HDRP/Lit |
_BaseColorMap, _BaseColor, _Smoothness, _EmissiveColorMap, _EmissiveColor |
It rebuilds the four facade materials, their _Day and _Night variants, the demo ground material
and the road surface material — and it re-applies your current Night Lights and Fake Interiors
settings while it is at it, so those survive a pipeline switch too. Smoothness is set to 0.12 on all
pipelines, and emission is enabled from the matching emission atlas.
The City Ledger's badge turns green immediately afterwards. The health dashboard also flags individual buildings whose material does not match the active pipeline; see Finishing and Shipping.
Night Lights
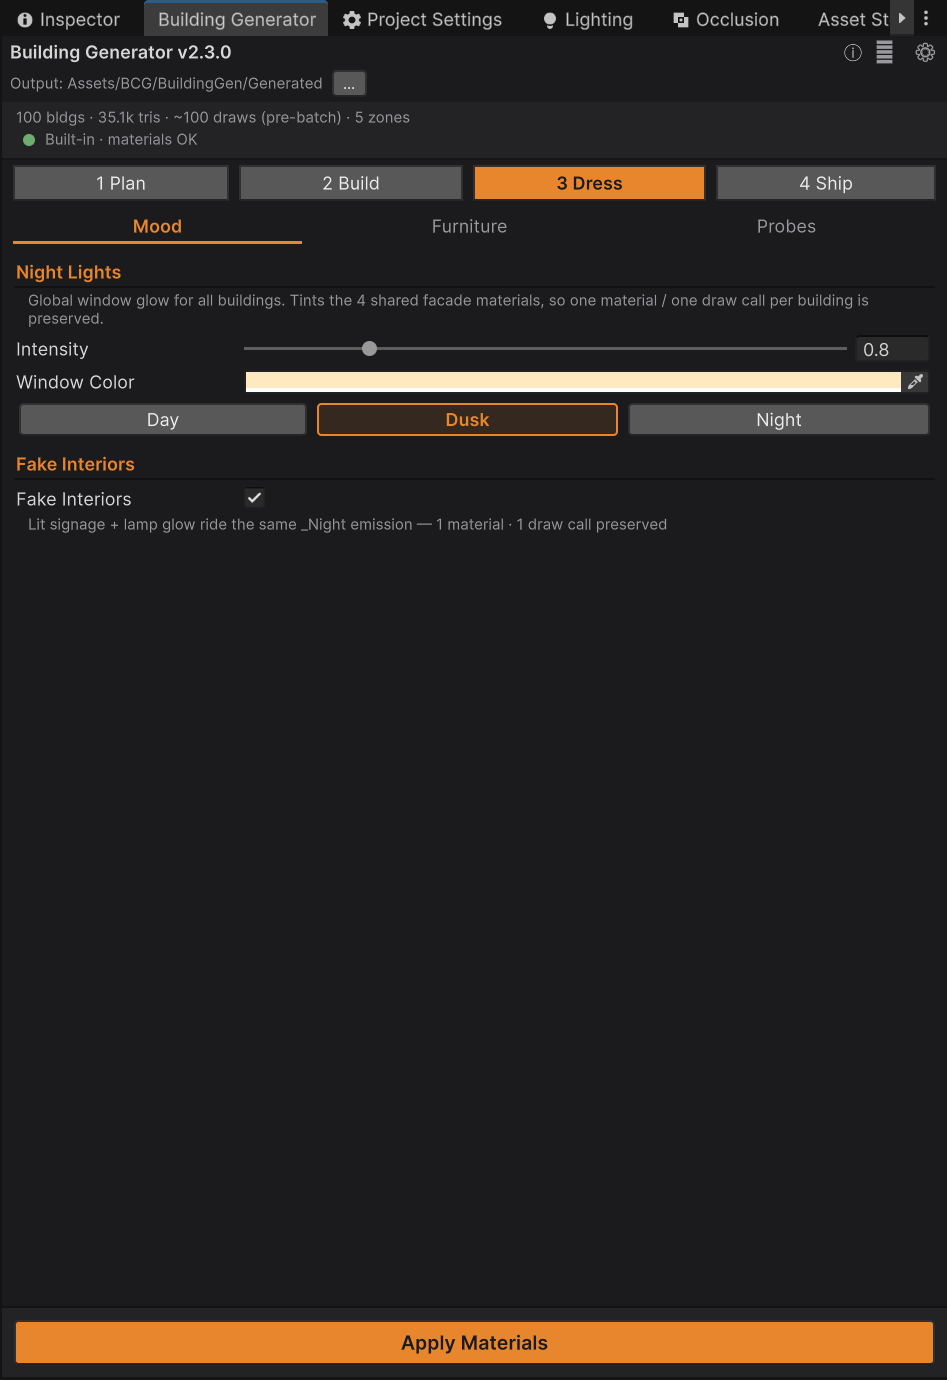
The Night Lights dial on 3 Dress ▸ Mood sets one global window glow for every building at once. It works by tinting the shared facade materials, which is why it costs nothing — the one-material, one-draw-call guarantee is untouched, and there are no real lights involved.
| Control | What it does |
|---|---|
| Intensity | Emission brightness. 0 turns the windows off entirely |
| Window Color | The glow colour. Warm amber reads as a lived-in night skyline |
| Day / Dusk / Night | One-click presets. The active one is highlighted |
The presets are Day (intensity 0, windows off), Dusk (0.8, warm) and Night (2.5, warm). The package ships on Dusk.
The setting is stored per user and honoured by Fix Materials, so your night look survives a material rebuild or a pipeline switch. Dragging the slider or picking a colour marks the materials dirty (saved with your next project save); the preset buttons save immediately.
On HDRP, physically-based exposure means you may need a higher intensity than under Built-in or URP to read the same on screen.
Day/night switching at runtime
Each facade material has a _Day and a _Night variant. Swapping a renderer's material between
them is how the demo scene's N key works, and it is the pattern to copy for an in-game day/night
cycle — swap the shared material, not per-building state. Road surfaces follow the same convention.
Fake interiors
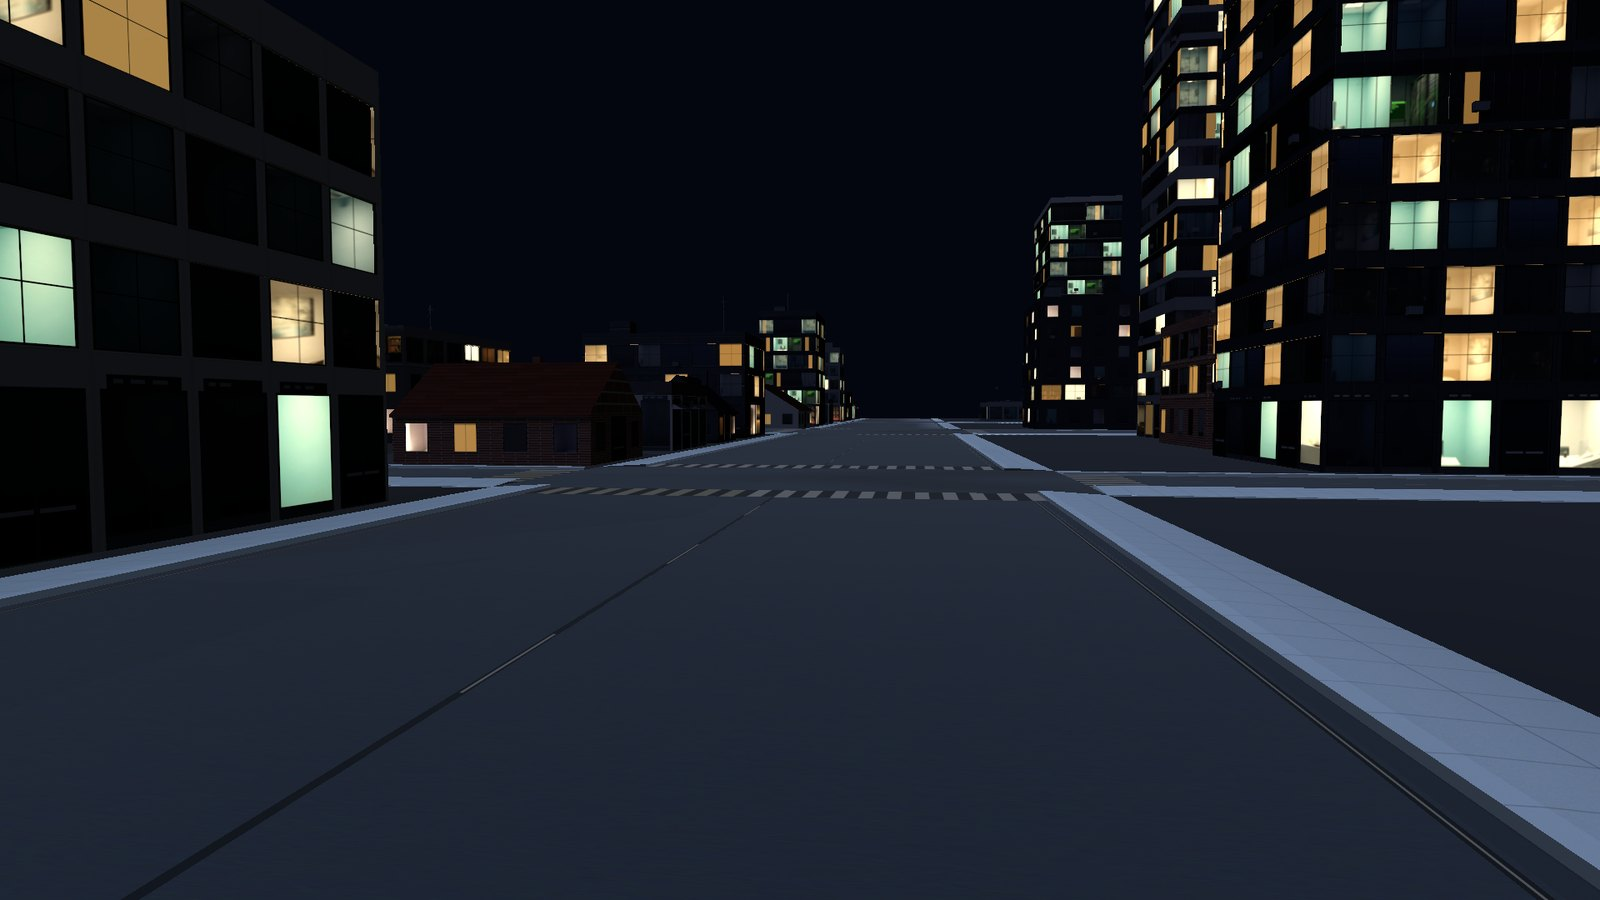
Fake Interiors paints rooms behind the window glass. There is no extra geometry and no extra draw call — the shader ray-traces into a virtual room per window cell and samples a pre-baked room atlas.
Turn it on with the Fake Interiors checkbox on 3 Dress ▸ Mood. That immediately rebuilds the shared facade materials with the interior shader; every building using a stock facade material picks it up at once, still at one material and one draw call each. Turning it off rebuilds them as ordinary lit materials.
Because rooms are derived from each window's UV cell, they align correctly on every building no matter its cell width, floor height or ground-floor height. A per-window hash decides which room variant appears, its tint, and whether it reads as lit at night — so it integrates with the Night Lights dial rather than fighting it.
How it looks
Rooms are composited behind the tinted glass, not instead of it. The glass keeps its tint and specular highlight, a view-angle (Fresnel) term fades rooms out at grazing angles so windows read as reflective from the side, and every window rolls a stable "openness" so roughly a third read as blinds-drawn while the rest vary in clarity.
Daytime interiors are a subtle hint. At night, with the glow on, lit rooms show through clearly — including through curtained windows, which read as sheer.
Two material properties control the balance. Fix Materials sets them; you can tweak them on the facade materials directly:
| Property | Default | Effect |
|---|---|---|
Interior Visibility (day) |
0.45 | Master daytime interior strength. 1.0 with curtains at 0 gives fully clear rooms |
Curtained Window Fraction |
0.30 | Fraction of windows reading as blinds-drawn dark glass |
Support and cost
| Pipeline | Behaviour |
|---|---|
| Built-in | Fully supported |
| URP | Fully supported |
| HDRP | Not supported. The toggle is disabled with a notice and materials stay stock HDRP/Lit |
The parallax maths runs per facade fragment — the result is only visible on glass texels, but the cost is paid across the whole facade. That is fine on mid-range desktop and up. On mobile, leave it off (the default) or test on device first; it is not part of the low-cost filler baseline.
Light probes
Static buildings can be lightmapped, but the dynamic objects driving past them — the cars this tool exists to serve — need light probes to pick up that baked light. 3 Dress ▸ Probes drops one tuned probe group over the whole generated city, working out the extents automatically from your road networks, districts and buildings.
Generating opens a small prompt first, because probe count is the one number worth thinking about.
| Preset | Spacing |
|---|---|
| Low | 24 m |
| Medium | 16 m |
| High (default) | 12 m |
| Ultra | 8 m |
| Custom | Anything from 1 m up |
The prompt shows the estimated probe count for your city, live, as you switch presets, using the real placement maths rather than an approximation.
Why spacing does not always come back as you asked
Probe count grows with the square of density: halve the spacing and you roughly quadruple the probes. Over a kilometre-scale city, 1 m spacing would need millions, which no lightmapper will bake. So the prompt gives you two levers:
- Probe Budget — the ceiling on probe count (default 4096, up to 65536). While your requested spacing fits the budget it is used exactly; when it does not, the spacing widens automatically and the prompt tells you precisely how many probes your request would have needed. Bake time and scene size scale with this number.
- Coverage — Whole city fills the entire bounding area, empty blocks included. Near roads + buildings spends the budget only within 15 m of a road or a facade, which is where dynamic objects actually travel. The same budget then buys a much tighter spacing where it matters.
If the effective spacing comes back wider than you asked for: raise the budget, switch to Near roads + buildings, or accept that the city is too large for that density.
What gets placed
Per grid column, the tool places a street-level probe at 1.5 m and a mid-rise probe at 8 m, plus a rooftop probe only where a building actually stands nearby (tallest roof plus 2 m). There are no wasted probes in empty sky.
Probes are also never left inside a building. Every position is tested against the buildings' own rotated footprint volumes; a probe landing in solid geometry is pushed out to the nearest open spot — typically right beside the facade, which is where things drive — and dropped only if its whole neighbourhood is solid. The Console reports how many were relocated or dropped. This matters more than raw count: a buried probe bakes black and drags everything interpolating against it dark.
The generated group is selected in the scene afterwards so you can see the cloud. Regenerating replaces it, identified by an internal marker, so a probe group you authored is never touched even if it shares the name. Remove Light Probes deletes the generated one.
Re-bake your lighting after generating probes — placing them does not fill them.
Baked lighting (lightmap UVs)
By default, generation skips the per-building lightmap UV unwrap. City-filler background buildings rarely need to receive baked GI, and the unwrap is the single most expensive part of generating a building.
If you later decide some or all of them should be lightmapped, you do not have to regenerate anything. Use Bake Lightmap UVs… — row 1 of the checklist on 4 Ship ▸ Finalize — which adds lightmap UVs and GI contribution to meshes that already exist.
What it operates on: your current selection. Selecting a street-row or district parent includes all its buildings; selecting an LOD child or a foundation skirt climbs to its owning building. With nothing generated selected, it processes every generated root in the open scene.
It asks before writing anything. A dialog reports the real workload — how many unique meshes lack a UV set versus already have one, which is what costs you time (two buildings sharing a mesh are one unwrap) — and offers:
- Bake Missing — unwrap only the meshes with no UV set. This is the everyday choice.
- Renew All — also re-unwrap meshes that already have one, discarding it. Use this after changing lightmap resolution, or when a mesh was hand-edited.
- Cancel — nothing is written.
A renderer only gets Contribute GI once its own mesh has a valid, lightmapper-safe UV set; a failed unwrap leaves GI off and says so in the Console. The renderer flag changes can be undone; the mesh UV write cannot — it is an asset modification, like Regenerate All.
Roads can be lightmapped too: with the Bake Lightmap UVs toggle on during generation, road surfaces get their own UV set and contribute to GI, with a lightmap scale tuned for their much larger surface area. The markings renderer is deliberately excluded.
Upgrading from version 2.3.0. Buildings generated by that version carry a lightmap UV set Unity's lightmapper cannot read, so they baked to nothing. They are counted as missing UVs rather than as already unwrapped — run Bake Missing once and they are repaired in place. You do not need Renew All and you do not need to regenerate your library.
Common questions
Everything went pink after I switched to URP. Press [Fix] in the City Ledger. See Fix Materials.
My night windows do not glow in the baked lighting. Emission is read from the materials assigned
at bake time. The _Night variants always glow; the base materials only glow with the Night Lights
intensity above zero. Set the look you want, then bake.
Fake Interiors is greyed out. You are on HDRP, where it is not supported. The materials stay
stock HDRP/Lit rather than breaking.
Should I use light probes or lightmaps? Both, for different things — lightmaps light your static buildings, probes light the moving objects between them. A driving game needs probes.
Where to go next
- Optimising — LODs, combining, and mobile guidance.
- Finishing and Shipping — the pre-ship checklist, in order.
- Atlas Layout — how the facade textures are organised.