Getting Started
This page takes you from a freshly imported package to your first generated building. It should take about ten minutes, and you do not need to read anything else first.
What you need
| Requirement | Detail |
|---|---|
| Unity version | Unity 6 (the package is built and tested on 6000.3.6f1) |
| Render pipeline | Built-in, URP or HDRP — all three are supported |
| Play Mode | Not needed. Everything the tool does happens in the Editor |
| Other packages | None. The tool has no third-party dependencies |
Installing
Import the package as normal. Everything lands under Assets/BCG/BuildingGen/:
Assets/BCG/BuildingGen/
  Editor/          The generator window and all the tools
  Runtime/         Small data components that ship in your build
  Textures/        The facade and road atlases
  Shaders/         The fake-interior shader
  Presets/         Four ready-made district styles
  Demo/            The demo scene
  Documentation/   This guide
  Generated/       Created the first time you generate something
The first time Unity finishes importing, a Welcome Window opens by itself with a quick tour and
links back to this documentation. You can reopen it at any time from
Tools ▸ BoneCracker Games ▸ Building Generator ▸ Welcome Window, and turn the automatic opening
off with its Show on startup toggle.
If your buildings look pink
This happens when you import into a URP or HDRP project, or switch pipeline afterwards, and it is the single most common first-run surprise. It is a one-click fix, not a broken package — see Fix Materials. The generator window tells you when this is the case and offers the fix right there.
Look at the demo first
Demo/BuildingGen_Demo_Showcase.unity ships ready to open. It contains five generated districts —
100 buildings in total — plus a light-probe group, and it is playable: press Play and you can
fly around with a collision-aware camera that slides along walls instead of clipping through them.
| Input | What it does |
|---|---|
| Click | Lock the cursor for mouse-look, and select the building under the crosshair |
| WASD + mouse | Move and look |
| Space or E | Fly up |
| Ctrl or Q | Fly down |
| Shift | Move faster |
| N | Toggle day / night |
| Esc | Release the cursor / deselect |
| H or F1 | Show or hide the controls overlay |
Click any building and an info card shows what it is made of — archetype, palette, seed, footprint, and its vertex and triangle counts. Those facts are read from a small marker component the generator stamps on everything it makes; the same marker is what lets the tool find, audit and clean up its own output later.
The bigger City demo (optional download)
A much larger playable demo — hundreds of buildings, drivable roads, baked lighting and a cinematic intro — ships as an add-on package rather than being imported by default, because it is large and most projects do not need it. It stays compressed until you ask for it, so the base asset imports quickly.
To install it, open the generator window, go to 4 Ship ▸ Health, find the Add-ons panel at
the bottom, and press Import next to City Demo. That unpacks
Demo/BuildingGen_Demo_City.unity along with its baked lighting. In that scene, C replays the
cinematic intro and any key skips it.
Opening the tool
Tools ▸ BoneCracker Games ▸ Building Generator ▸ Building Generator
The window is a single dockable panel. Dock it wherever you like — it works from about 418 × 480 pixels upward, though the Ship stage is more comfortable with 600 pixels or more of height.
The same menu also holds the Welcome Window and a handful of maintenance commands that work with no window open at all (Fix Materials, Regenerate All…, Clean Unused…, Select All Generated), plus the city-dressing tools.
Your first building
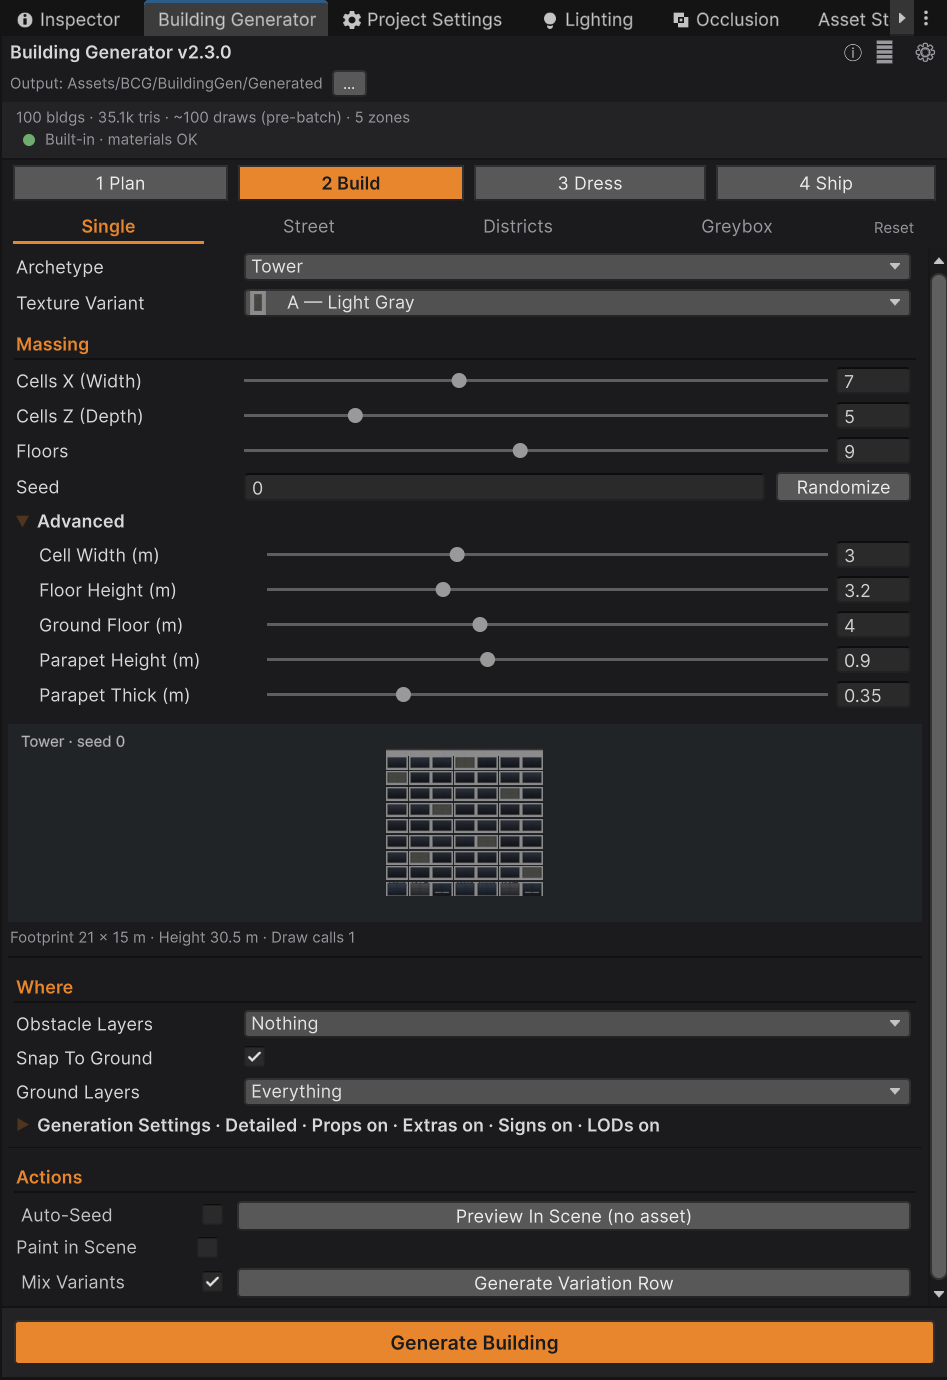
- Go to 2 Build ▸ Single.
- Leave Archetype on Tower and Texture Variant on A — Light Gray.
- Press Randomize next to Seed a few times. The little preview above the footprint readout redraws each time — that preview is the actual building you are about to get.
- Press Generate Building at the bottom of the window.
A tower appears in the Scene view at your scene-view pivot, dropped to ground level. Under the
preview you will see something like Footprint 21 × 15 m · Height 30.5 m · Draw calls 1 — one draw
call is the whole point of the tool, and it stays true no matter how tall or detailed the building
gets.
The building is now an ordinary GameObject with an ordinary mesh. Press Ctrl+Z and it goes away; nothing special is holding it in place.
What just got written to your project
With the default settings, generating a building writes two asset files under
Assets/BCG/BuildingGen/Generated/ — a mesh in Meshes/ and a prefab in Prefabs/ — and puts an
instance of that prefab in your scene. Generating the same recipe again overwrites the same files,
so you never accumulate duplicates of the same building.
If you would rather not write assets at all — useful when you are filling a large open world with background geometry you will never reuse — turn off Save As Prefab Assets in the pane's Generation Settings foldout. See What gets written to disk for the trade-offs, including one important caveat about saving your scene.
Your first city
One building is not why you bought this. Try the other end of the scale:
- Go to 1 Plan ▸ City Grid.
- Leave everything at its defaults.
- Press Generate City.
You get a 4 × 4 grid of districts separated by streets, with every third street widened into an avenue, roads and pavements filling the gaps, and a skyline that peaks in the middle and drops towards the edges. The readout above the button tells you the size and rough building count before you commit — with the defaults that is about 288 × 248 metres.
Buildings appear one per frame rather than all at once, so the Editor never freezes. Progress shows in the status band near the top of the window, which also carries the only Cancel button.
Ctrl+Z once removes the buildings; twice removes the grid itself.
Where to go next
- How It Works — the few concepts that make everything else obvious. Worth ten minutes before you go further.
- Cities and Districts — shaping that generated city into the one you actually want.
- Customising Buildings — archetypes, palettes and detail levels.
- Troubleshooting — if anything above did not behave the way this page describes.