How It Works
There are about six ideas behind this tool. Once they click, every pane in the window makes sense and you can stop reading documentation. This page is those six ideas.
A building is a recipe, not a model
The package contains no building models. There is no library of prefabs to browse, and nothing was modelled in Blender. Instead there is a generator that builds a mesh from four ingredients:
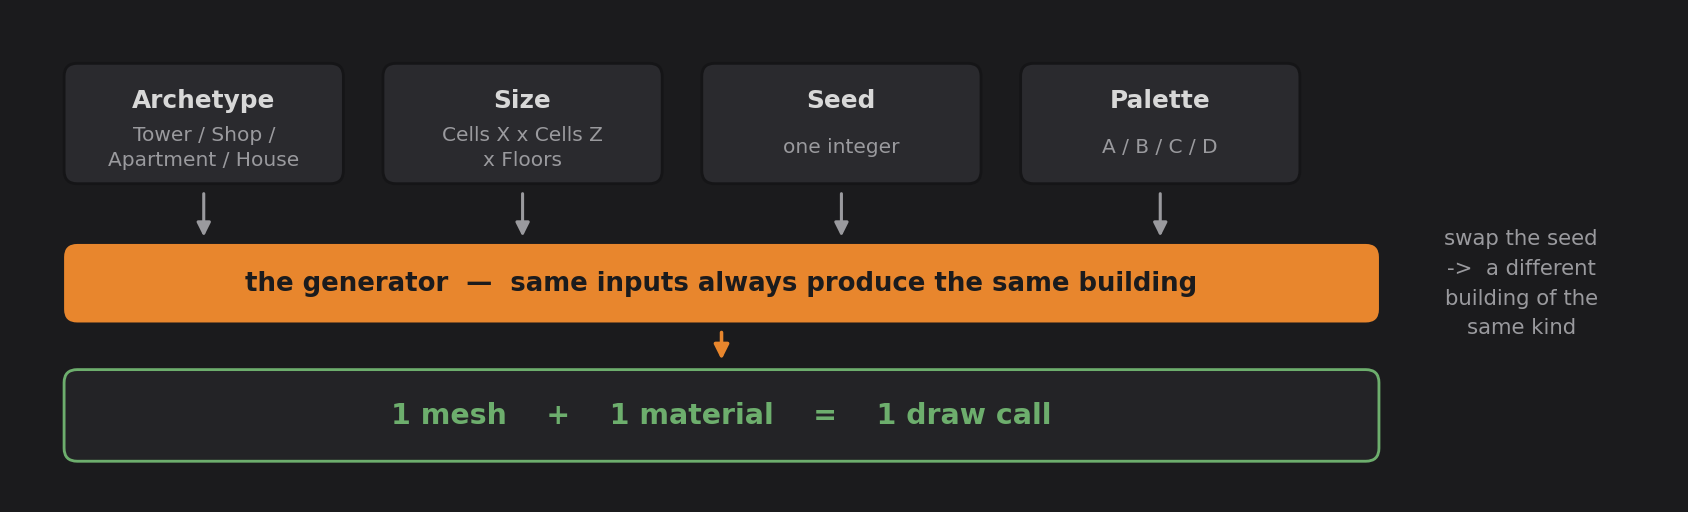
| Ingredient | What it decides |
|---|---|
| Archetype | The kind of building: Tower, Shop, Apartment or House |
| Size | Cells X × Cells Z × Floors — a cell is one window column, 3 m wide by default |
| Seed | One integer that decides every random choice inside the building |
| Palette | Which of the four texture variants (A–D) it wears |
Change any ingredient and you get a different building. Keep them all the same and you get the identical building, every time, on every machine, forever.
That is why sizes are expressed in cells rather than metres. A tower is "7 cells wide, 5 deep, 9 floors" — the generator turns that into 21 × 15 m using the cell width. Thinking in cells means windows always land on a sensible grid instead of being stretched to fit an arbitrary width.
The seed is the whole random system
Every random decision a building makes — its massing shape, which facade style each floor gets, where the roof clutter sits, whether a house has a chimney — is drawn from a single sequence of random numbers started from the seed. Nothing else is random. There is no hidden state and no dependence on time or scene order.
This has three practical consequences:
- Randomize is just "pick a new seed." It is not a re-roll of some deeper randomness. Note down a seed you liked and you can reproduce that exact building next year.
- A city is reproducible too. A city's seed derives a stable seed for every block, so the same City Seed rebuilds the same city, and each block can be regenerated on its own without disturbing its neighbours.
- Order matters internally, so the tool never reorders it. The sequence of random draws is a fixed contract; features added in later versions append to the end rather than inserting in the middle. That is what lets you upgrade the package without your existing seeds producing different buildings. The full ordering is written down in Reference ▸ The seed contract if you ever need it.
One mesh, one material, one draw call
Every generated building is a single mesh using a single material. The facade textures live in a shared atlas — one image holding every wall, window, storefront and roof surface — and the generator maps each face to the right patch of that atlas as it builds the geometry.
This is the reason the tool exists. A hundred buildings cost a hundred draw calls before Unity's static batching or the SRP Batcher does anything at all, and because they share four materials between them, batching then collapses them much further. It is also why you cannot assign a different material to one wall of a building: there is only one material, by design.
The trade-off is that buildings are exteriors. There are no interiors, no openable doors and no separate window objects. What you do get is a convincing illusion of interiors — a shader trick that paints rooms behind the glass without adding a single triangle. See Fake interiors.
Everything is generated in the Editor
The tool runs entirely at edit time. When you generate, it writes real Unity assets and puts real GameObjects in your scene. When you are done, you can delete the tool from your project and your city keeps working, because nothing in it depends on the generator at runtime.
The only things that ship inside your build are a few tiny data-only components — most importantly a hidden marker stamped on every generated building recording what it is (archetype, palette, seed, footprint). Those markers are how the tool recognises its own output later: how the health dashboard finds your buildings, how Select All Generated works, and how the anti-overlap system knows what is already there.
There is also a runtime API for games that need to generate buildings while playing — endless runners, streaming worlds, procedural cities. Same engine, same seeds, same results. See Reference ▸ Runtime API.
What gets written to disk
| Setting | What happens when you generate |
|---|---|
| Save As Prefab Assets on (default) | A mesh asset and a prefab asset are written under Generated/, and an instance is placed in your scene. Regenerating the same recipe overwrites the same files, so nothing accumulates. |
| Save As Prefab Assets off | The building is placed straight into the scene. No files are written and Generated/ is untouched. |
Turn it off when you are filling a large scene with background geometry you will never reuse — there is no point writing eight hundred prefab assets you will never reference.
One caveat if you turn it off. Scene-only buildings live in the scene file and nowhere else. A script recompile or an Editor restart destroys unsaved scene objects. Save the scene right after generating, or you will lose them.
The four-stage pipeline
The window is laid out in the order a city actually gets built, as four stages you work through left to right:
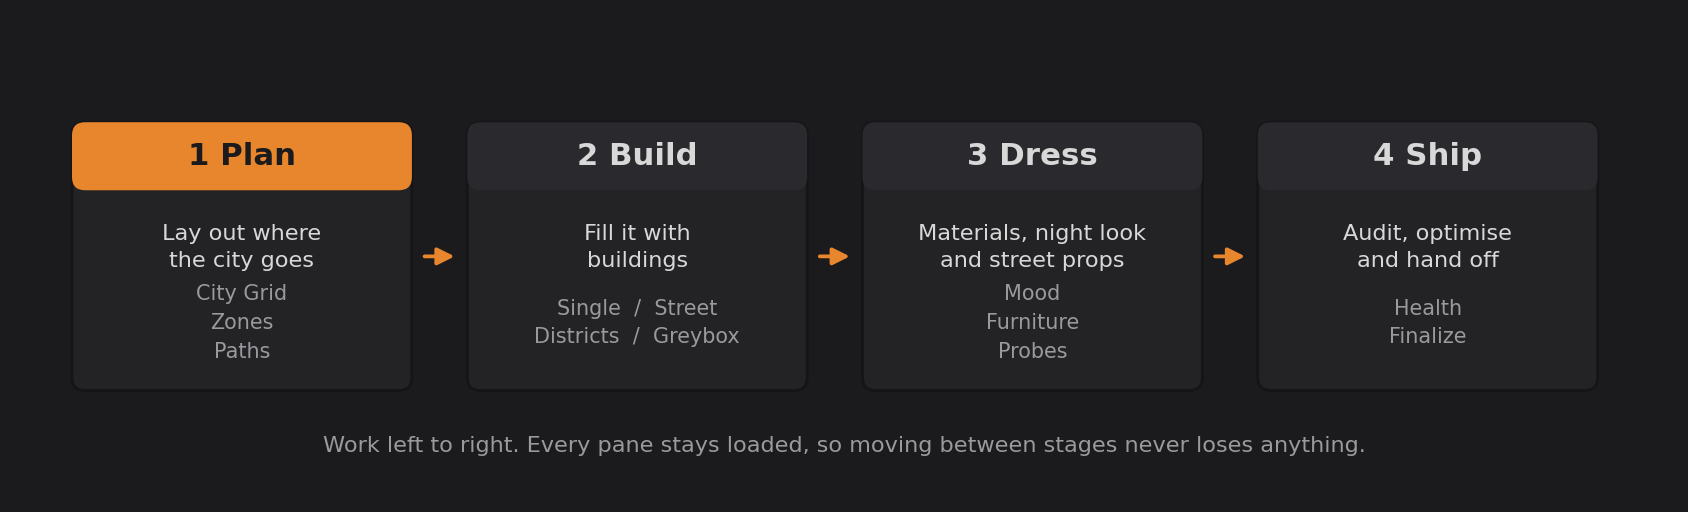
| Stage | Sub-tabs | Use it to |
|---|---|---|
| 1 Plan | City Grid · Zones · Paths | Decide where buildings go — the one-click city grid, district markers, street paths |
| 2 Build | Single · Street · Districts · Greybox | Actually make buildings — one at a time, along a street, into districts, or from a blockout |
| 3 Dress | Mood · Furniture · Probes | Materials and night look, street furniture, light probes |
| 4 Ship | Health · Finalize | Audit what is in the scene, then work down a pre-ship checklist |
You are not forced through it. If all you want is one building, go straight to 2 Build ▸ Single and ignore the rest. The ordering exists because it is the order that avoids rework — laying out roads after you have filled a district means moving buildings.
Every pane is built when the window opens and simply hidden when you switch away, so nothing you typed is ever lost by clicking around. The stage you were on is remembered per project.
The parts of the window
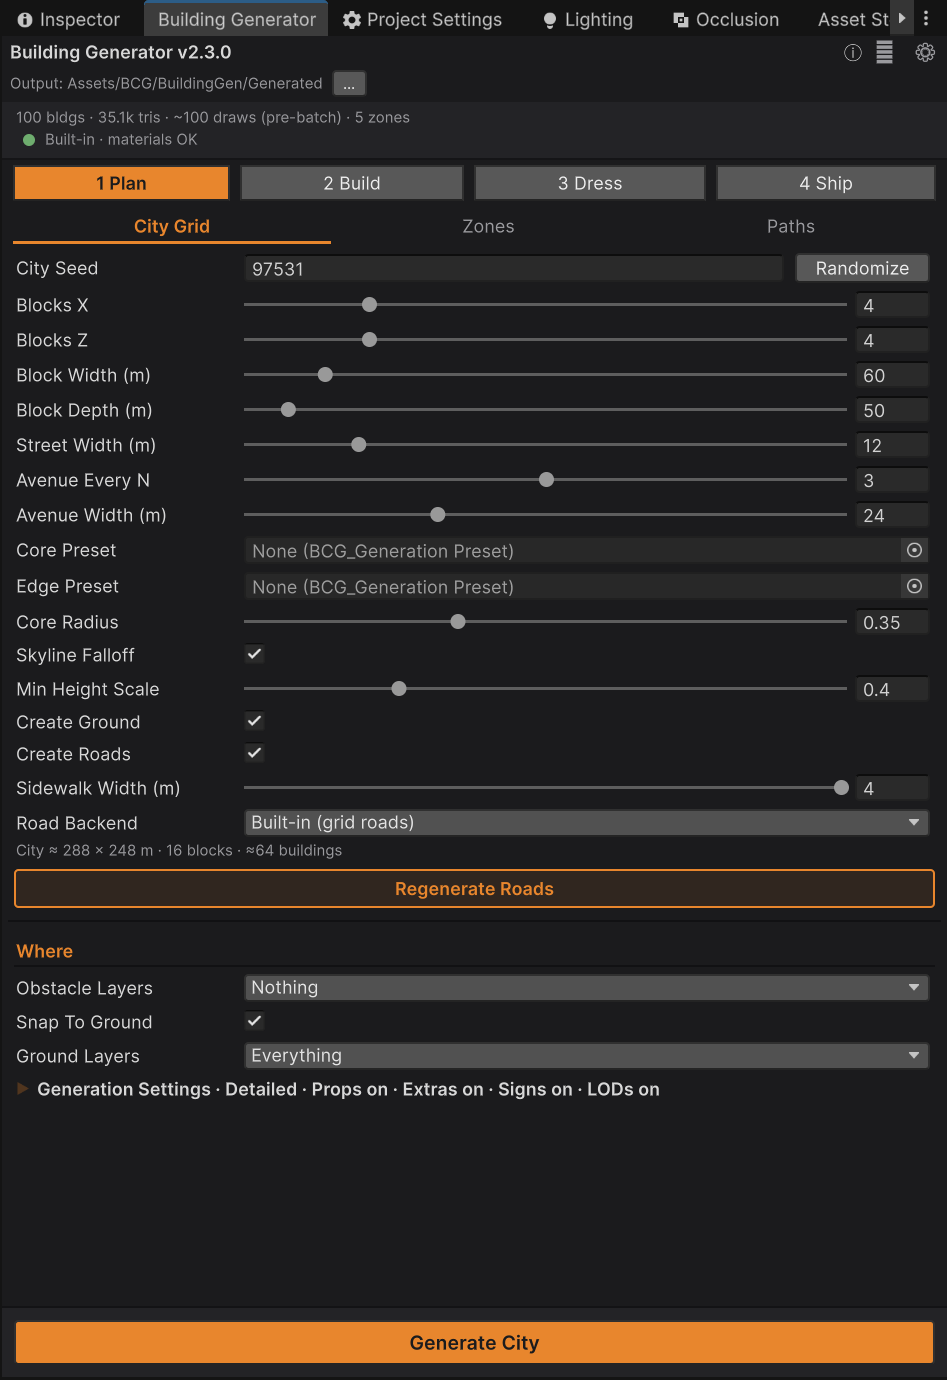
Top to bottom, the frame around every pane is always the same:
- Title row — the tool name and version, plus three small buttons:
ⓘ(what this tool is),⌕(command search) and⚙(preferences). - Output row — where generated assets get written. Click the path to choose a different folder
anywhere inside
Assets;↺puts it back. Changing it never moves assets you already made. - City Ledger — the one status band. It shows scene totals (
100 bldgs · 35.1k tris · ~100
   draws · 5 zones
), a material-health badge with an inline [Fix] button when something needs fixing, and — while a fill is running — a progress bar carrying the only Cancel button in the window. - Identity strip — appears only when you select a generated building, showing its recipe
(
Tower 7×5 F9 · seed 12345 · 6.2k tris) with buttons to copy the seed or load the recipe back into Build ▸ Single. - Stage strip, then that stage's sub-tab strip.
- The pane — scrolls vertically only.
- Action bar — pinned to the bottom, holding exactly one primary button whose label follows the pane you are on (Generate City, Generate Building, Populate Selected Zones…). When it cannot run, it greys out and a short reason appears beside it.
Finding a command
There is deliberately no catch-all menu. Every command lives on the pane it belongs to. If you
cannot remember where something is, press ⌕ in the title row and type — the palette matches
loosely (fixmat finds Fix Materials), and each result tells you which pane it lives on, so
it teaches as well as launches.
Four commands are also mirrored as ordinary Unity menu items so they work with no window open:
Fix Materials (Active Pipeline), Regenerate All…, Clean Unused… and Select All Generated,
all under Tools ▸ BoneCracker Games ▸ Building Generator.
Buildings never overlap each other
Every placement path checks the ground before it puts a building down. Before each building is placed, its footprint is tested against every generated building already in the scene; if the spot is taken, the building is moved to the nearest free spot by searching outward in rings. If it fits where you asked, it stays exactly there.
Two things are worth knowing:
- This is always on and costs no randomness. Relocation happens after the random draws, so a seeded layout stays identical whether or not anything had to move.
- By default it only avoids the tool's own buildings. Your own scenery is invisible to it. To keep buildings off your roads, props or terrain features, point Obstacle Layers at the physics layers that scenery lives on — then a blocked spot relocates, or is skipped entirely if nothing nearby is clear.
Where to go next
- Creating a Single Building — the recipe idea in practice.
- Cities and Districts — the same idea at city scale.
- Customising Buildings — what each archetype and detail level actually changes.
- Reference — every setting, the seed contract, the runtime API.