Editor Tools
Realistic Helicopter Controller Pro (RHCP) ships a complete editor tooling suite that turns "I imported the asset" into "my helicopter flies" with as little manual wiring as possible. This document covers the Validator and its rule catalog, one-click fixes, the Project Doctor, the custom component inspectors, the Scene-view gizmos and handles, the Welcome window, the Demo Content installer, and the full menu reference. Everything described here lives under Assets/Realistic Helicopter Controller Pro/Editor/ in the BoneCrackerGames.RHCP.Editor assembly and never ships into a player build.
Tooling Overview
The editor tooling is built entirely with UI Toolkit and is the headline feature of the v2.0 rebuild. It exists because a flight controller has a lot of moving parts that all have to agree — a Rigidbody, a flight-config asset, at least one rotor, an input manager with an actions asset, a camera rig, and (optionally) boundary zones, audio, and VFX. When any one of those is missing or misconfigured, the helicopter either throws at Play time or flies badly, and the cause is rarely obvious. The tooling's job is to catch those problems at edit time, explain them in plain language, and fix the safe ones with a single click.
The suite is organized into a few cooperating pieces. The Setup Wizard walks you from a bare model to a validator-clean, flyable helicopter (covered in Set Up Your Helicopter). The Validator scans your scene, selection, or prefabs against a catalog of rules and reports findings ranked by severity. The Project Doctor checks project-wide settings — input handling, packages, render pipeline, color space, Unity version, and TextMeshPro — that the helicopter depends on. Custom inspectors add a branded header, an inline validation strip, and live telemetry to every RHCP component. Scene gizmos visualize physics and rotor geometry directly in the Scene view. The Welcome window and Demo Content installer handle onboarding.
All of these share one important design principle: every mutation goes through Unity's SerializedObject/Undo system, so a single Ctrl+Z reverts a whole action, multi-object editing works, and no fix ever silently corrupts a prefab or scene. The tooling also writes nothing to your Project Settings without an explicit click on a Project Doctor Fix button.
The Validator
The Validator is the central quality gate. It is driven by RHCP_Validator, a stateless runner that discovers every validation rule at compile time (via Unity's TypeCache), builds a snapshot of the relevant objects in your chosen scope, runs each rule against that snapshot, and returns a flattened, sorted list of findings. Because discovery is reflection-based with no manual registry, you can add your own custom rules to your project simply by subclassing RHCP_ValidationRule — they appear in the window automatically.
A rule never scans the project itself. Instead the runner gathers the relevant objects once into an RHCP_ValidationContext, and each rule reads from that pre-gathered context and yields one RHCP_ValidationResult per problem it finds. This keeps rules fast and consistent, and it means a single buggy custom rule cannot break the whole run — if a rule throws during detection, the runner logs the error and continues with the rest.
What It Scans
You choose a scope in the Validator window's toolbar, and the runner builds the context accordingly:
| Scope | What it gathers | Typical use |
|---|---|---|
| Selection | The RHCP_Helicopter hubs found on, above, or beneath the currently selected GameObjects, plus all scene boundary zones and camera managers |
Validating one helicopter you are actively setting up |
| Open Scenes | Every RHCP_Helicopter, RHCP_BoundaryZone, and RHCP_CameraManager in all loaded scenes (including inactive objects) |
A full pre-Play scene check; this is the default |
| Project Prefabs | The same component types found inside every prefab asset in the project | A pre-ship sweep across all your helicopter prefabs |
A few rules behave differently against a cold prefab asset than against a live scene instance — for example, collider bounds and the Rigidbody center of mass are only physically meaningful for an instantiated object, so the center-of-mass and out-of-bounds rules deliberately skip the Project Prefabs scope to avoid false positives.
Severities
Every finding carries one of three severities, defined by the RHCP_ValidationSeverity enum and used to sort and color the report (errors first, then warnings, then info):
| Severity | Meaning | Action expected |
|---|---|---|
| Error | Broken at Play time — expect a null-reference exception, no thrust, or no control. | Must be fixed before shipping. |
| Warning | The helicopter runs, but behavior is degraded or confusing. | Should be fixed; left as-is it produces a worse experience. |
| Info | A non-blocking suggestion, such as an optional asset left unassigned. | Optional; the feature is simply off. |
The Validator Window
Open the Validator from Tools ▸ BoneCracker Games ▸ RHCP ▸ Validator…. The window has a toolbar with a scope dropdown, a Re-run button, and a Fix All (safe) button. Below that, each finding is shown as a row prefixed with its rule ID and message, with a colored left border indicating severity. Each row offers up to three buttons: Fix (only when the rule supports a one-click fix), Select (pings and selects the offending object in the hierarchy), and ? (opens the online documentation anchor for that rule). When everything passes, the window shows "All clear" and a green footer; otherwise the footer summarizes the error/warning/info counts.
The window re-runs automatically whenever the scene hierarchy changes while it is open, so the report tracks your edits live without needing a manual refresh. The same rule engine also powers the inline validation strip shown in each component inspector (see Custom Component Inspectors) and the self-test the Demo Content installer runs after opening the demo scene.
Rule Catalog
The Validator ships with 26 rules, named RHCP-VAL-001 through RHCP-VAL-027. The numbers are not contiguous: VAL-013 is intentionally absent. The original specification reserved VAL-013 for a "rotor blur visual equals the static visual" check, but the v2.0 rotor has a single optional spin-mesh slot rather than separate static and blur slots, so there is nothing to collide and the rule cannot exist by design. The IDs are stable and will not change once shipped, which is what makes the ? documentation links and any automated tests reliable.
Each rule lives in its own file under Editor/Validator/Rules/, named by its ID. The table below enumerates every shipped rule. "One-click fix" means the rule offers a Fix button; "Fix All" indicates whether that fix is included in the unattended Fix All (safe) batch (see One-Click Fixes and Fix-All).
| ID | Severity | What it checks | One-click fix | In Fix All |
|---|---|---|---|---|
| VAL-001 | Error | The hub has no RHCP_FlightConfig assigned — the flight model has no parameters and no airframe category. |
Yes — assigns the bundled default flight config | Yes |
| VAL-002 | Error | A hub is nested under another RHCP_Helicopter (two hubs sharing one body). Exactly one hub per airframe is required. |
No | — |
| VAL-003 | Warning | The Rigidbody center of mass sits outside the combined collider bounds — a classic cause of unstable hover and tumbling. | Yes — resets the center of mass to the PhysX centroid, then snaps it horizontally under the main rotor hub | No |
| VAL-004 | Warning | The Rigidbody mass is still Unity's default 1 kg while the flight config specifies a real mass. | Yes — writes the config mass onto the Rigidbody | Yes |
| VAL-005 | Warning | Rigidbody interpolation is None — the chase camera will judder because it relies on an interpolated pose. | Yes — sets interpolation to Interpolate | Yes |
| VAL-006 | Warning | The hub root has a non-unit local scale, which skews mass, inertia, and collider sizing. | No (bake the scale on import) | — |
| VAL-007 | Error | No solid (non-trigger) collider exists anywhere under the hub. Crash detection and ground sensing both need one. | No (use the Setup Wizard's physics-body step) | — |
| VAL-008 | Warning | A collider sits on a rotor node or its spinning mesh — colliders on spinning geometry destabilize PhysX. | Yes — removes the offending collider | Yes |
| VAL-009 | Error | An extra Rigidbody is on a child of the hub. The helicopter must be a single rigidbody. | Yes — removes the extra Rigidbody (structural, so excluded from Fix All) | No |
| VAL-010 | Error | No RHCP_Rotor with role Main is registered under the hub — there is no source of thrust. |
No (use the Setup Wizard's rotor step) | — |
| VAL-011 | Warning | The flight config models main-rotor torque reaction but no Tail-role rotor exists to counter it; toward the realistic end of the profile the airframe will spin. | No | — |
| VAL-012 | Warning | A rotor's visual spin axis does not line up with its disc plane, so the blades sweep the wrong plane. | Yes — re-derives the rotor's spin axis from the role-aware disc normal | Yes |
| VAL-014 | Info | A rotor has no spinning visual mesh assigned — blade spin is cosmetic only and will not appear. | No (detection-only) | — |
| VAL-015 | Error | The helicopter has no RHCP_InputManager, so the hub never receives control input. |
Yes — adds the component (structural, so excluded from Fix All) | No |
| VAL-016 | Error | The RHCP_InputManager has no Input Actions asset assigned, so device input cannot bind. |
Yes — assigns the bundled RHCP_InputActions asset |
Yes |
| VAL-017 | Info | An RHCP_Audio module has neither an engine nor a rotor loop clip, so the helicopter is silent. |
No (detection-only) | — |
| VAL-018 | Info | An RHCP_VFX module has no exhaust, ground-dust, or crash particles assigned — nothing will emit. |
No (detection-only) | — |
| VAL-019 | Error | An RHCP_CameraManager has no Camera wired, so the view will not render. |
No (detection-only) | — |
| VAL-020 | Error | An RHCP_CameraManager has no target helicopter to follow. |
Yes — auto-assigns the sole helicopter when exactly one is in scope | Yes |
| VAL-021 | Error | An RHCP_BoundaryZone has no collider, or its collider is not a trigger, so it can never fire. |
Yes — adds a box trigger, or flips the existing collider to a trigger | Yes |
| VAL-022 | Warning | An RHCP_BoundaryZone trigger volume is degenerate (near-zero size) and can never be entered. |
No (size the collider manually) | — |
| VAL-023 | Info | A helicopter has a Damage module (so respawn-on-crash is expected) but the scene has no Out-Of-Bounds boundary zone. | No (detection-only) | — |
| VAL-024 | Warning | The shipping Runtime assembly declares mutable static state (a reassignable static field, static read-write property, mutable static readonly reference, or static event), which leaks across Play sessions when domain reload is disabled. | No (design change required) | — |
| VAL-025 | Warning | An RHCP_CameraManager has no RHCP_CameraConfig, so the camera layers fall back to a hard-coded baseline and cannot be tuned. |
Yes — assigns the project's bundled default camera config | Yes |
| VAL-026 | Error | An RHCP_CameraManager has neither a chase nor a cockpit mode behaviour wired, so the rig has no camera to drive. |
No (detection-only) | — |
| VAL-027 | Warning | A camera config has spring-arm collision enabled but its collision mask is set to Nothing, so the camera has no occlusion protection. | No (detection-only — the correct layers depend on your environment) | — |
A note on VAL-024: this project ships with Enter Play Mode Settings set to "Reload Scene only", which disables the domain reload between Play sessions for fast iteration. Under that setting, static fields are not reset and static event subscribers are not cleared, so any mutable static state in runtime code would carry stale data — or duplicate subscribers — into the next Play session. The v2.0 runtime is deliberately static-free, and VAL-024 is the regression guard that keeps it that way. It is detection-only because the remedy (moving the state onto a component instance, or adding an explicit reset path) is a design decision that cannot be automated. The dev-only QA assembly is never scanned by this rule. See Troubleshooting if you hit stale-state symptoms after adding your own runtime code.
The detection-only rules in the Info and content-dependent categories (VAL-014, VAL-017, VAL-018, VAL-019, VAL-023, VAL-026, VAL-027) report a problem but leave the fix to you, either because the fix is structural, because the correct values depend on your project, or because the matching one-click action ships with later content. They are still valuable: they tell you exactly what is missing and why it matters before you ever press Play.
One-Click Fixes and Fix-All
A rule opts in to a one-click fix by reporting that it can auto-fix; when it does, the Validator window and the inspector strip both show a Fix button next to that finding. Pressing Fix calls RHCP_Validator.Fix, which brackets the rule's fix inside a single collapsed Undo group named after the rule (for example, "RHCP Fix: RHCP-VAL-001"). That means one Ctrl+Z reverts the entire fix cleanly, and the change participates in normal Unity serialization and prefab workflows.
The Fix All (safe) button in the window toolbar applies a curated subset of fixes in one batch, also inside a single Undo group. A rule is included in this batch only when its fix is safe to run unattended — that is, when the fix is a pure reference or flag write that cannot surprise you. Fixes that create or destroy GameObjects, add components, or move geometry are deliberately excluded from the batch even when they offer an individual Fix button, because those are structural changes you should make one at a time and review.
Concretely, the Fix All (safe) batch covers VAL-001 (assign flight config), VAL-004 (apply config mass), VAL-005 (enable interpolation), VAL-008 (remove rotor-node collider), VAL-012 (align rotor spin axis), VAL-016 (assign input actions asset), VAL-020 (assign camera target), VAL-021 (fix boundary trigger), and VAL-025 (assign camera config). Three other rules offer an individual Fix button but are kept out of the batch so you apply them deliberately: VAL-003 (reset center of mass), VAL-009 (remove extra Rigidbody), and VAL-015 (add input manager) — the latter two because they are structural changes. After a batch fix, the window shows a brief "Fixed N issues" notification and re-runs so you can see what remains.
The Project Doctor
The Project Doctor checks project-wide settings that the helicopter depends on but that live outside any single GameObject. Open it from Tools ▸ BoneCracker Games ▸ RHCP ▸ Project Doctor…. Like the Validator, it discovers its checks via TypeCache and runs each one, but its scope is the project itself rather than your scene. It ships six checks:
| ID | Title | What it verifies |
|---|---|---|
| DOC-01 | Active Input Handling | The project's input backend includes the New Input System. Legacy "Input Manager only" is an error (the input layer throws at runtime); "Both" works but the target is "Input System only". |
| DOC-02 | Input System package | The com.unity.inputsystem package is installed, detected by probing for the loaded assembly. |
| DOC-03 | Render pipeline | The active pipeline is Built-in or URP (both supported); HDRP and other pipelines are flagged as out of scope. |
| DOC-04 | Color space | Reports the color space; Linear is recommended, Gamma is supported with a note. |
| DOC-05 | Unity version | The editor meets the supported Unity 6000.3 floor. |
| DOC-06 | TextMeshPro essentials | TextMeshPro Essential Resources are imported, which the HUD needs to render text. |
Two of these checks offer a one-click Fix: DOC-01 sets Active Input Handling to "Input System only" (which requires an editor restart, so it confirms with a dialog first), and DOC-02 requests the Input System package through the Package Manager. Per the suite's ground rules, these are the only places in the entire tooling that touch your Project Settings, and they only do so when you explicitly click Fix. The Project Doctor is most relevant during first-time setup — see Installation for the recommended project configuration and the order in which to resolve these checks. The Welcome window also surfaces the Doctor's worst status as a colored badge.
Custom Component Inspectors
Every concrete RHCP runtime component has a custom inspector built on a shared base, RHCP_ComponentEditorBase. Each inspector renders, in order: a branded header band, the validation strip for that component, an optional subclass-specific header section, the default bound fields (which keep free Undo support, multi-object editing, and the tooltips authored on the runtime fields), and an optional subclass footer section.
The header band shows the product logo when bundled art is present, and otherwise falls back to a styled text label rather than a missing or clipped image — a deliberate fix for a v1 bug where the header tried to load art from Resources/ and shipped editor-only art into every player build. RHCP editor art is never loaded from Resources/.
The validation strip is the inspector's most useful addition. It runs the validator for the component's helicopter and renders a HelpBox — colored by severity — for every finding that targets this specific component, complete with an inline Fix button when the rule supports one. The strip re-evaluates whenever the object's serialized data changes or an undo occurs, never per frame, so it stays current without costing performance. This means you see the relevant warnings right where you would fix them, instead of having to open the Validator window separately.
The hub inspector (RHCP_Helicopter) goes further. Its header section adds two buttons — Tune Flight (opens this helicopter's Flight Config in Basic mode, the plain-language speed/climb/turn sliders) and Validate (opens the Validator pre-scoped to the current selection) — above a Flight Config reference row. When the assigned config (or input config) is a shipped/shared asset, an amber "Shared preset" notice appears with a one-click Clone for this helicopter button that copies it into your project and re-points the field, so tuning never silently changes the demo or other helicopters. (The Setup Wizard is intentionally not offered here — it is a create-time tool; see Setup Wizard.) Its footer adds a collapsible Live Telemetry foldout that, in Play Mode only, polls and displays read-only runtime values: engine state, normalized rotor RPM, altitude above ground level, airspeed, collective input, and grounded state. Outside Play Mode the foldout shows a hint to enter Play Mode. None of these telemetry values are serialized — they are read-only properties, so nothing leaks into your scene file.
Scene Gizmos and Handles
RHCP draws gizmos and interactive handles directly in the Scene view so you can see and adjust the physics and rotor geometry visually. With one exception, gizmos are drawn only for the selected object, by the owning component's editor; the boundary-zone volumes are the single always-on exception, because scene-safety geometry needs to be visible while you place the helicopter. Every drawer is gated by an EditorPrefs toggle so you can turn off anything you do not want cluttering the view.
The available gizmos and handles are:
- Boundary volumes — Always-on wireframe outlines of every
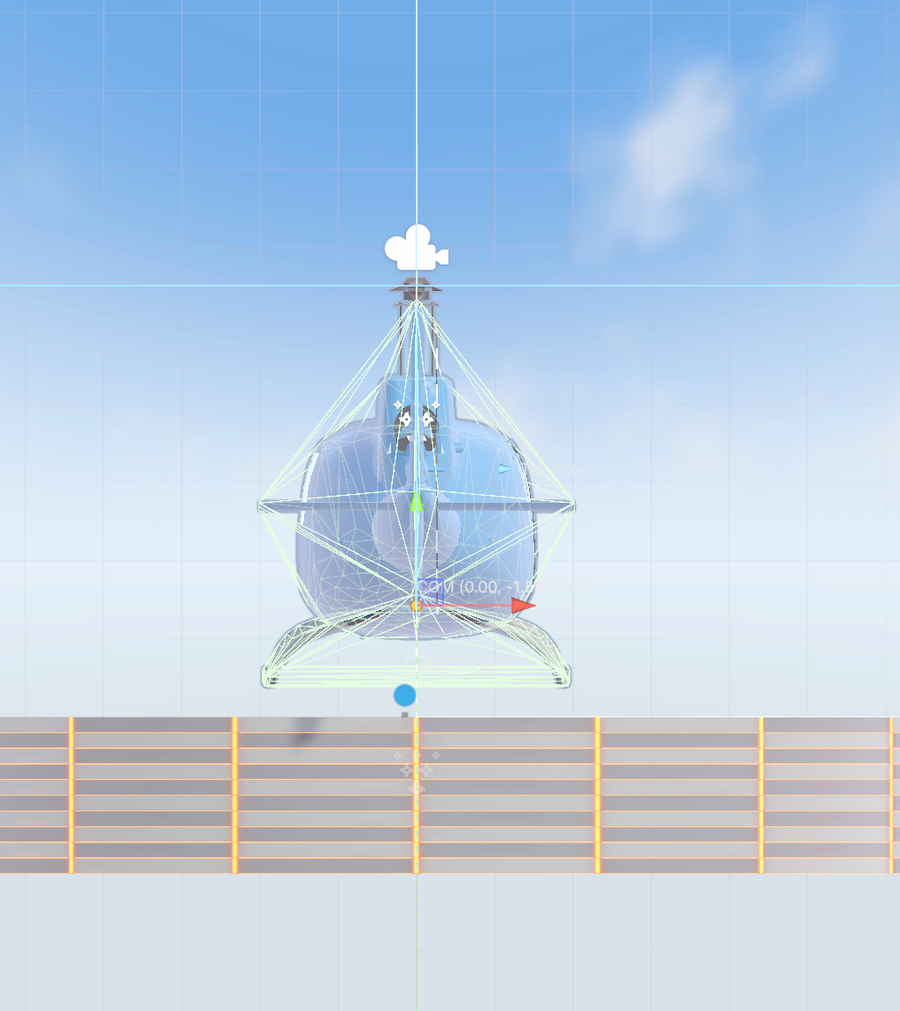
RHCP_BoundaryZonecollider across all loaded scenes, with a label showing the zone name and type. Water zones are tinted blue and out-of-bounds zones red, so you can read the play-area limits at a glance. - Center-of-mass handle — When a hub is selected, an orange sphere marks the Rigidbody center of mass, with a draggable position handle. Dragging it writes directly to
Rigidbody.centerOfMasswith proper Undo support — this is the fastest way to fix the kind of imbalance VAL-003 warns about. - Rotor-axis discs — When a hub or rotor is selected, each rotor's disc plane is drawn as a wireframe disc sized to the rotor radius, with a thrust-direction arrow and a role label. The disc is tinted blue when the visual spin axis matches the disc plane and red when it does not (the VAL-012 condition), giving you an immediate visual cue that something is misaligned.
- Ground-sensing ray — When a hub is selected, a downward dotted ray shows the ground-effect sensing length (roughly 1.5 main-rotor radii). If it hits ground, the impact point is marked with a small disc and an "AGL" label showing the measured altitude, so you can confirm the helicopter will detect the ground for ground-effect lift and dust effects.
- Chase-camera preview — When an
RHCP_ChaseCamerais selected, a dotted line and a draggable sphere mark the camera's follow anchor (the serialized anchor offset, shown in the target helicopter's local space). Dragging it writes the anchor offset back with Undo support. - Camera rig — A preview of the camera rig (orbit rings, FOV cone, collision probe, cockpit pivot), shown when an
RHCP_CameraManageris selected.
Gizmo Toggles
Each gizmo is backed by an EditorPrefs flag in RHCP_GizmoPrefs, all defaulting to on, and each is exposed as a checkmarked menu item under Tools ▸ BoneCracker Games ▸ RHCP ▸ Gizmos/:
| Toggle | Menu item | Default |
|---|---|---|
| Center of Mass | Gizmos ▸ Center of Mass | On |
| Rotor Discs | Gizmos ▸ Rotor Discs | On |
| Chase Camera Preview | Gizmos ▸ Chase Camera Preview | On |
| Boundary Volumes | Gizmos ▸ Boundary Volumes | On |
| Ground-Sensing Ray | Gizmos ▸ Ground-Sensing Ray | On |
| Camera Rig | Gizmos ▸ Camera Rig | On |
These toggles persist across editor sessions because they are stored in EditorPrefs, and the menu items show a checkmark reflecting the current state. For more on the cameras these gizmos preview, see Cameras.
The Welcome Window
The Welcome window is the first thing you see after importing the asset. It shows once per version — guarded by an EditorPrefs version key plus a session flag so a domain reload does not re-show it in the same session — and is re-openable any time from Tools ▸ BoneCracker Games ▸ RHCP ▸ Welcome. It replaces the v1 onboarding, which was a static document file with no interactivity.
The window shows the product name and version, a clickable Project Doctor status badge (green when the project is RHCP-ready, amber when there are notes, red when setup needs attention — clicking it opens the Project Doctor), and its primary action buttons: Setup Wizard, Project Doctor, Documentation, and Support. (An Install Demo Content row is gated behind a feature flag and hidden at launch, since the asset ships a single airframe with nothing separable to install.) A footer offers a Don't show on startup toggle (which sets the "shown for this version" flag) and a Changelog button. The Documentation button opens the bundled offline HTML manual (under the package's Documentation/ folder), falling back to the online portal if it isn't present; Support opens the online portal page, which is also where the per-rule ? links point. Because the badge runs the Doctor's worst-status check, the Welcome window doubles as an at-a-glance health indicator the moment you open the project.
The Demo Content Installer
The Demo Content installer opens the demo scene and verifies it for you. Reach it from Tools ▸ BoneCracker Games ▸ RHCP ▸ Demo Content/Install… (or the Welcome window). The window explains what it does and offers Install / Verify Demo and Uninstall Demo buttons.
Install runs in three steps. First it applies a Project Doctor gate: if the input-handler check (DOC-01) or the input-package check (DOC-02) is in an error state, install is blocked and the Project Doctor opens, so a hard project-level problem fails loudly before Play rather than throwing at runtime. Second, it locates and opens the demo scene (RHCP_Demo), prompting to save any modified scenes first. Third, it runs the Validator as a self-test against the open scene and reports the result — "installed and verified" when there are no errors, or a count of errors to resolve in the Validator otherwise. This self-test is the regression net that would have caught the kind of silent content break that affected v1.
Uninstall is currently a safe no-op: it explains via a dialog that demo-content packaging is finalized in a later release phase and that there is no separable demo folder to remove yet, so nothing is deleted. This is intentional — it never destructively touches your project. For a guided walkthrough of the demo scene itself, see Quick Start.
Menu Reference
Every RHCP menu item is defined in one place (RHCP_MenuItems) so the whole surface is auditable at a glance. The tools live under the Tools ▸ BoneCracker Games ▸ RHCP/ root, with create helpers under GameObject ▸ BoneCracker Games ▸ RHCP/. The full tree, in menu order:
Tools/BoneCracker Games/RHCP/
├── Welcome                      Open the welcome window
├── Setup Wizard…                Open the setup wizard (pre-fills from selection)
├── Validator…                   Open the validator (auto-scopes to selection if a hub is selected)
├── Project Doctor…              Open the project doctor
├── Demo Content/
│   ├── Install…                 Open the demo content installer (install/verify)
│   └── Uninstall…               Open the demo content installer (uninstall)
├── Auto-Create Scene Manager    Toggle auto-creating a scene manager (checkmarked)
├── Enable Mobile Controls       Toggle the on-screen touch controls into the build (checkmarked, off by default)
├── Gizmos/
│   ├── Center of Mass           Toggle the COM gizmo (checkmarked)
│   ├── Rotor Discs              Toggle the rotor-disc gizmos (checkmarked)
│   ├── Chase Camera Preview     Toggle the chase-cam preview (checkmarked)
│   ├── Boundary Volumes         Toggle the always-on boundary volumes (checkmarked)
│   ├── Ground-Sensing Ray       Toggle the ground-sensing ray (checkmarked)
│   └── Camera Rig               Toggle the camera-rig preview (checkmarked)
├── Documentation                Open the online documentation portal
└── Support                      Open the support page

GameObject/BoneCracker Games/RHCP/
├── Helicopter (Setup Wizard)…   Open the setup wizard pre-filled from the selected GameObject
├── Boundary Zone                Create a 50×50×50 m box-trigger boundary zone at the Scene view pivot
├── Scene Manager                Create (or select the existing) RHCP_SceneManager
├── Camera Rig                   Instantiate the camera rig prefab; auto-binds to a selected helicopter
└── UI/
    ├── HUD                      Instantiate the flight HUD canvas prefab
    ├── Mobile Controls          Instantiate the on-screen touch controls prefab
    ├── Settings Panel           Instantiate the demo settings panel prefab
    └── Controls Panel           Instantiate the controls cheat-sheet panel prefab
The Validator… entry is context-aware: if the selected GameObject is (or is under) an RHCP_Helicopter, the validator opens pre-scoped to that selection; otherwise it opens scoped to the open scenes. The GameObject ▸ … ▸ Boundary Zone helper creates a ready-to-use trigger zone — a 50-metre box collider already set as a trigger with an RHCP_BoundaryZone component — positioned at the current Scene view pivot, with full Undo support. For the rules that govern boundary zones, see VAL-021, VAL-022, and VAL-023 in the Rule Catalog above.
The Camera Rig and UI create helpers instantiate the shipped prefabs directly into the active scene, keeping the prefab connection so later prefab edits propagate, and each is Undo-wrapped and selected on creation. Camera Rig additionally binds the new rig's RHCP_CameraManager to a selected helicopter (when one is selected) so the camera follows it immediately — equivalent to the rig the Setup Wizard's camera step builds. The four UI entries each drop a complete, self-contained canvas: the flight HUD, the on-screen mobile controls, the demo settings panel, and the in-scene controls cheat-sheet.