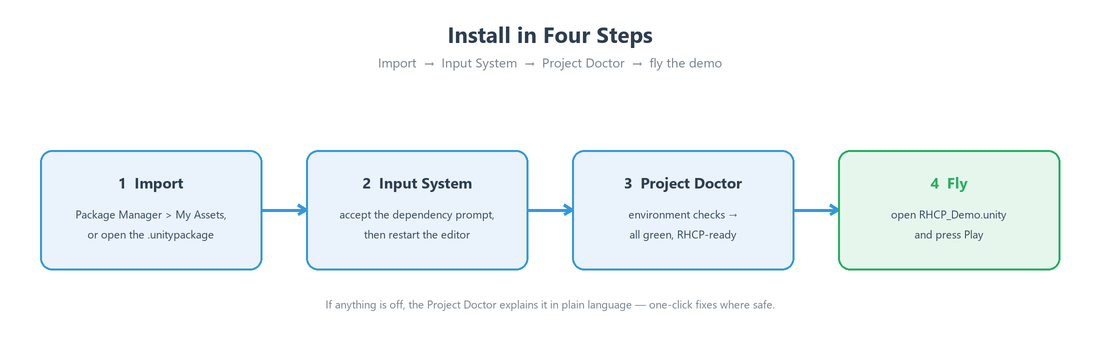
Installation
This guide walks you through importing Realistic Helicopter Controller Pro (RHCP) into a Unity project, satisfying its single hard dependency (the New Input System), choosing a render pipeline, and confirming the project is configured correctly. The centerpiece of the process is the Project Doctor — an editor window that inspects your environment, explains every problem in plain language, and offers a one-click fix where one is safe to apply. By the end you will have a validated project and a flying demo helicopter.
System Requirements
RHCP targets a modern Unity baseline and a specific input/rendering configuration. Meeting these requirements up front avoids the most common import-time failures, almost all of which the Project Doctor will catch for you anyway.
| Requirement | Supported | Notes |
|---|---|---|
| Unity Editor | 6000.3 (Unity 6.3) or newer | This is the version floor. A package uploaded from 6000.3 imports only into 6000.3 and later, so older editors are not supported. |
| Active Input Handling | Input System (New) | RHCP is New-Input-System only. Legacy-only projects will throw at runtime; see The Input System Dependency. |
| Input System package | com.unity.inputsystem |
Declared as a package dependency, so importing RHCP prompts you to install it automatically. |
| Render pipeline | Built-in or URP | Both are supported. HDRP is not supported. |
| TextMeshPro | TMP Essential Resources imported | Required for the on-screen HUD to render text. |
| Color space | Linear (recommended) | Gamma is supported but Linear is recommended for correct lighting. |
The asset itself ships under a single root folder, Assets/Realistic Helicopter Controller Pro/, and adds no custom tags, layers, or input axes to your project. That keeps the footprint small and the uninstall clean.
Importing the Package
You import RHCP the same way as any Asset Store package. Open your project in Unity 6000.3 or newer, then bring in the asset through the Package Manager or by double-clicking the downloaded .unitypackage.
- In the Unity Editor, open Window ▸ Package Manager, switch to My Assets, locate Realistic Helicopter Controller Pro, and click Download then Import. Alternatively, double-click the
.unitypackagefile to open the import dialog directly. - In the import dialog, leave everything selected and click Import. All shipped content lands under
Assets/Realistic Helicopter Controller Pro/. - If your project does not already have the Input System package, Unity prompts you to install it as part of the import — accept this (details below).
Because RHCP declares com.unity.inputsystem as a dependency, a fresh project that lacks it gets the install prompt automatically rather than failing to compile. Once import and any dependency installation finish, Unity recompiles and the RHCP tooling menu appears under Tools ▸ BoneCracker Games ▸ RHCP.
The Input System Dependency
RHCP uses the New Input System exclusively — the legacy Input Manager is not supported. The entire input layer (Runtime/Input/) is built on com.unity.inputsystem, so the package cannot compile or run without it, and a project whose Active Input Handling is set to legacy-only will throw at runtime as soon as the input layer initializes.
Two distinct things must be true, and the Project Doctor checks both separately:
- The package must be installed. If you accept the dependency prompt during import, this is handled for you. If you skipped it, install
com.unity.inputsystemvia Window ▸ Package Manager ▸ Unity Registry. - Active Input Handling must include the Input System. This lives in Edit ▸ Project Settings ▸ Player ▸ Active Input Handling. The RHCP target is Input System (New). The setting Both also works (the asset runs), but RHCP's target is Input System only so the legacy backend can be removed.
Important — editor restart required. Changing Active Input Handling only takes effect after you restart the Unity Editor. When you apply the Project Doctor's fix for this setting, expect a prompt telling you to restart. Until you do, the project may still behave as if the old setting were active.
Choosing a Render Pipeline
RHCP supports two render pipelines and ships material sets for each. You do not have to make a decision before importing — the asset detects whichever pipeline is active and tells you which material pack to use.
- Built-in Render Pipeline — the default for a fresh Unity project (no Render Pipeline Asset assigned). Use the Built-in material pack.
- Universal Render Pipeline (URP) — if your project has a URP asset assigned under Project Settings ▸ Graphics ▸ Default Render Pipeline. Use the URP material pack.
- HDRP is not supported. If RHCP detects an HDRP (or any other unrecognized) pipeline, the Project Doctor flags it as a warning; the flight model and tooling still function, but the shipped materials are not authored for HDRP.
How the doctor detects this: it reads GraphicsSettings.defaultRenderPipeline. A null value means Built-in (reported as OK). A pipeline type whose name contains Universal is reported as URP (OK). Anything else is reported as an unsupported pipeline (warning). Note that the pipeline check is detection and guidance only — there is no one-click pipeline switch, because changing pipelines is a project-wide decision and reimport. See the Troubleshooting guide if your materials appear pink (magenta), which indicates a pipeline/material mismatch.
TextMeshPro Essentials
The runtime HUD is built with uGUI and TextMeshPro, so all numeric readouts (altitude, airspeed, rotor RPM, and so on) render through TMP. TextMeshPro needs its Essential Resources — a default font, shaders, and settings asset — imported into the project before any TMP text will display. Without them, the HUD draws its panels but shows no text.
To import them, use Window ▸ TextMeshPro ▸ Import TMP Essential Resources. The Project Doctor detects whether they are present by searching for the TMP_Settings asset that the essentials package always includes; if it is missing, the doctor reports an informational note pointing you at that exact menu path. This is a standard, one-time step for any project that uses TextMeshPro and is not specific to RHCP.
Tip — fonts must be Static. Under this project's recommended Play Mode settings, dynamic TMP atlases can render as invisible text. If you author your own HUD fonts, bake them as Static TMP font assets. The fonts shipped with RHCP are already configured correctly.
Running the Project Doctor
The Project Doctor is the single place to confirm your environment is RHCP-ready. Open it from Tools ▸ BoneCracker Games ▸ RHCP ▸ Project Doctor…. The window runs every check on open, lists each one with a colored status indicator, and provides a Fix button next to any check that is both fixable and currently not passing. A Re-run button at the top re-evaluates everything after you make a change, and an ⓘ button on each row opens the relevant documentation page.
Status indicators follow four levels: OK (green check), Info (neutral note — supported but worth knowing), Warning (yellow — sub-optimal but works), and Error (red cross — broken, blocks the package). Above the list a status banner shows the worst result with an "X of N checks passed" count, and the footer echoes it: "Project is RHCP-ready ✓" when everything is green, "Review the highlighted checks." for warnings/info, or "Action needed — resolve the red checks." when any error is present.
There are six checks, run in this order:
| ID | Title | What it verifies | Status when wrong | One-click fix? |
|---|---|---|---|---|
RHCP-DOC-01 |
Active Input Handling | Active Input Handling includes the New Input System. | Error if set to legacy Input Manager only; Info if set to Both (works, but the target is Input System only). | Yes — sets it to Input System (New); requires an editor restart. |
RHCP-DOC-02 |
Input System package | com.unity.inputsystem is installed (detected by probing for the loaded Unity.InputSystem assembly). |
Error if not installed — RHCP input cannot compile or run. | Yes — adds the package via Package Manager. |
RHCP-DOC-03 |
Render pipeline | Reports the active pipeline so you import the matching material pack. | Warning for an unsupported pipeline (e.g. HDRP). Built-in and URP both report OK. | No — detection/guidance only. |
RHCP-DOC-04 |
Color space | Player color space; Linear is recommended. | Info if set to Gamma (supported, but Linear is recommended). | No — changing color space is a project-wide reimport. |
RHCP-DOC-05 |
Unity version | The editor meets the 6000.3 version floor. | Warning if below the floor; Info if the version string cannot be parsed for comparison. | No — upgrade the editor manually. |
RHCP-DOC-06 |
TextMeshPro essentials | TMP Essential Resources are imported (probes for a TMP_Settings asset). |
Info if not found — the HUD needs them. | No — import via Window ▸ TextMeshPro ▸ Import TMP Essential Resources. |
DOC-01 — Active Input Handling
This is the check most likely to require action on a project that was not already New-Input-System-only. It reads the activeInputHandler setting and reports OK only when it is Input System only. A value of Both is reported as Info because the asset still runs, just with the legacy backend present. A value of Input Manager only is an Error, because the input layer will throw at runtime. The Fix opens a confirmation dialog (it edits Project Settings), sets the value to Input System only, and then prompts you to restart the editor for the change to take effect.
DOC-02 — Input System package
This confirms the com.unity.inputsystem package is actually present by checking whether the Unity.InputSystem assembly is loaded — a synchronous, offline probe. If the package is missing it is an Error, and the Fix opens a confirmation dialog and then requests the package through Unity's Package Manager. The Package Manager surfaces its own progress and triggers a recompile when the install finishes.
DOC-03 — Render pipeline
This reports your active render pipeline so you know which material pack applies, as described in Choosing a Render Pipeline. Built-in and URP are OK; anything else is a Warning. There is no fix button here by design — selecting a pipeline is your project decision.
DOC-04 — Color space
Content is authored to look correct in either color space, but Linear is recommended for physically plausible lighting. A Gamma project is reported as Info, not an error. There is no one-click fix because switching color space triggers a project-wide texture reimport that you should run deliberately, via Project Settings ▸ Player ▸ Color Space.
DOC-05 — Unity version
This compares your editor version against the supported floor of 6000.3. At or above the floor it reports OK; below it, a Warning advising you to upgrade for full support. If the version string is in an unexpected format it falls back to an Info note rather than failing.
DOC-06 — TextMeshPro essentials
This confirms the TMP Essential Resources are imported, as covered in TextMeshPro Essentials. Missing essentials are reported as Info with the exact import menu path, since importing them is a quick, standard, one-time TMP action.
Verification: Open the Demo and Fly
Once the Project Doctor footer reads "Project is RHCP-ready", confirm everything works end to end by flying the demo. The demo scene runs entirely on the v2 stack — the hero airframe, the camera rig, the HUD, and the New Input System input layer — so a clean flight proves the whole pipeline.
- Open the demo scene at
Assets/Realistic Helicopter Controller Pro/Scenes/RHCP_Demo.unity. - Press Play. The helicopter should sit on the pad with a stable hover-ready posture and no console errors.
- Raise the collective (vertical thrust/lift) to climb — by default this is W on keyboard or the left stick on a gamepad. Use the cyclic (which tilts the rotor disc to control pitch and roll) and the pedals (anti-torque/yaw) to maneuver. See Controls and Input for the full binding list.
- Confirm the HUD shows live telemetry (altitude, airspeed, rotor RPM) and that the camera follows the aircraft.
If the helicopter flies and the HUD updates, your installation is correct. If something is off — pink materials, invisible HUD text, input that does nothing — return to the Project Doctor first; in almost every case one of the six checks will explain it. The Quick Start covers the demo controls in more detail, and the Troubleshooting guide lists symptom-by-symptom fixes.
Folder Structure
After import, all of RHCP lives under one root folder, which keeps your project tidy and makes the asset trivial to remove. The high-level layout is:
Assets/Realistic Helicopter Controller Pro/
├── Runtime/        Hub + modules, input, cameras, HUD, mobile, demo scripts, configs
│   ├── Core/       RHCP_Helicopter (hub), RHCP_Module, RHCP_BoundaryZone, shared types
│   ├── Modules/    RHCP_Rotor, RHCP_Engine, RHCP_Damage, RHCP_Audio, RHCP_VFX
│   ├── Input/      RHCP_InputManager, providers, RHCP_InputActions.inputactions
│   ├── Cameras/    RHCP_CameraManager, chase + cockpit cameras
│   ├── UI/         uGUI + TextMeshPro HUD (driver, widgets, config)
│   ├── Mobile/     On-screen touch controls (collective, cyclic, pedals)
│   ├── Demo/       Demo controller + settings panel
│   └── Configs/    RHCP_FlightConfig + airframe presets
├── Editor/         Tooling suite: Setup Wizard, Validator, Project Doctor,
│                   custom inspectors, scene gizmos, welcome window, demo installer
├── Prefabs/        Hero airframe, camera rig, HUD, mobile controls, settings panel
├── UI/             HUD theme/config asset + HUD sprites
└── Scenes/         RHCP_Demo.unity (the demo scene you fly in)
The runtime code uses the namespace BoneCrackerGames.RHCP (with sub-namespaces such as .UI, .Mobile, and .Demo) and all public types carry the RHCP_ prefix, so the asset will never collide with your own scripts. The editor tooling lives in BoneCrackerGames.RHCP.Editor and never runs in builds. For a fuller architecture tour, see Overview.
Troubleshooting Installation
Most first-run problems trace back to one of the six Project Doctor checks, so the doctor is always the first place to look. The table below maps common symptoms to the responsible check and the fix.
| Symptom | Likely cause | Resolution |
|---|---|---|
Compile errors mentioning UnityEngine.InputSystem or the input layer |
Input System package not installed (RHCP-DOC-02). |
Run the doctor and click Fix on the Input System package check, or install com.unity.inputsystem via Package Manager. |
ArgumentException / input errors as soon as you press Play |
Active Input Handling set to legacy only (RHCP-DOC-01). |
Doctor Fix sets it to Input System (New), then restart the editor. |
| Setting looks correct but the project still misbehaves | Active Input Handling change not yet applied. | The setting requires an editor restart to take effect. |
| HUD panels appear but show no text | TMP Essential Resources missing (RHCP-DOC-06), or a custom font is dynamic. |
Import TMP essentials via Window ▸ TextMeshPro ▸ Import TMP Essential Resources; bake custom HUD fonts as Static. |
| Materials render pink/magenta | Pipeline/material mismatch (RHCP-DOC-03). |
Use the material pack matching the doctor's reported pipeline (Built-in or URP). HDRP is not supported. |
| Lighting looks washed out or too dark | Gamma color space (RHCP-DOC-04). |
Switch to Linear in Project Settings (project-wide reimport); supported either way. |
| RHCP menu missing or tooling errors | Editor below the version floor (RHCP-DOC-05). |
Upgrade to Unity 6000.3 or newer. |
If a symptom is not listed here, re-run the Project Doctor and read each row's message and ⓘ link; the messages are written to be self-explanatory. The dedicated Troubleshooting and FAQ pages cover deeper issues, and the Setup Wizard is the recommended next step for configuring your own helicopter model.
Next Steps
With a validated project and a flying demo, you are ready to move from the sample content to your own aircraft. The natural progression is:
- Quick Start — fly the demo, learn the controls, and understand what each component does in two minutes.
- Setup Wizard — turn your own helicopter FBX into a validated, flyable airframe with zero manual wiring, the headline feature of the asset.
- Editor Tools — get the full tour of the tooling suite (Validator with one-click fixes, custom inspectors, scene gizmos) that the Project Doctor is part of.
For deeper, programmer-facing topics, consult the XML documentation comments on the runtime types themselves, which document every public type and member of the runtime API (your IDE's IntelliSense surfaces them as you type).