Adding and Editing Jobs and Loads
This guide walks you through creating your own delivery jobs and cargo loads for Realistic Truck Simulator: making a new job asset, filling in its requirements, registering it with the Job Manager so it appears in the in-game job list, and building custom load prefabs. Read it when you are ready to go beyond the five jobs that ship with the demo — for the underlying job flow (start → load → deliver), see How It Works first.
Prerequisites
Before starting, make sure you have:
- A scene with the RTS systems already in place (Job Manager, Scene Manager, UI Canvas, Guide System) — see Scene Setup.
- At least one delivery zone and one load station in the scene — see Locations.
- A trailer of the type your job will require, either placed in the scene or provided by a trailer spawn point — see Creating Trailers.
How Jobs and Loads Fit Together
A job is an RTS_Job asset — a ScriptableObject, which is a Unity asset file that stores data in your project instead of living on a scene object. Each job describes what to haul (a load type and a minimum weight in kilograms), with what (a required trailer type), and where to (the name of a delivery zone).
A load is a prefab — a reusable GameObject saved as a project asset — carrying the RTS_Load component, which defines the cargo's type and weight. When a load station fills your trailer, the trailer instantiates copies of these prefabs on its bed in a grid layout.
The RTS_JobManager component in your scene holds the list of jobs the player can accept. Only one job can be active at a time: trying to start a second one shows the notification "Can't start a new job, you already have one".
Step 1: Create a New Job Asset
RTS_Job deliberately has no entry in Unity's Assets → Create menu. New jobs are created from the Job Browser window instead, which keeps every job asset in the correct folder automatically.
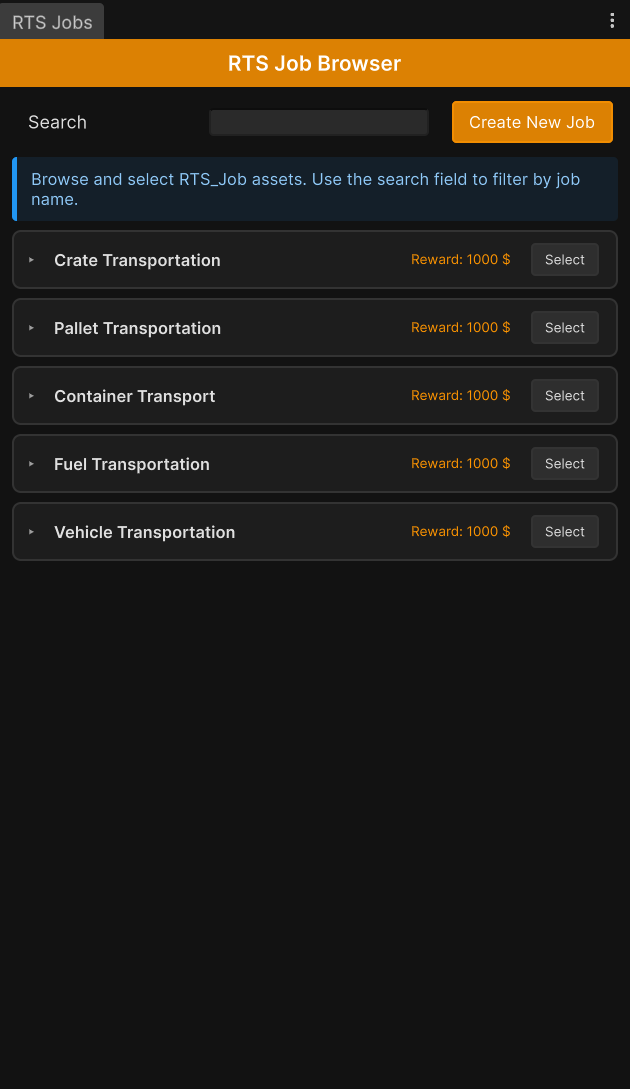
- Open Tools → BoneCracker Games → Realistic Truck Simulator → Job List (the same item also exists under GameObject → BoneCracker Games → Realistic Truck Simulator). A window titled RTS Jobs opens, with the header band RTS Job Browser.
- The window shows a Search field, a Create New Job button, and one expandable card per existing job. Each card shows the job name, a "Reward: 1000 $" style annotation, and a Select button; clicking the card's title expands it to reveal Description, Required Trailer, Required Load (with the amount in kg), and Delivery Zone rows.
- Click Create New Job. The window creates a new asset named
RTS_Job_New.asset(a unique name is generated if one already exists) insideAssets/RTS/Resources/Jobs, creating that folder first if it is missing. The new asset is then selected and highlighted in the Project window, ready to edit.
Keep your job assets inside Assets/RTS/Resources/Jobs — the browser lists every RTS_Job it finds in a Resources/Jobs folder, so assets moved elsewhere disappear from this window.
Step 2: Configure the Job
With the new asset selected, the Inspector shows the RTS Job custom inspector with a Job Details section and a Runtime State section.
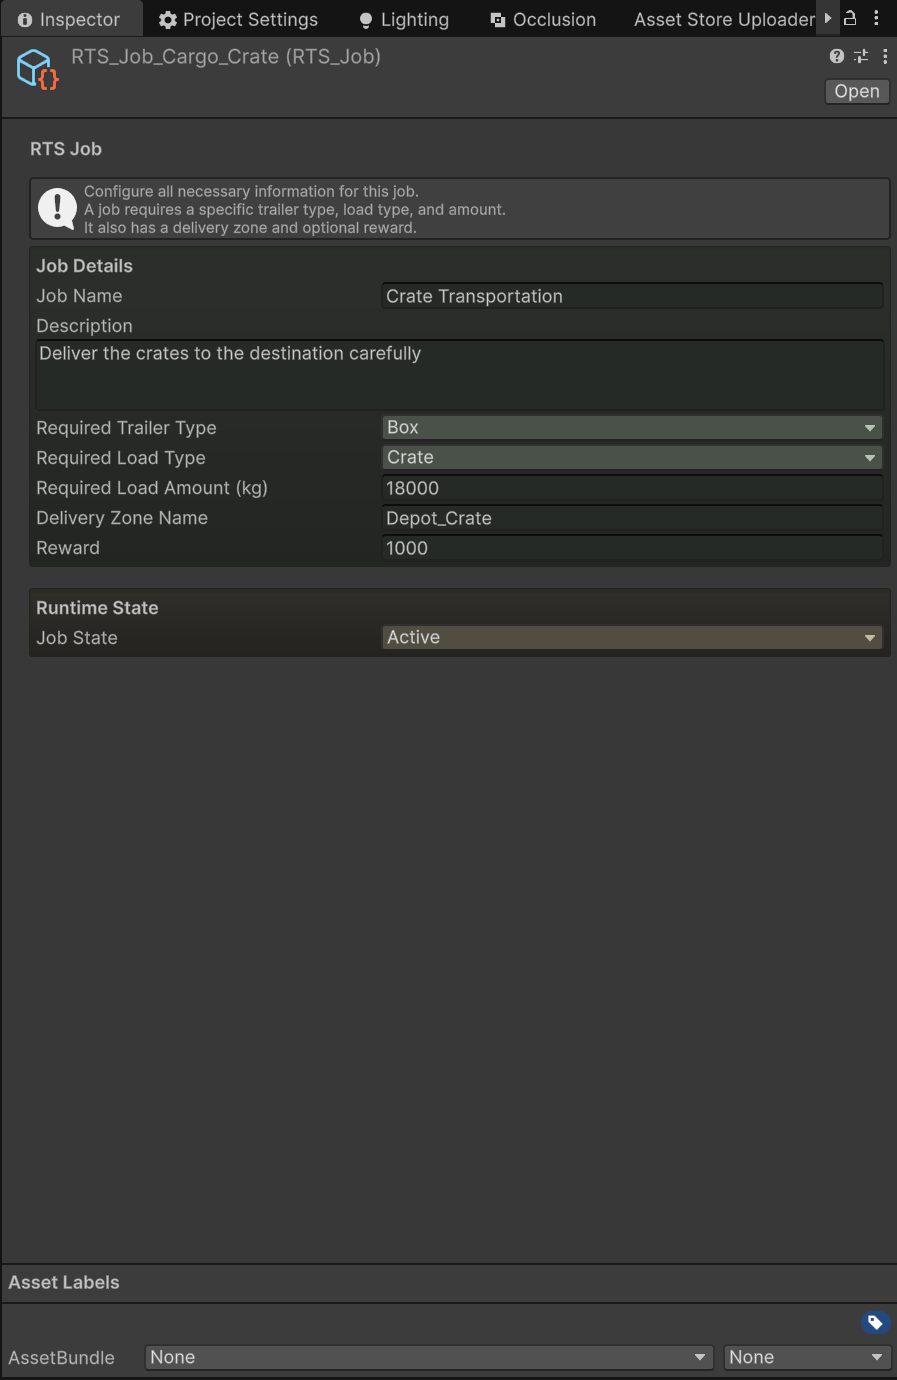
Every field of RTS_Job, with its default value and meaning:
| Inspector Label | Field | Type | Default | Meaning |
|---|---|---|---|---|
| Job Name | jobName |
string | New Delivery Job |
Display name of this job, shown on job cards and in notifications. |
| Description | description |
string (multi-line) | Deliver specific cargo to the destination |
Description or objective of this job. |
| Required Trailer Type | requiredTrailerType |
RTS_Trailer.TrailerType |
Box |
Trailer type required to accept this job (Flatbed, Tanker, Box, or LowLoader). |
| Required Load Type | requiredLoadType |
RTS_Trailer.LoadType |
Crate |
Load type required for this delivery (None, Pallet, Fuel, Vehicle, Crate, Container). |
| Required Load Amount (kg) | requiredLoadAmount |
float, Min 0 | 2000 |
Minimum cargo weight in kilograms required for delivery. |
| Delivery Zone Name | deliveryZoneName |
string | Depot_01 |
Name of the target delivery zone in the scene — must exactly match the zoneID of an RTS_DeliveryZone (see Locations). |
| Reward | reward |
int, Min 0 | 1000 |
Money earned upon successful delivery (see The Reward Field below). |
| Job State | state |
RTS_Job.JobState |
Active |
Current runtime state (Active, Completed, Terminated). Leave at the default — the Job Manager sets it during play. |
Two fields deserve extra care:
- Delivery Zone Name is matched by string against the
zoneIDof the delivery zones in your scene. A typo here means the guide system cannot find the destination and the job can never be completed at the intended zone. - Required Trailer Type and Required Load Type must be a valid combination, because load stations refuse incompatible cargo. The compatibility rules are: Tanker carries
Fuelonly; Flatbed carries any load type exceptNone; Box carriesPallet,Container, orCrate; LowLoader carriesVehicle,Container, orCrate.
Step 3: Add the Job to the Job Manager
Creating the asset is not enough — jobs only appear in the game when they are listed on the Job Manager. RTS_JobManager keeps a plain serialized list called Available Jobs (availableJobs); it does not scan the Resources/Jobs folder automatically. The shipped city demo has its five jobs assigned to this list on the RTS_JobManager object in the scene.
- Select the RTS_JobManager GameObject in your scene's Hierarchy.
- In the Inspector, under Job References, expand the Available Jobs list.
- Increase the list size (or press +) and drag your new job asset into the empty slot.
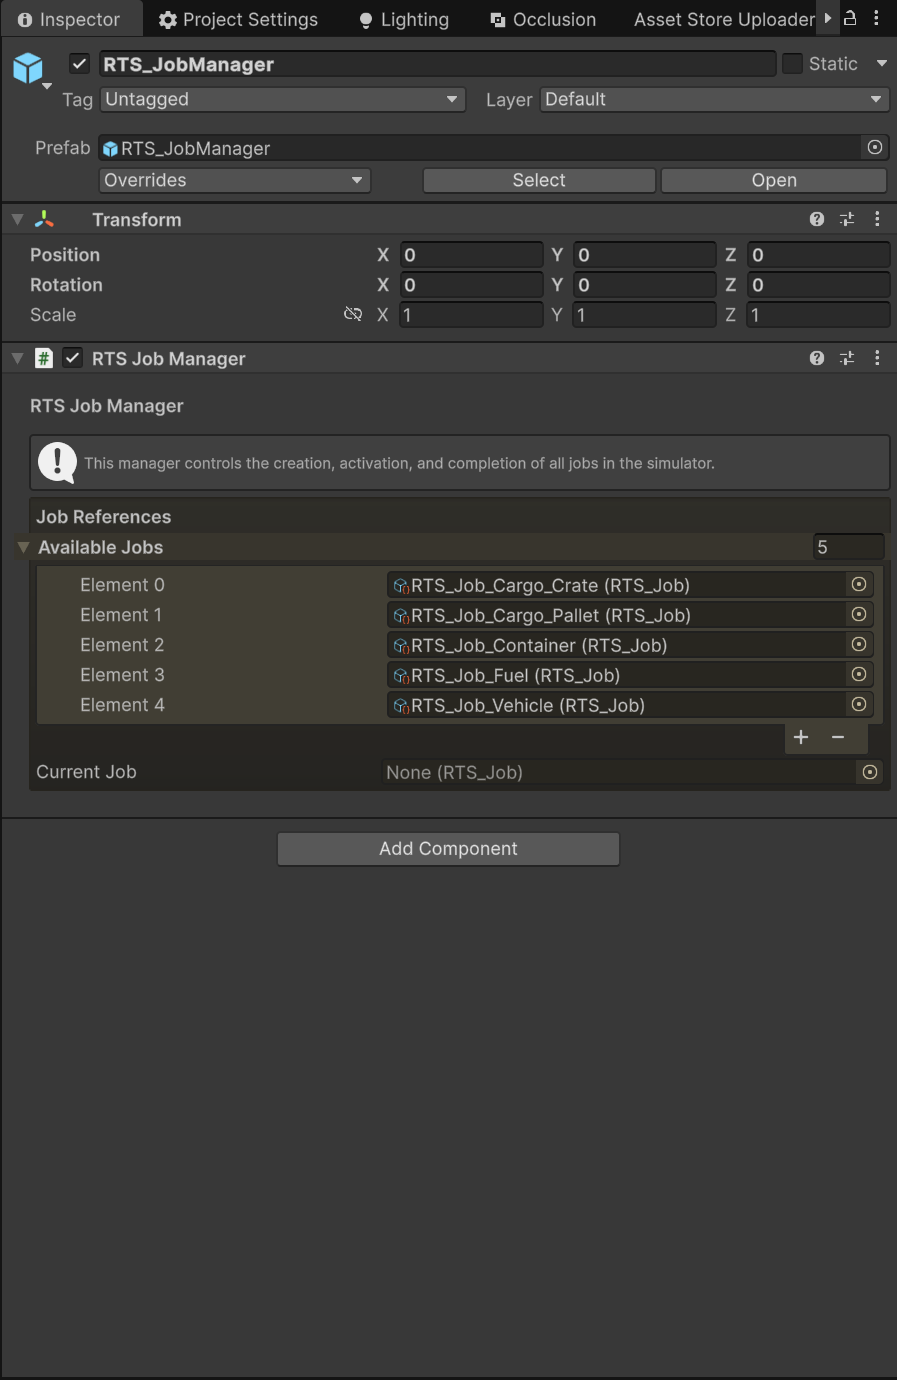
The Current Job slot below the list shows the active job at runtime — leave it empty in the editor. During Play Mode, the same inspector also shows Debug Actions (Play Mode) with Complete Current Job and Terminate Current Job buttons for quick testing.
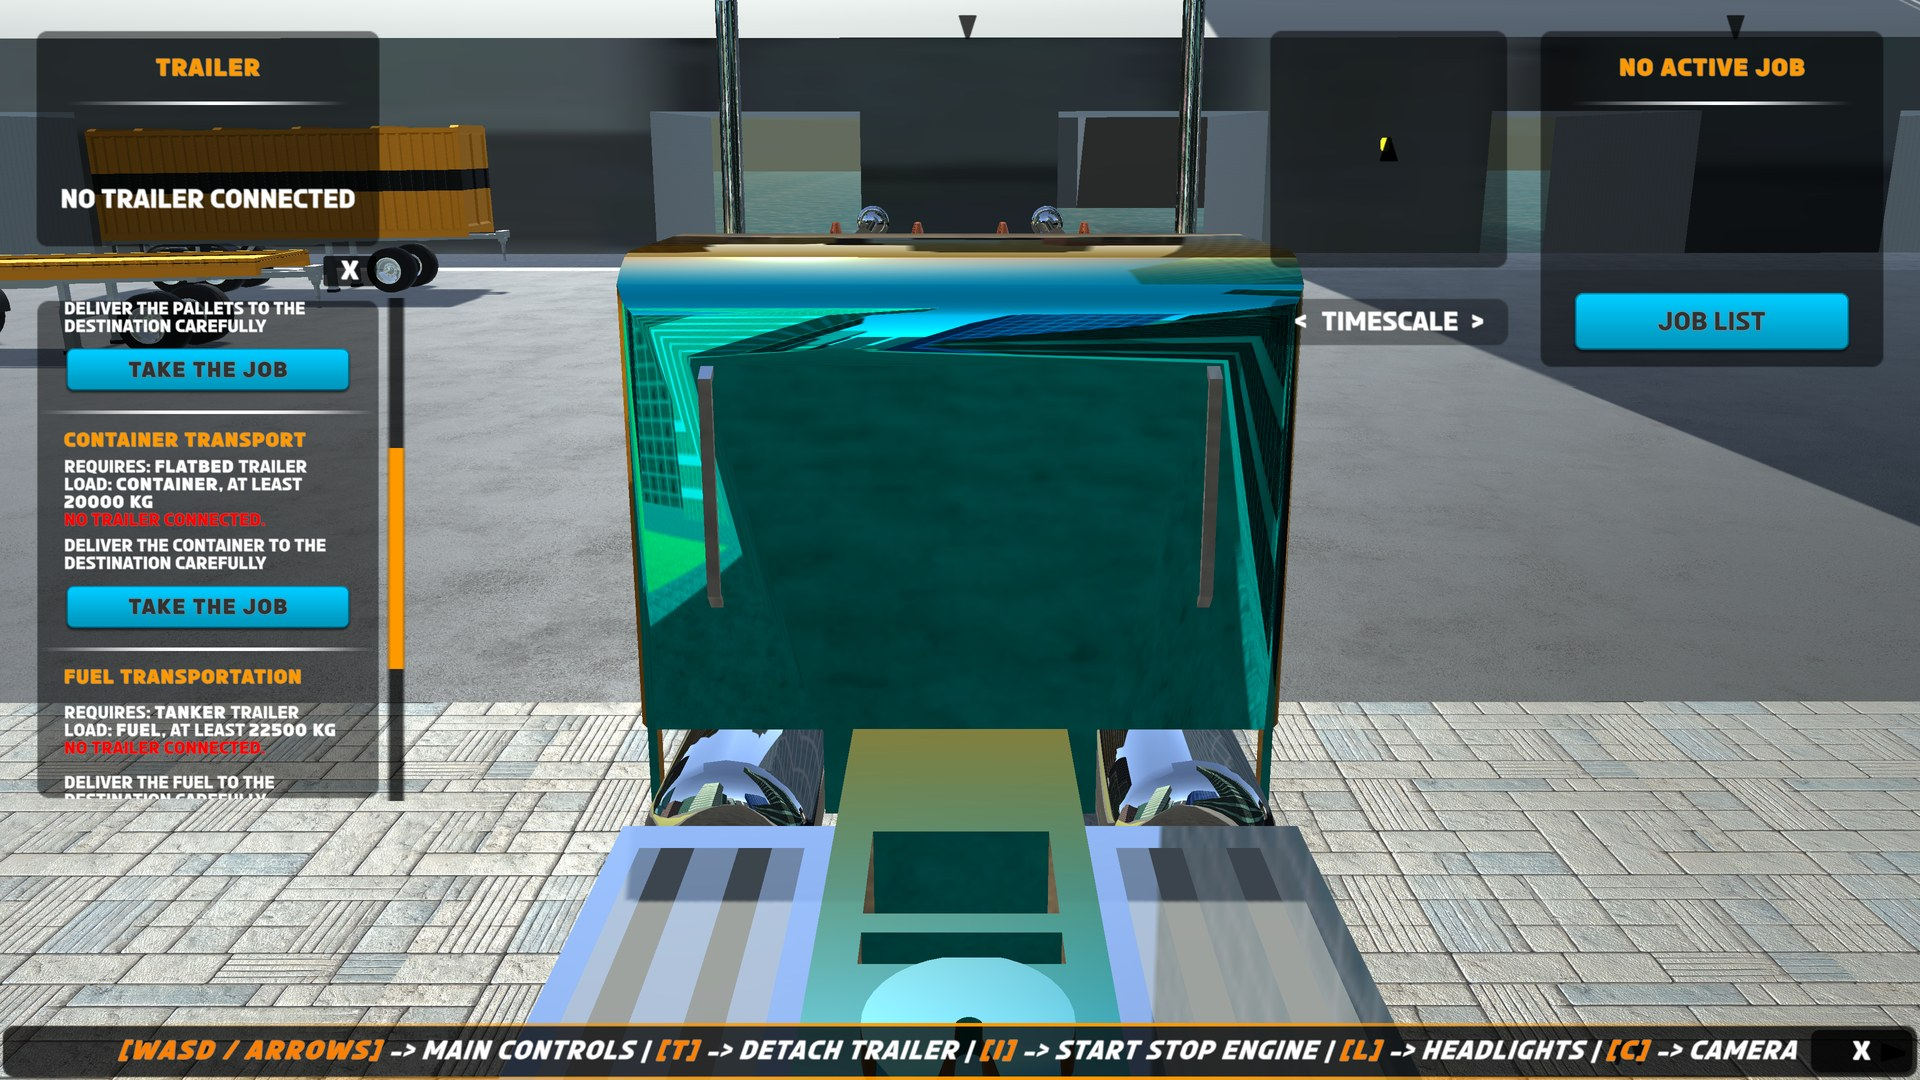
Once listed, the job shows up as a card in the in-game job list panel. Each card reports trailer compatibility live: "No trailer connected." (red), "Current trailer is incompatible." (orange), or "Trailer compatible. Ready to start." (green). See UI System for the panel itself.
The Five Shipped Jobs
These job assets ship in Assets/RTS/Resources/Jobs and are pre-assigned to the Job Manager of the city demo scene. Each Delivery Zone value matches the zoneID of a delivery zone placed in that scene:
| Asset | Job Name | Required Trailer | Required Load | Amount (kg) | Delivery Zone | Reward |
|---|---|---|---|---|---|---|
RTS_Job_Cargo_Crate |
Crate Transportation | Box | Crate | 18000 | Depot_Crate |
1000 |
RTS_Job_Cargo_Pallet |
Pallet Transportation | Box | Pallet | 21000 | Depot_Pallet |
1000 |
RTS_Job_Container |
Container Transport | Flatbed | Container | 20000 | Depot_Container |
1000 |
RTS_Job_Fuel |
Fuel Transportation | Tanker | Fuel | 22500 | Depot_Fuel |
1000 |
RTS_Job_Vehicle |
Vehicle Transportation | Flatbed | Vehicle | 10000 | Depot_Vehicle |
1000 |
They are good references when tuning your own amounts: the shipped trailers all have a maxLoad of 22500 kg, so required amounts stay at or below that ceiling.
The Reward Field
In V1.5 the reward field is stored on the job asset and displayed in the Job Browser, but no built-in system spends or grants it — RTS does not include a money/economy system. It exists as your integration point. The moment a delivery succeeds, RTS_Events.OnJobCompleted fires with the completed job, so granting money is one small script:
using UnityEngine;

public class MyMoneySystem : MonoBehaviour {

    public int playerMoney = 0;

    private void OnEnable() {
        RTS_Events.OnJobCompleted += OnJobCompleted;
    }

    private void OnDisable() {
        RTS_Events.OnJobCompleted -= OnJobCompleted;
    }

    private void OnJobCompleted(RTS_Job job) {
        playerMoney += job.reward;
        Debug.Log("Earned " + job.reward + " for completing " + job.jobName);
    }

}
For the full event list and API surface, see Scripting API.
Loads
What a Load Is
Each cargo item is a prefab with the RTS_Load component (Add Component → Realistic Truck Simulator → Spawning → RTS Load). It has just two fields:
| Field | Type | Default | Meaning |
|---|---|---|---|
loadType |
RTS_Trailer.LoadType |
Crate |
Category of this load item. |
weight |
float, Min 0 | 1000 |
Weight of this load item in kilograms. |
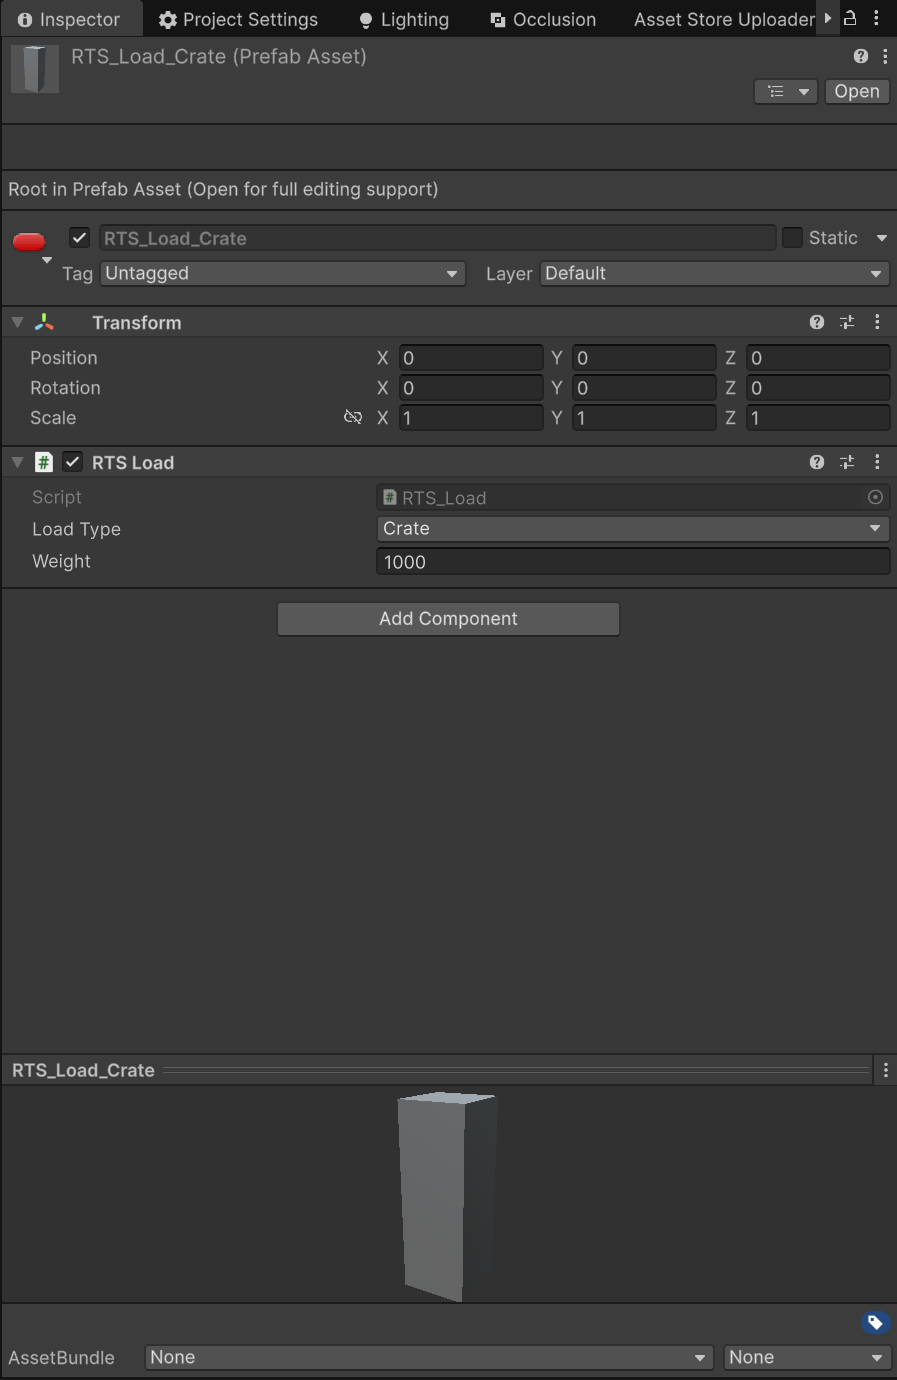
Trailers collect every RTS_Load prefab from the Resources/Loads folder automatically when they wake up — you never fill a trailer's load prefab list by hand. When a load station adds cargo, the trailer picks the prefab whose name contains the load type's name (case-insensitive — for example, RTS_Load_Crate matches the Crate type) and spawns roughly one instance per prefab-weight worth of cargo, arranged in the grid defined by the trailer's column/row/spacing settings (Creating Trailers). Cargo that would exceed the trailer's maxLoad is clamped.
Shipped Load Prefabs
These prefabs ship in Assets/RTS/Resources/Loads:
| Prefab | Load Type | Weight (kg) |
|---|---|---|
RTS_Load_Container |
Container | 20000 |
RTS_Load_Crate |
Crate | 1000 |
RTS_Load_Fuel |
Fuel | 5000 |
RTS_Load_Pallet |
Pallet | 1000 |
RTS_Load_Vehicle_1 |
Vehicle | 5000 |
RTS_Load_Vehicle_2 |
Vehicle | 5000 |
The Load Browser
Open Tools → BoneCracker Games → Realistic Truck Simulator → Load List to open the RTS Loads window (header band: RTS Load Browser). It works exactly like the Job Browser: a Search field filters by prefab name, each card shows the prefab name plus a "Crate • 1000 kg" style annotation, a Select button pings the prefab in the Project window, and expanding a card shows its Load Type and Weight rows.
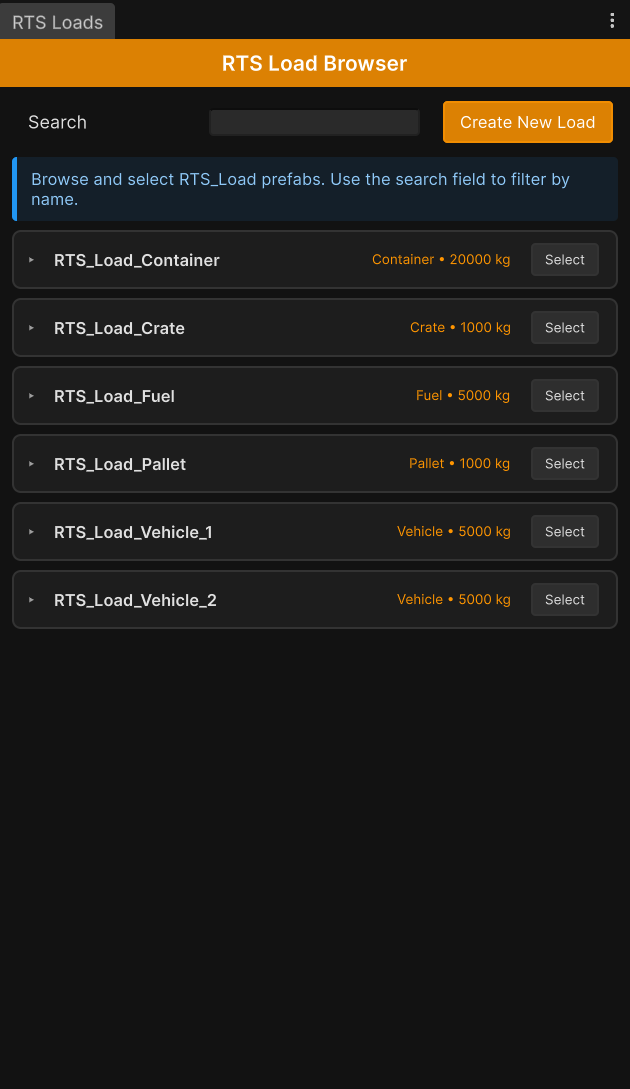
The Create New Load button creates RTS_Load_New.prefab in Assets/RTS/Resources/Loads (creating the folder if needed) with loadType = Crate and weight = 1000, then selects it — a bare GameObject with the component attached, waiting for your model.
Creating a Custom Load Prefab
- Click Create New Load in the Load Browser (or build a GameObject manually and add the RTS Load component).
- Open the prefab and add your cargo model as a child object, so the visual mesh travels with the load.
- Set Load Type to the category this cargo belongs to, and Weight to its mass in kilograms. Weight matters for gameplay math: a station loading 5000 kg of a 1000 kg load spawns five items on the trailer bed.
- Rename the prefab so its name contains the load type's name — for example
RTS_Load_Palletfor thePallettype. The trailer matches prefabs to load types by this name-contains rule, so a Crate prefab namedMyBoxwould never be found. Include exactly one load-type word in the name to avoid ambiguous matches. - Make sure the prefab is saved in a
Resources/Loadsfolder —Assets/RTS/Resources/Loadsis the shipped one. Trailers collect prefabs from anyResources/Loadsfolder in the project.
If several prefabs match the same load type (like the two shipped Vehicle loads), the trailer uses the first match it finds in its collected list.
Testing Your Job
Run through this checklist before pressing Play — each item is a common reason a custom job silently fails:
- [ ] The job asset lives in
Assets/RTS/Resources/Jobsand is added to the Job Manager's Available Jobs list. - [ ] A trailer of the job's Required Trailer Type exists in the scene, or a trailer spawn point provides one (Creating Trailers).
- [ ] A load station with a matching Load Type exists (Locations). Note that stations only load your trailer while the job is active — otherwise you get "You're not permitted to load this trailer unless you take the job".
- [ ] A delivery zone exists whose
zoneIDexactly equals the job's Delivery Zone Name. Driving into any other zone shows "This delivery zone is not compatible for your cargo". - [ ] A load prefab whose name contains the required load type exists in
Resources/Loads.
Then verify in Play Mode:
- Open the job list panel and confirm your job's card appears with the status "Trailer compatible. Ready to start." once the right trailer is attached.
- Start the job. You should see the notification "Job Name started!" followed by "Deliver the load type to the zone name", and the guide ribbon should lead you to a load station (or straight to the delivery zone if the trailer is already loaded).
- Load cargo until the "Loaded ... kg of ..." notifications reach the required amount, then follow the guide to the delivery zone.
- Entering the correct zone with enough cargo shows "Job Name completed", clears the trailer, and the job list becomes available again. If you instead see "Not enough cargo of the required load type to complete the job", raise the loaded amount or lower
requiredLoadAmount.
Next Steps
- Locations — place and configure the delivery zones and load stations your jobs point at, including
zoneIDdetails. - Creating Trailers — build trailers for each
TrailerType, including the load grid that positions your cargo prefabs. - UI System — the job list panel, job cards, and notifications your players interact with.
- Scripting API — start, complete, and terminate jobs from code, and hook the full event set.