Creating New Trailers and Trailer Types
This guide walks you through building your own trailer for Realistic Truck Simulator — from a bare model to a fully working, job-ready trailer that appears in the RTS tooling. You will learn what the two trailer components do, how the cargo grid works, why the trailer type you pick decides which cargo it can carry, and how to spawn your trailer in a scene. Read this if the three shipped trailers (Box, Flatbed, Tanker) are not enough, or if you want to build the fourth type, the LowLoader, which ships as an enum option but has no prefab.
Prerequisites
Before starting, make sure you have:
- A scene with the RTS systems already set up — see Scene Setup.
- A working player truck — see Creating New Trucks.
- A trailer model (your own, or a duplicate of a shipped trailer to experiment on).
- Basic familiarity with prefabs. A prefab is a GameObject saved as a reusable asset file — you configure it once, and every copy placed in a scene inherits that configuration.
Anatomy of a Trailer
Every RTS trailer is built from two cooperating components on the same root GameObject:
| Component | Comes from | Responsibility |
|---|---|---|
RCCP_TrailerController |
Realistic Car Controller Pro (bundled) | Physics: wheels, joints, and attaching/detaching to the truck |
RTS_Trailer |
Realistic Truck Simulator | Cargo logic: trailer type, weight, the load grid, and job compatibility |
RCCP_TrailerController makes the trailer drivable — it handles the physical connection to the truck (the player detaches with the T key by default). RTS_Trailer makes the trailer useful — it tells the job system what kind of trailer this is, tracks what is loaded onto it, and places cargo visuals on the deck. RTS_Trailer requires RCCP_TrailerController on the same GameObject: if it is missing, the component logs the warning "{name} is missing RCCP_TrailerController! RTS_TrailerManager requires it." and disables itself.
The Shipped Trailer Prefabs
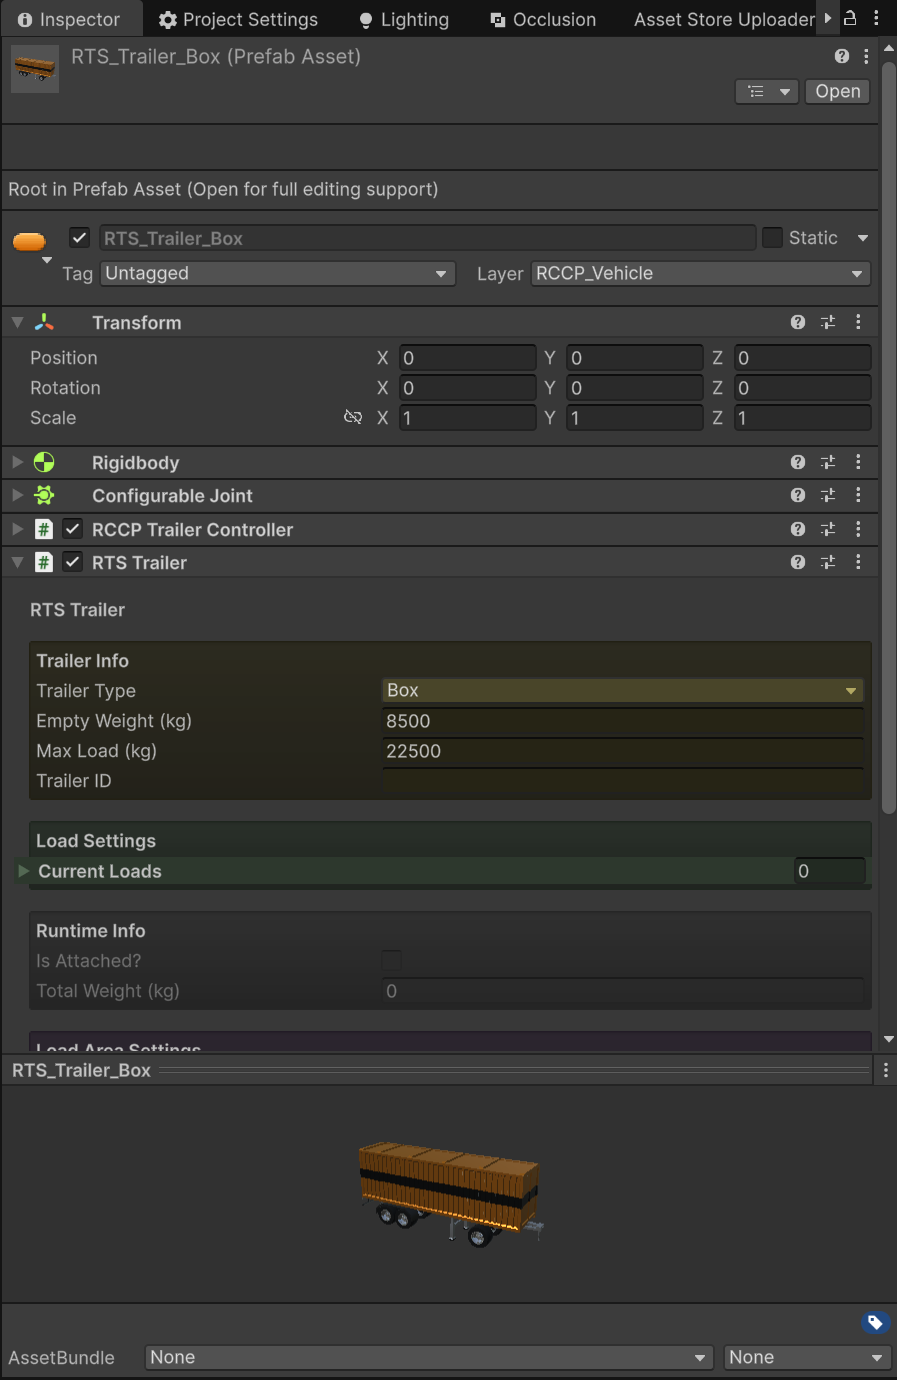
Three ready-made trailers live in Assets/RTS/Resources/Trailers. They are your best reference — when in doubt, open one and compare it against your own trailer.
| Prefab | Trailer Type | Empty Weight (kg) | Max Load (kg) | Grid (Columns × Rows) | Spacing X / Z |
|---|---|---|---|---|---|
RTS_Trailer_Box |
Box | 8500 | 22500 | 3 × 5 | 0.6 / 1.2 |
RTS_Trailer_Flatbed |
Flatbed | 8500 | 22500 | 1 × 2 | 0 / 4.5 |
RTS_Trailer_Tanker |
Tanker | 8500 | 22500 | 3 × 5 | 1.2 / 1.2 |
Notice how the grid matches the cargo: the Flatbed carries one or two large items (a vehicle or a container) in a single column, while the Box trailer stacks fifteen small crates or pallets in a tight 3 × 5 grid.
Step 1: Make the Trailer Work in RCCP First
RTS does not add physics of its own — get the trailer rolling, attaching, and detaching correctly in RCCP before you touch any RTS component. Set up RCCP_TrailerController on your trailer model following the Realistic Car Controller Pro documentation bundled with this asset at Assets/RTS/Realistic Car Controller Pro/Documentation/ (available as both Markdown in MD/ and HTML in HTML/).
A quick sanity check before moving on: enter Play Mode, back your truck up to the trailer, confirm it attaches, drive a loop, and press T to detach. If any of that fails, fix it on the RCCP side first — no RTS setting can repair a broken physics rig.
Step 2: Add the RTS_Trailer Script
With the RCCP side working:
- Select the root GameObject of your trailer in the scene (not a child mesh or wheel).
- Choose Tools → BoneCracker Games → Realistic Truck Simulator → Add → Add RTS Trailer Script To Selected Trailer. The same item also exists under GameObject → BoneCracker Games → Realistic Truck Simulator → Add.
The menu adds an RTS_Trailer component to the selected object. Two dialogs can appear instead:
- "Selected trailer already has an RTS_Trailer component." — the script is already there; nothing was changed.
- "Please select only one trailer in the scene. Be sure to select root of the trailer gameobject before adding the trailer script." — you selected multiple objects or a prefab asset in the Project window. (With nothing selected, the menu item does nothing.) Select exactly one scene object and try again.
You can also add the component manually via Add Component → Realistic Truck Simulator → Trailer → RTS Trailer — the menu item is just a convenience with safety checks.
Step 3: Configure the RTS_Trailer Fields
The custom inspector groups the fields into four sections (three of them color-tinted). Here is every field, its default, and what it does.
Trailer Info
| Field | Type | Default | What it means |
|---|---|---|---|
| Trailer Type | enum | Flatbed |
One of Flatbed, Tanker, Box, LowLoader. Decides job eligibility and load compatibility — see Step 4. |
| Empty Weight (kg) | float | 1000 |
The trailer's own weight without any cargo. |
| Max Load (kg) | float | 5000 |
Maximum cargo weight the trailer can carry. Loading stops here, and any load that would overflow is clamped so the total never exceeds this value. |
| Trailer ID | string | (empty) | Optional label for debugging or UI. If set, the Trailer Browser shows it next to the prefab name. |
The script defaults (1000 / 5000) are intentionally modest — the shipped trailers override them to 8500 / 22500. Pick values that fit your game's job amounts: a job's required load amount (for example 18000 kg for the shipped Crate job) must physically fit under Max Load, or the job can never be completed with that trailer.
Load Settings and Runtime Info
Current Loads (default: empty list) holds the RTS_Load items currently on the trailer. At runtime the load stations fill it; leave it empty on the prefab.
The Runtime Info section is read-only (grayed out): Is Attached? mirrors the RCCP attachment state each frame, and Total Weight (kg) shows Empty Weight plus the summed weight of all current loads. Both are display-only — you never edit them.
Load Area Settings — the Cargo Grid
When cargo is added, RTS instantiates load prefabs and arranges them in a simple grid on the trailer's deck. The grid is defined relative to one Transform:
| Field | Type | Default | What it means |
|---|---|---|---|
| Load Root | Transform | (none) | The anchor point for cargo placement. If left empty, the trailer's own transform is used. |
| Load Columns | int | 3 (Min 1) |
Number of side-to-side slots per row. |
| Load Rows | int | 5 (Min 1) |
Number of front-to-back rows. |
| Load Spacing X | float | 1.2 (Min 0) |
Sideways distance between neighboring load items. |
| Load Spacing Z | float | 1.5 (Min 0) |
Front-to-back distance between rows. |
| Load Prefabs | list | (auto-filled) | Filled automatically at runtime from the Resources/Loads folder — you do not assign this by hand. |
How the grid works, in plain terms: the first row of loads is placed at the Load Root, filling side to side — the columns are centered on the Load Root, spread apart by Load Spacing X. When a row is full (after Load Columns items), the next row starts Load Spacing Z further toward the rear (the Load Root's negative Z direction).
Practical placement: create an empty child GameObject on your trailer, position it at the front-center of the deck surface, point its blue Z axis toward the truck, and assign it as Load Root. Then size the grid to your cargo — big items like containers want 1 column and generous Z spacing (the Flatbed uses 1 × 2 with 4.5 m spacing); small crates pack tighter (the Box uses 3 × 5 with 0.6 / 1.2 spacing). The easiest way to tune it: enter Play Mode, load the trailer at a station (or via RTS_Trailer.AddLoad() from the Scripting API), and adjust spacing until nothing overlaps or hangs off the deck.
Step 4: Choose the Trailer Type — and Understand the Consequences
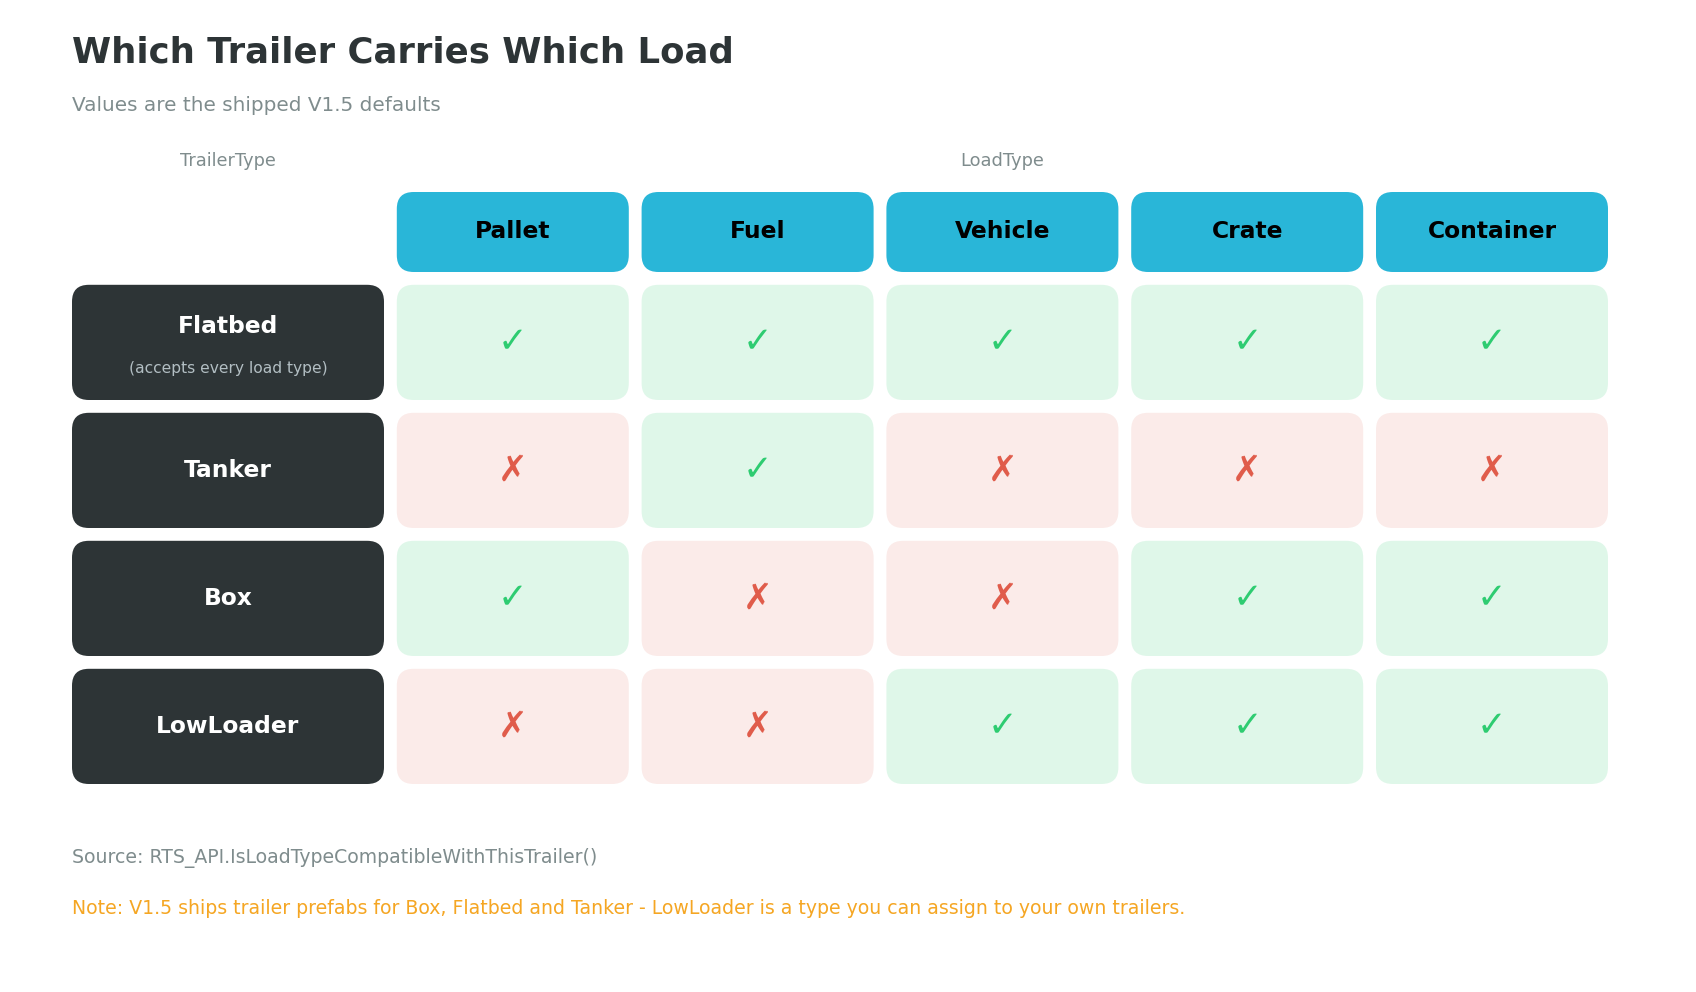
Trailer Type is not cosmetic. It is checked in two places: a job can only be started with a trailer of the job's required type, and a load station only fills trailers whose type is compatible with the station's load type. The rules are fixed in RTS_API.IsLoadTypeCompatibleWithThisTrailer():
| Trailer Type | Compatible Load Types |
|---|---|
| Flatbed | Pallet, Fuel, Vehicle, Crate, Container — anything except None |
| Tanker | Fuel only |
| Box | Pallet, Container, Crate |
| LowLoader | Vehicle, Container, Crate |
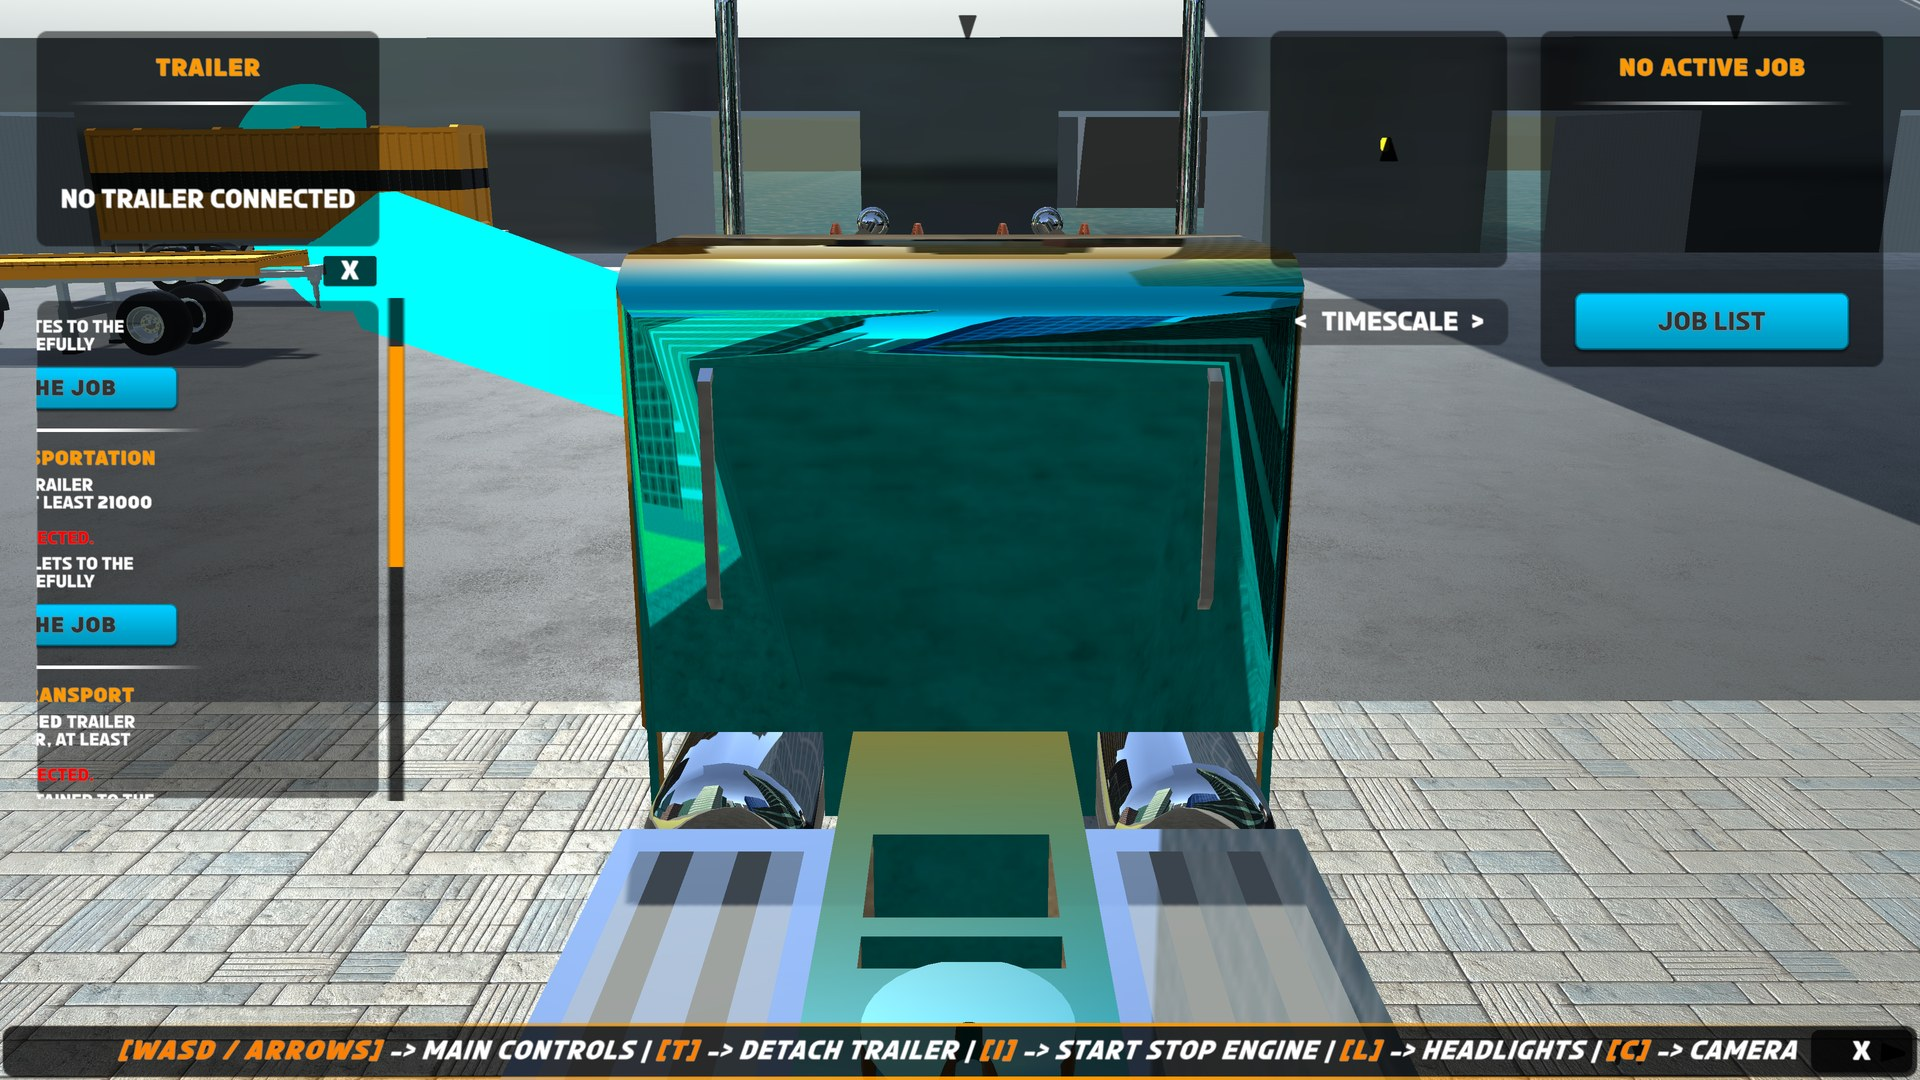
The type also drives guidance: if the player starts a job with no trailer connected, the guide system routes them to the closest trailer of the required type — including yours, if it is in the scene. (Starting a job with a wrong-type trailer already attached instead shows the notification "Trailer type does not match job requirements" — no guidance is given.) Attaching an incompatible trailer at a load station triggers the notification "Trailer type \<type> is not compatible with this \<load type> load station".
Step 5: Save the Prefab into Resources/Trailers
Drag your finished trailer from the Hierarchy into Assets/RTS/Resources/Trailers to create the prefab. This location matters: Resources folders are special — Unity can load their contents by name at runtime, and the RTS tooling relies on that.
Specifically, the Trailer Browser window loads every GameObject from a Resources/Trailers folder (via Resources.LoadAll) and lists only those that carry an RTS_Trailer component. The shipped folder is Assets/RTS/Resources/Trailers; technically any Resources/Trailers folder in your project is picked up, but keeping everything in the shipped folder keeps your project tidy and matches what the window's own help text says: "Browse and select any RTS_Trailer prefab. Prefabs are loaded from Assets/RTS/Resources/Trailers."
A prefab saved elsewhere still works when placed in a scene by hand — it just will not show up in the browser tooling.
How Loads Find Their Prefabs — the Naming Rule
You never assign cargo visuals per trailer. At startup, every RTS_Trailer fills its Load Prefabs list with all prefabs from the Resources/Loads folder (shipped: Assets/RTS/Resources/Loads) that have an RTS_Load component. When cargo is added, the trailer picks the first prefab whose name contains the load type's name (case-insensitive):
RTS_Load_Cratecontains "Crate" → used for Crate loads.RTS_Load_Vehicle_1contains "Vehicle" → used for Vehicle loads.
So if you create custom load prefabs, the rule is: the prefab's file name must contain the exact LoadType word (Pallet, Fuel, Vehicle, Crate, or Container). A prefab named WoodenBox will never be found for Crate loads; Crate_Wooden will. The number of instances spawned is the requested weight divided by the prefab's own weight value, rounded up — a 5000 kg load of 1000 kg crates spawns five crate models. See Jobs and Loads for creating load prefabs and jobs.
Spawning Trailers in Your Scene
You can drop a trailer prefab straight into a scene, but the intended pattern is the RTS_TrailerSpawnPoint component — a marker that instantiates a trailer at runtime. When a job needs a trailer, the guide system routes players to the closest spawned trailer of the required type — which sits wherever its spawn point placed it.
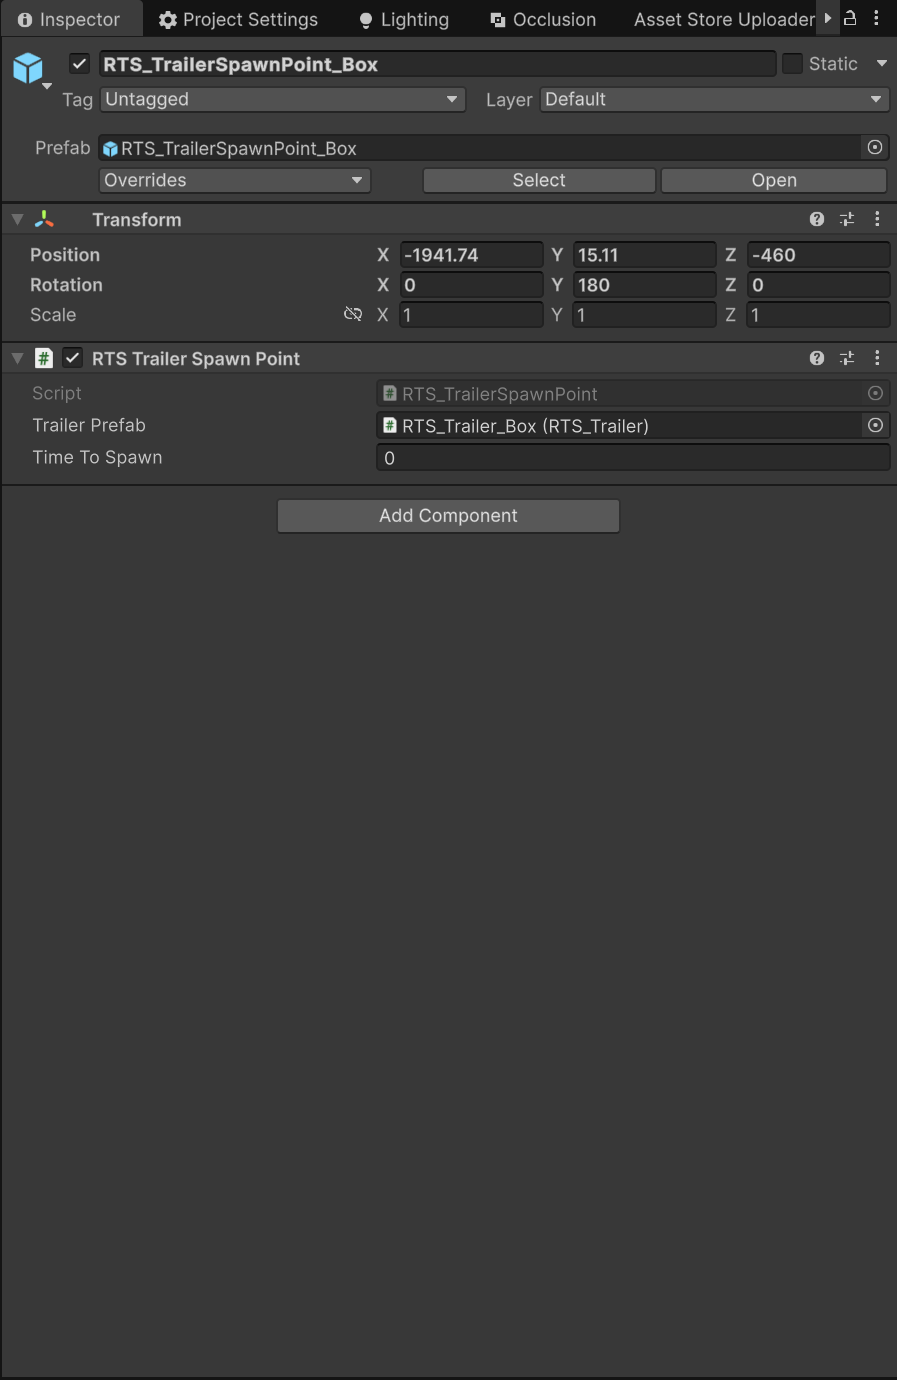
| Field | Type | Default | What it means |
|---|---|---|---|
| Trailer Prefab | RTS_Trailer | (none) | The trailer prefab to instantiate. Assign your new prefab here. |
| Time To Spawn | float | 0 (Min 0) |
Delay in seconds after scene start before the trailer appears. |
How spawning works: when the scene starts, the spawn point waits Time To Spawn seconds, then instantiates the assigned prefab through RTS_API.SpawnTrailer() at its own position raised 1.5 meters up, using its own rotation — the trailer drops onto the ground instead of spawning inside it. The spawn point then adopts the spawned trailer's type, which drives its Scene-view label (see below). If no prefab is assigned, it logs "No trailer prefab assigned to spawn point {name}." and spawns nothing.
In the Scene view a spawn point draws a translucent green sphere plus an orange Trailer Spawner: label with the type shown in brown (the label obeys the drawLabelOnStations toggle in Settings).
Three ready spawn point prefabs ship in Assets/RTS/Prefabs/TrailerSpawners/ (RTS_TrailerSpawnPoint_Box, _Flatbed, _Tanker), and Tools → BoneCracker Games → Realistic Truck Simulator → Create → Scene → Create RTS Trailer Spawner places a Box spawn point for you — swap its Trailer Prefab to your own. You can place as many spawn points as you like.
One placement note: the scene manager deactivates trailers farther than 800 meters (trailerVisibilityDistance) from the player and re-activates them on approach — so a distant spawned trailer being inactive in the Hierarchy is normal, not a bug.
The Trailer Browser Window
Open Tools → BoneCracker Games → Realistic Truck Simulator → Trailer List to open the RTS Trailers window — a quick catalog of every trailer prefab in Resources/Trailers.
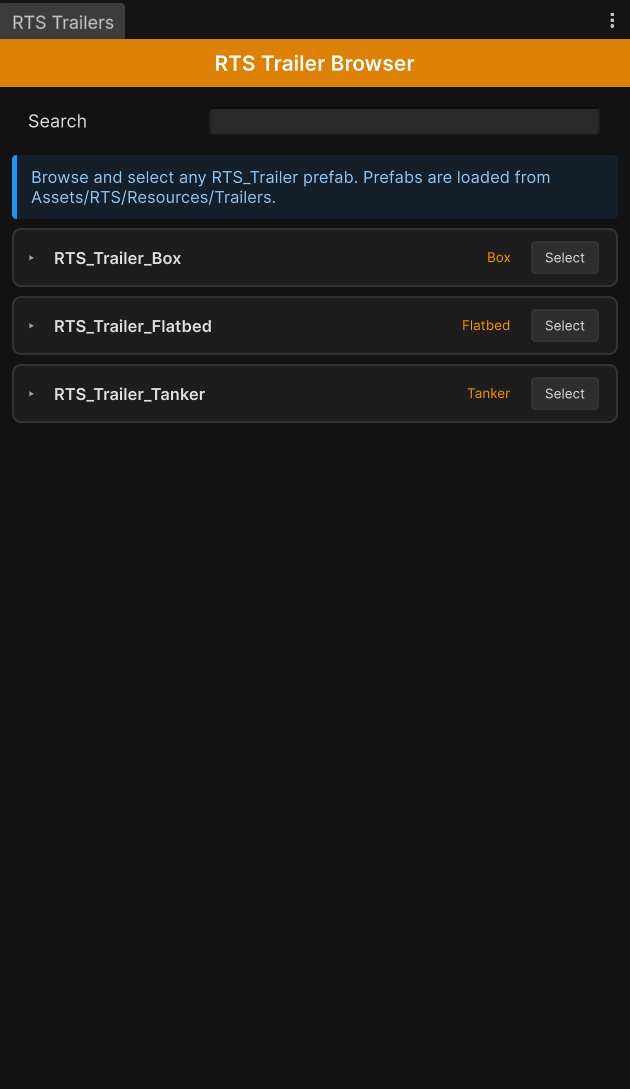
What the window actually does:
- Search filters the list live, matching against the prefab name and the Trailer ID (case-insensitive).
- Each row shows the prefab name (plus
(ID: …)if a Trailer ID is set) and the trailer type on the right. - Clicking a row's title expands it to show Trailer Type, Empty Weight (kg), Max Load (kg), and Trailer ID if set.
- Select selects the prefab and pings (highlights) it in the Project window, so you can jump straight to editing it.
- The list reloads automatically whenever the project changes — save a new prefab into the folder and it appears without reopening the window.
If your new trailer is missing here, it is almost always one of two things: the prefab is not in a Resources/Trailers folder, or its root has no RTS_Trailer component. The window then shows: "No RTS_Trailer prefabs found in Assets/RTS/Resources/Trailers (or none match your search)."
Creating a LowLoader — the Missing Fourth Type
The LowLoader trailer type exists in the code (compatible with Vehicle, Container, and Crate loads) but no LowLoader prefab ships with the asset — it is deliberately left as an integration point. Creating one is exactly the workflow above:
- Build a low-bed trailer that works in RCCP (Step 1).
- Add
RTS_Trailervia the menu (Step 2). - Set Trailer Type to
LowLoader; configure weights and a wide, flat load grid — for vehicle cargo,1column with large Z spacing, like the Flatbed's 1 × 2 layout, is a good starting point (Step 3). - Save it into
Assets/RTS/Resources/Trailers(Step 5). - Give it work: create a job whose required trailer type is
LowLoader(see Jobs and Loads) and add a spawn point for it.
Verification
To confirm your trailer is fully integrated:
- Browser check — the trailer appears in the RTS Trailers window with the correct type and weights.
- Attach check — in Play Mode, the truck attaches to it, tows it, and T detaches it.
- Loading check — with a matching job active, a compatible load station fills it: cargo models appear on the deck in your grid, and the notification "Loaded \<kg> kg of \<load type>" shows.
- Guidance check — start a matching job with no trailer attached; the guide ribbon should lead to your spawned trailer (sitting at its spawn point).
- Delivery check — deliver to the job's delivery zone and complete the job.
If loading fails, re-check the compatibility matrix in Step 4 and the Common Mistakes list.
Next Steps
- Jobs and Loads — create jobs that require your new trailer, and custom load prefabs for it.
- Locations — set up the load stations and delivery zones your trailer will service.
- Scripting API — spawn and query trailers from code (
RTS_API.SpawnTrailer,IsTrailerFull,GetTrailerLoadAsWeight, and more). - Creating New Trucks — if you have not yet built the truck that will tow it.