The UI System
This document is a guided tour of the RTS user interface: the HUD (heads-up display) you see while driving, the job list, notifications, the minimap, off-screen indicator arrows, and the floating name tags above zones and trailers. Read it when you want to understand what each panel does, which script drives it, and how to restyle or extend the UI for your own game. Everything here is built with standard Unity uGUI (Unity's built-in GameObject-based UI system) plus TextMeshPro for text, so no special tools are needed to customize it.
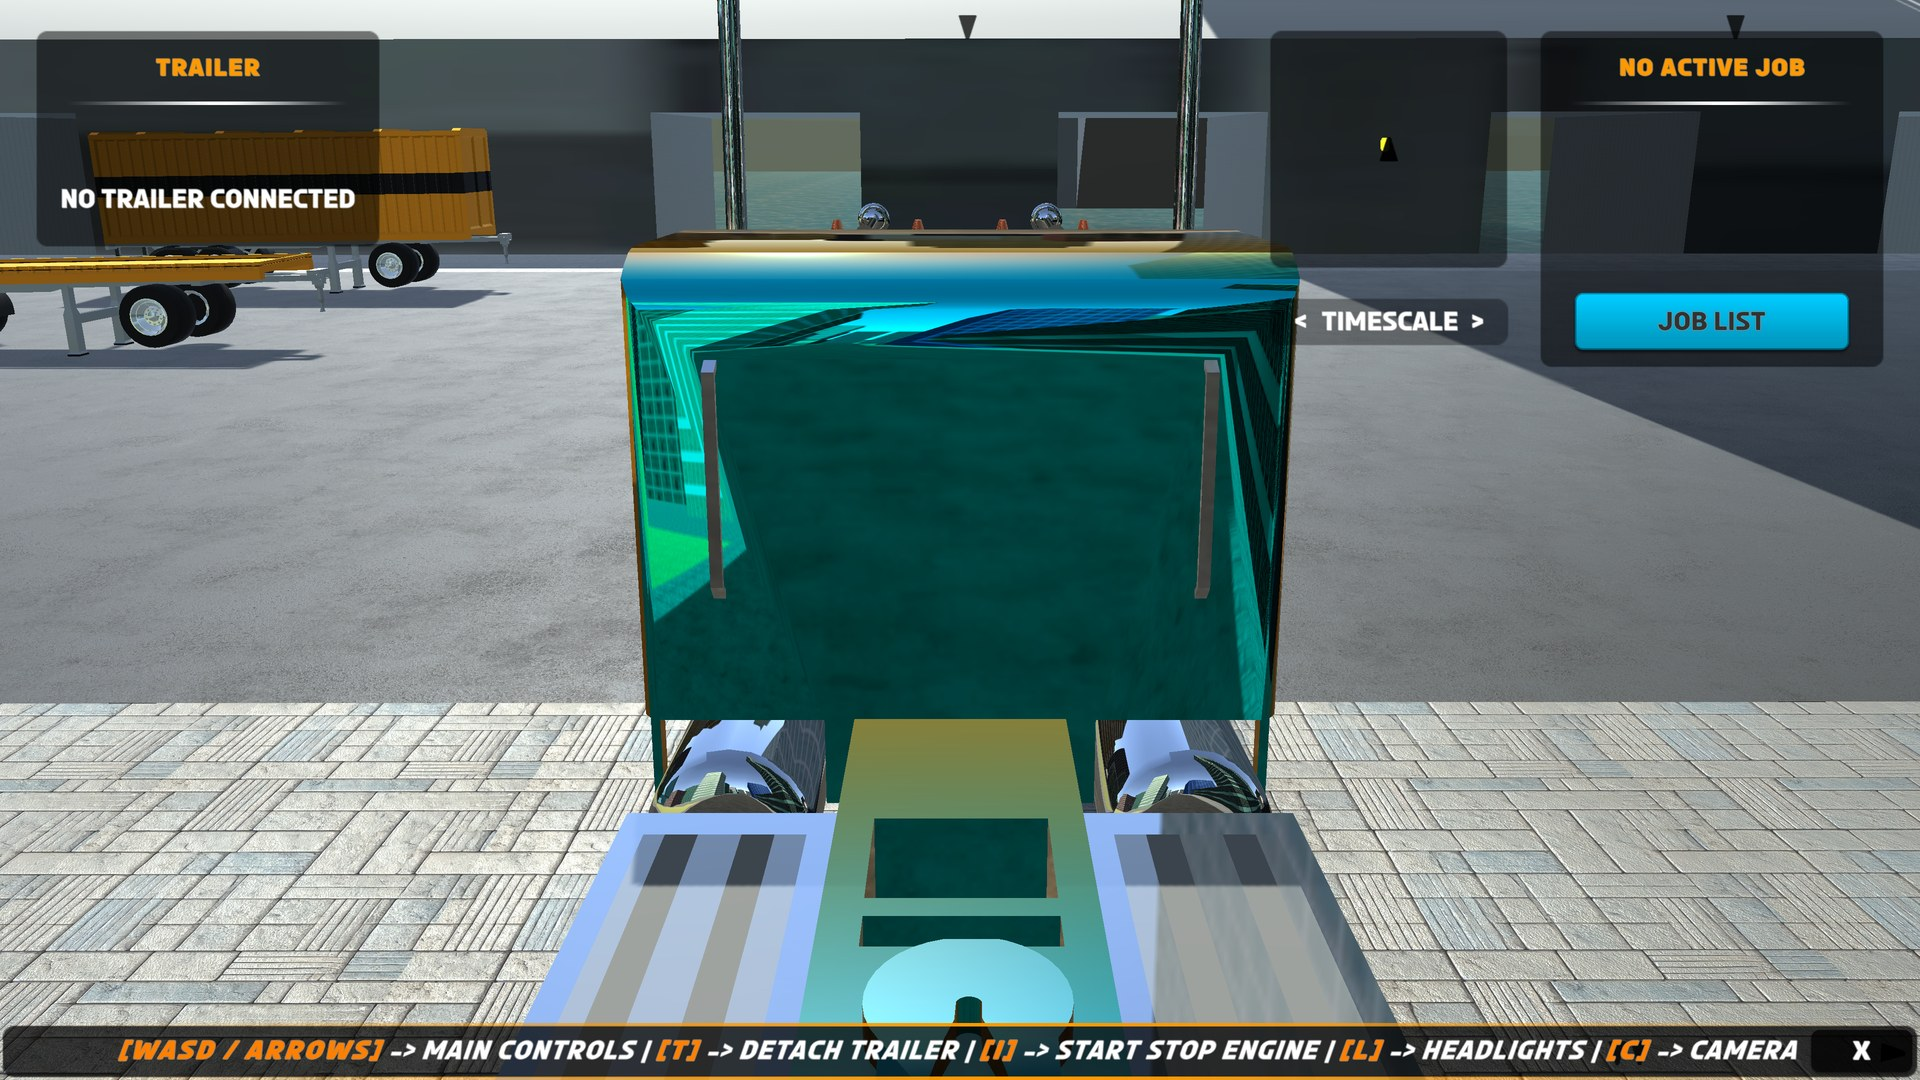
The Two Canvas Prefabs
RTS ships its UI as two prefabs (a prefab is a saved, reusable GameObject you can drop into any scene) in Assets/RTS/Prefabs/UI/. Both are referenced by the RTS_Settings asset and can be added to a scene from the menu — see Scene Setup.
| Prefab | Menu item | What it carries |
|---|---|---|
RTS_Canvas |
Tools → BoneCracker Games → Realistic Truck Simulator → Create → Scene → Create RTS UI Canvas | The main HUD. Root components: Canvas (Screen Space – Overlay), CanvasScaler, GraphicRaycaster, RTS_UI_Manager, RTS_UI_JobListPanel, plus RCCP's RCCP_MobileInputs and RCCP_UIManager. |
RTS_Canvas (ScreenSpace) |
Tools → BoneCracker Games → Realistic Truck Simulator → Create → Scene → Create RTS UI Canvas (ScreenSpace) | The world-tracking overlay. Root components: Canvas (Screen Space – Camera, sorting order -1 so it draws behind the main HUD), RTS_NameTagSystem, and RTS_UI_OffsetIndicatorManager, with child objects UI_Nametag and UI_OffsetArrow. |
The split is intentional: the first canvas holds everything that sits at a fixed screen position (panels, buttons, gauges), while the second holds elements that are repositioned every frame to follow objects in the 3D world (name tags and indicator arrows). Each menu item checks for duplicates — the first by looking for an existing RTS_UI_Manager, the second for an existing RTS_UI_OffsetIndicatorManager — so you cannot accidentally add the same canvas twice.
Inside RTS_Canvas you will find these child panels (names as they appear in the Hierarchy):
| Panel | Purpose |
|---|---|
EventSystem |
Unity's EventSystem with InputSystemUIInputModule — required for any button clicks to register. |
Dashboard |
RCCP's gauge cluster: Gear, Speed, RPM readouts, indicator/ABS/ESP/TCS/headlight icons, plus light, camera, and pause buttons. |
Panel_ActiveTrailer |
The trailer info panel (see below). |
Panel_ActiveJob |
The job info panel and job status button (see below). |
Panel_JobListHolder |
Scroll View that hosts the job cards, with an X close button. |
Panel_NotificationPanel |
Floating notifications, driven by RTS_UI_Notification. |
Panel_Minimap |
RawImage that displays the minimap camera's render texture. |
Panel_Test |
Five demo-only test buttons, driven by RTS_TestUIBehavior. |
Panel_Timescale |
Slider_Timescale — a test slider that sets Time.timeScale. |
Mobile Controllers |
RCCP touch controls plus the RTS trailer detach button. |
Panel_KeyboardControllersInfo |
Desktop-only strip listing the keyboard controls. |
Options |
RCCP's settings/pause panel with restart and quit confirmations. |
Trailer Info Panel
RTS_UI_Manager (the component on the canvas root) refreshes the trailer panel every frame in LateUpdate() — that is, after all gameplay updates have run, so the numbers are always current. When no trailer is connected, it writes "No Trailer Connected" into noTrailerText and blanks the other fields. When a trailer is attached, it writes three lines:
trailerTypeText—Type: {trailerType}(e.g.Type: Box)loadText—Load: {current} kg / {maxLoad} kgweightText—Weight: {total} kg(empty trailer weight plus cargo)
You never call these updates yourself; the panel simply reflects whatever RTS_SceneManager.Instance.playerTruck reports.
Job Panel and the Job Status Button
The same RTS_UI_Manager fills the job panel each frame. With no active job it shows "No Active Job" and the status button reads "Job List". With an active job it shows the job's name, its description, and a requirements block in this format:
Requires Trailer: Box
Required Load: Crate • 18000 kg
Delivery Zone: Depot_Crate
The job status button is color-coded from two public fields on RTS_UI_Manager:
jobStatusButtonColor_TakeJob(defaultColor.green) — shown when there is no active job, or the last job was completed/terminated. The label reads "Job List".jobStatusButtonColor_Terminate(defaultColor.red) — shown while a job is active. The label reads "Terminate".
Clicking the button calls JobStatusButtonOnClick(): with no job it opens the job list via RTS_API.ToggleJobsListPanel(true); with an active job it calls RTS_API.TerminateJob(). So the same button is both your "browse jobs" and your "give up" control.
The Job List Panel
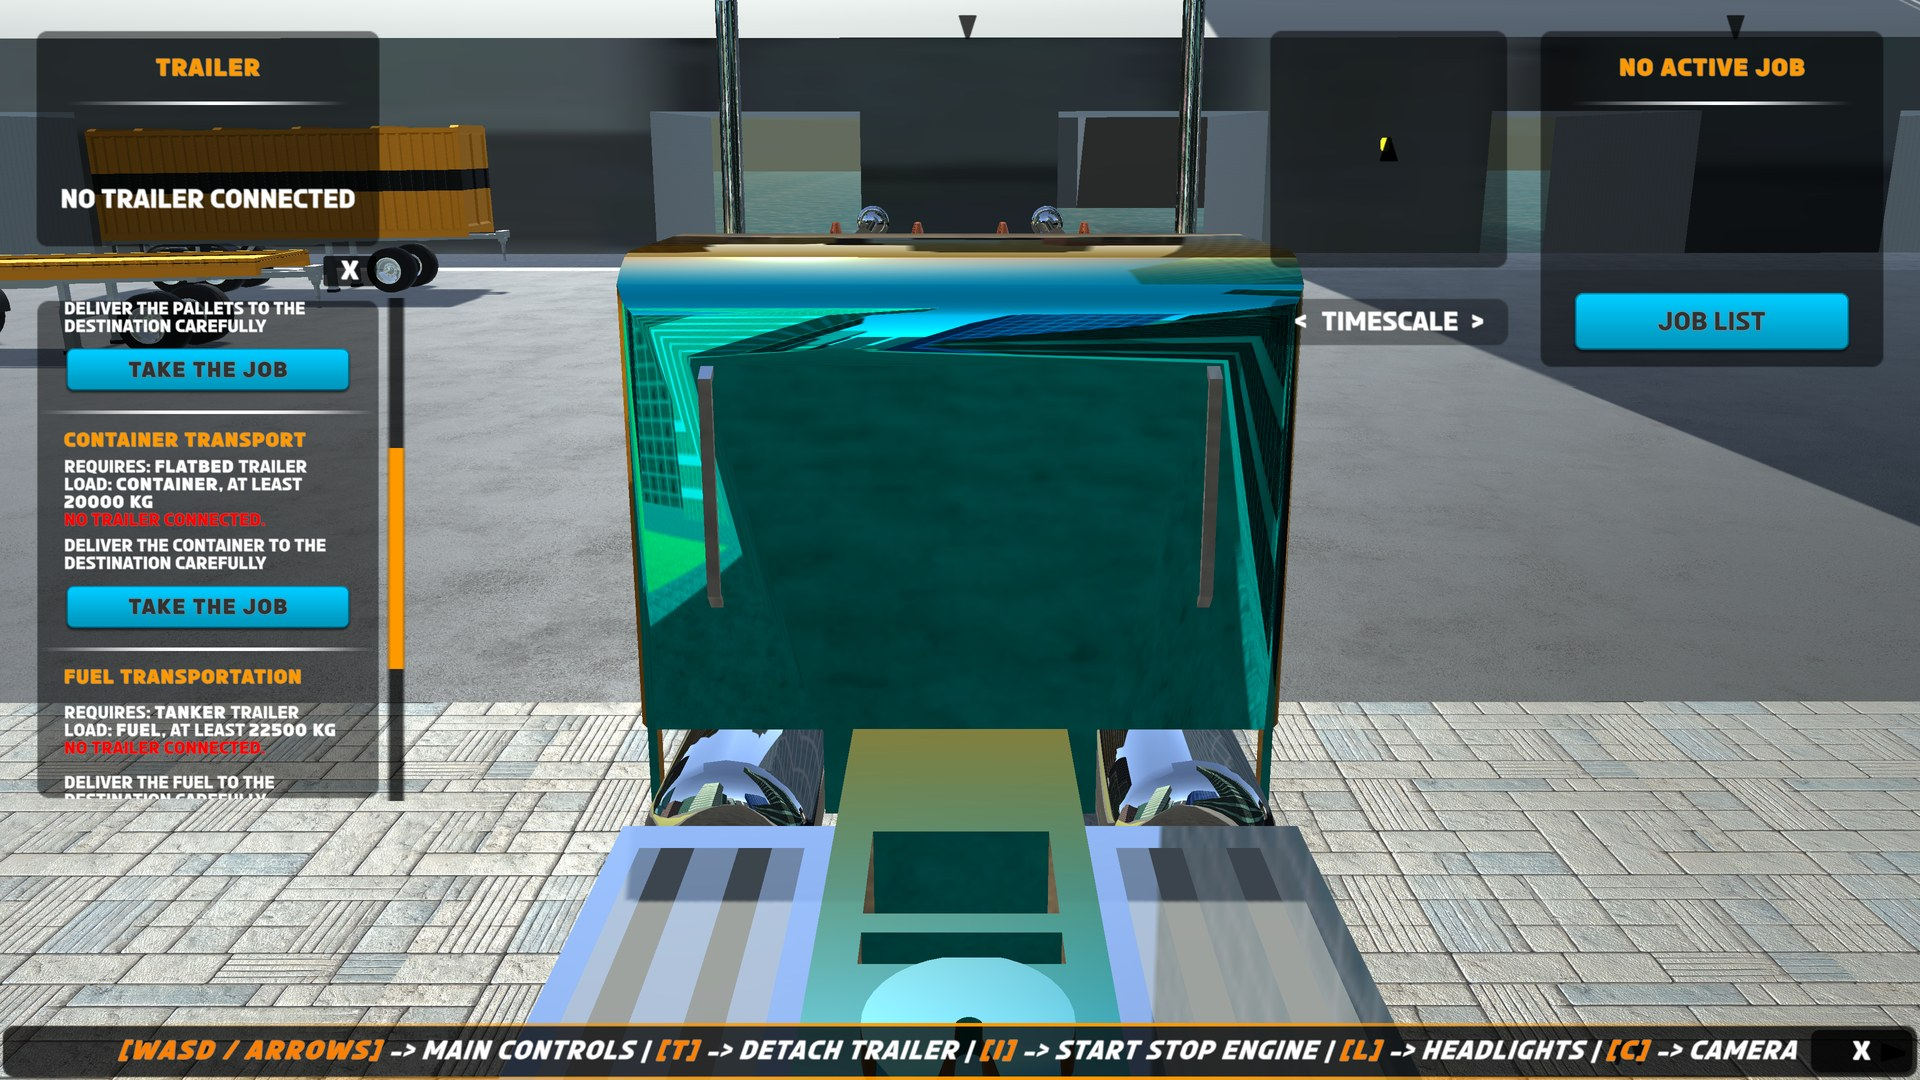
RTS_UI_JobListPanel (also on the canvas root) spawns one RTS_UI_JobCard prefab per available job into jobCardContainer, the content area of the Scroll View. The list is built by CreateJobList(), invoked 0.1 seconds after Start(), and the panel's visibility simply follows the public panelIsActive bool (default true) — which is also what RTS_API.ToggleJobsListPanel(bool) flips.
Each card (RTS_UI_JobCard.Setup()) shows the job name, description, and a requirements block:
Requires: Box trailer
Load: Crate, at least 18000 kg
followed by one color-coded status line based on your current trailer:
| Status line | Color | Meaning |
|---|---|---|
No trailer connected. |
red | The player truck has no trailer attached. |
Current trailer is incompatible. |
orange | A trailer is attached, but its type does not match the job. |
Trailer compatible. Ready to start. |
green | The attached trailer matches the required type. |
The start button on a card is always clickable, even when the status line is red or orange. That is deliberate: clicking calls RTS_API.StartJob(RTS_Job) with the card's job, and the job manager itself validates the request — if you have no trailer, it guides you to the closest matching one instead of starting the job. See Jobs and Loads for that full flow.
The list refreshes automatically (via a short 0.1 s delayed RefreshAllCards() coroutine) whenever a truck spawns or despawns with a player trailer, or a trailer is attached to or detached from the player truck — so the status lines and colors always match your current rig. When a job starts, the panel hides itself (OnJobStarted → TogglePanel(false)).
Notifications
RTS_UI_Notification lives on Panel_NotificationPanel and shows short, timed messages: load confirmations, job started/completed, and error hints like "Trailer type does not match job requirements". Only one notification is visible at a time — calling ShowNotification(string) replaces the current message, retriggers the panel's Animator (by toggling the content object off and on), and restarts the hide timer. The message stays on screen for displayDuration seconds (default 2.5, minimum 0.1).
You can use it from your own scripts through its singleton:
RTS_UI_Notification.Instance.ShowNotification("Custom message with <b>rich text</b>");
The text field is a TextMeshPro component, so rich-text tags such as <b> and <color=...> work — the built-in RTS messages use them too.
Test Panel and Timescale Slider
Panel_Test holds five buttons — AddCrate, AddFuel, RemoveLoad, ClearLoads, CompleteJob — meant purely for demos and testing. Their click handlers live in RTS_TestUIBehavior and forward to RTS_DemoManager (AddCrate(), AddFuel(), RemoveSomeLoad(), ClearAllLoads(), CompleteDemoMission()). RTS_UI_Manager.UpdateTestButtons() sets their interactable state every frame:
- AddCrate / AddFuel — enabled only if that load type is compatible with the attached trailer and the trailer is not full.
- RemoveLoad / ClearLoads — enabled only if the trailer is not empty.
- CompleteJob — enabled only while a job is active.
- All five are disabled when no trailer is attached.
Panel_Timescale contains Slider_Timescale; dragging it calls RTS_TestUIBehavior.OnTimescaleChanged(Slider), which sets Time.timeScale to the slider value — handy for slow-motion inspection of trailer physics. For a shipping game you will normally disable (not delete — see Customizing the UI) both panels.
Mobile Controls vs Keyboard Info
The Mobile Controllers group holds RCCP's touch controls (throttle, brake, handbrake, steering buttons, joystick, steering wheel, NOS) and is managed by RCCP's RCCP_MobileInputs component on the canvas root — it appears when the mobile controller is enabled in RCCP Settings. One button in this group is RTS-specific: TrailerDetach, driven by RTS_UI_TrailerDetachButton, which is active only when RCCP_Settings.Instance.mobileControllerEnabled is true and detaches the trailer via the trailer controller. On desktop there is no detach button — players press T instead.
The mirror image is Panel_KeyboardControllersInfo: its RTS_UI_KeyboardControllersInfo component deactivates the panel in Awake() whenever mobile controls are enabled, so it only shows on desktop. It displays the control reminder strip along the bottom of the screen:
[WASD / ARROWS] -> MAIN CONTROLS | [T] -> DETACH TRAILER | [I] -> START STOP ENGINE | [L] -> HEADLIGHTS | [C] -> CAMERA
The Minimap
The minimap is a small top-down camera view, not a drawn map. The RTS_MinimapCamera prefab (Assets/RTS/Prefabs/RTS_MinimapCamera .prefab, added via Create → Scene → Create RTS Minimap System) carries two components plus an orthographic child camera (orthographic size 500) that renders into the RTS_Minimap render texture — a texture a camera draws into instead of the screen. The Image (RT) RawImage inside Panel_Minimap on RTS_Canvas displays that texture, which is how the camera feed ends up in the HUD corner.
RTS_MinimapCameraFollower keeps the rig above the player. Its offset defaults to (0, 100, 0) — 100 m straight up — and it repositions in LateUpdate() so the camera never lags the truck. Set matchTruckRotation (default false) to true if you want the map to rotate with the truck's heading instead of staying north-up.
RTS_UI_Minimap manages the icons. On enable it spawns an icon 50 m above every load station and delivery zone in the scene, using the prefabs in Assets/RTS/Prefabs/MinimapIcons/, and each icon gets an RTS_MinimapIconFollower so it tracks its target. Trailer icons are event-driven: they are refreshed on trailer spawn/despawn/attach/detach and are only shown while the player truck has no trailer attached — the map highlights trailers you could hook up, then clears them once you are hitched.
All icons are placed on the RTS_MinimapIcons layer (layer 12 in the shipped project), and RTS_UI_Minimap removes that layer from the RCCP camera's culling mask at startup, so icons are visible to the minimap camera but never in the main game view. If the layer is missing from your project, you get the console warning Layer "RTS_MinimapIcons" not found. Make sure the layer name is correct.
Off-Screen Indicators
RTS_UI_OffsetIndicatorManager (on the ScreenSpace canvas, execution order 10) draws arrow indicators for points of interest that are off-screen or far away. In Start() it auto-collects every delivery zone, load station, and active trailer in the scene and creates one arrow per target from indicatorPrefab. Arrows are color-coded:
| Target | Color (default) |
|---|---|
| Delivery zones | deliveryZoneColor = green |
| Load stations | loadStationColor = blue |
| Trailers | trailerColor = white |
| Anything else | magenta (fallback) |
An arrow appears when its target is off-screen, or on-screen but farther than showIndicatorDistance (default 100 m). Off-screen targets pin the arrow to the nearest screen edge, inset by edgeBuffer (default 50 px); far-but-visible targets pin it to the top edge. The arrow rotates to point from its pinned position toward the target's actual screen position, so players always know which way to turn. The manager rechecks Camera.main every 2.5 seconds, so camera swaps are picked up automatically. Use AddTarget(Transform) / RemoveTarget(Transform) to track your own objects.
Name Tags
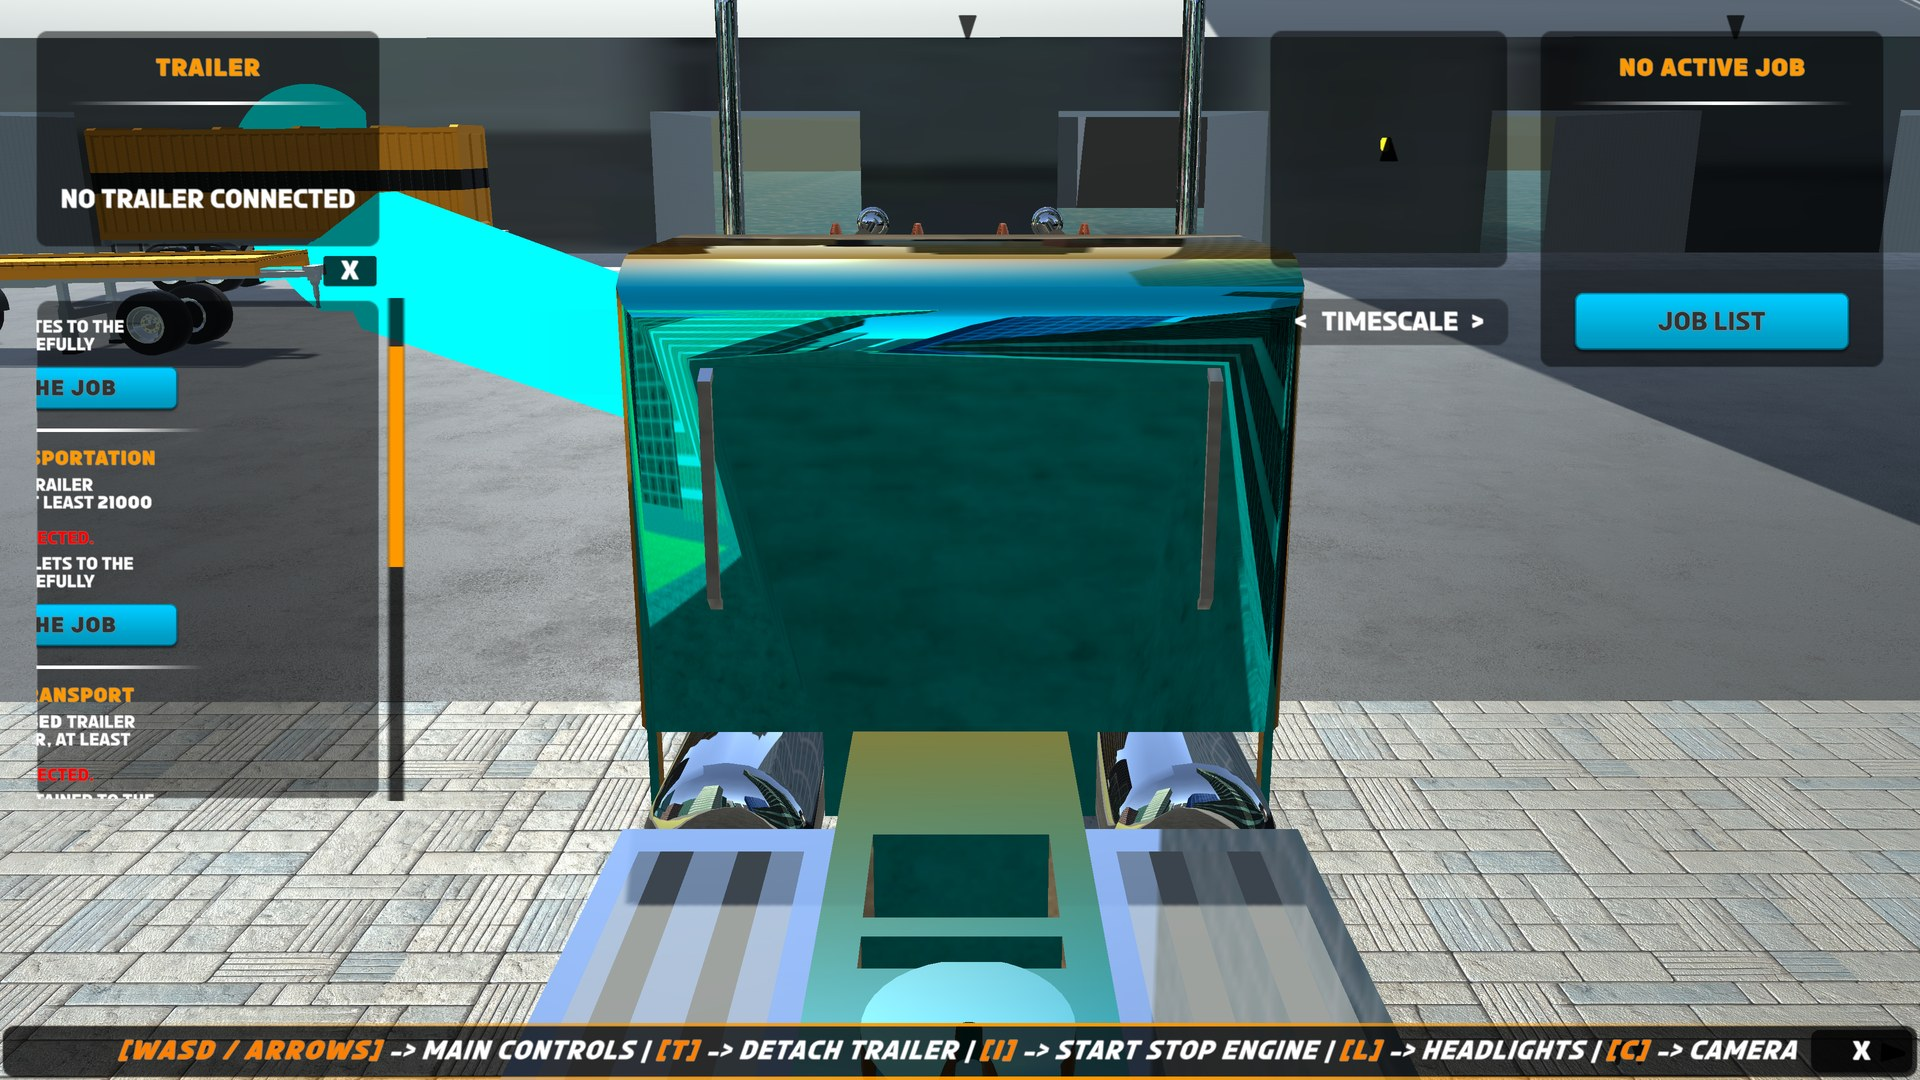
RTS_NameTagSystem (also on the ScreenSpace canvas, execution order 10 — after the scene manager has scanned trailers) creates floating labels in Awake() for three kinds of objects:
- Delivery zones —
Delivery Zone: {zoneID}(e.g.Delivery Zone: Depot_Crate) - Load stations —
Load Station: {loadType}(e.g.Load Station: Fuel) - Active trailers — a dynamic three-line tag refreshed every frame:
Trailer Type: Box
Load: 3000 kg / 22500 kg
Total: 11500 kg
If a trailer has a trailerID set, it is appended to the type line in parentheses. A trailer's tag is hidden entirely while that trailer is attached to a truck — you only see tags on trailers you could pick up.
Tags are positioned each frame at the screen position 8 m above their target and fade with distance via a CanvasGroup: fully visible up close, starting to fade at 50 % of maxViewDistance and fully invisible beyond it. maxViewDistance defaults to 50 (meters, minimum 1), so with defaults the fade runs from 25 m to 50 m. Tags behind the camera are hidden. The nameTagPrefab must contain a TextMeshProUGUI child; the shipped template is Assets/RTS/Prefabs/UI/RTS_UI_Nametag.prefab.
Customizing the UI
Because everything is plain uGUI + TextMeshPro, restyling is ordinary Unity work: swap sprites on Image components, change fonts, colors, and sizes on the text components, move and re-anchor panels — none of that affects the scripts. Three rules keep you out of trouble:
- Keep script references intact.
RTS_UI_Managerholds serialized references to its eight text fields, the job status button, and the five test buttons, and writes to them every frame. If you delete a referenced object, you get null reference errors. To remove something you do not want (e.g.Panel_TestorPanel_Timescale), disable the GameObject instead of deleting it — the scripts keep working against the inactive objects. - Edit a prefab variant or your own copy, not the shipped prefabs, so asset updates do not overwrite your changes.
- Add new UI by subscribing to events, not by editing shipped scripts. Every gameplay moment fires a static event on
RTS_Events, so your own component can react without touching RTS code:
using UnityEngine;

public class MyJobRewardUI : MonoBehaviour {

    private void OnEnable() {
        RTS_Events.OnJobCompleted += OnJobCompleted;
    }

    private void OnDisable() {
        RTS_Events.OnJobCompleted -= OnJobCompleted;
    }

    private void OnJobCompleted(RTS_Job job) {
        RTS_UI_Notification.Instance.ShowNotification("Delivered! Earned <b>$" + job.reward + "</b>");
    }

}
The full event list (truck, trailer, connection, and job events) is documented in the Scripting API. Note that the reward field on jobs is not consumed by any shipped money system — displaying or banking it, as above, is exactly the kind of integration left to your game.
Troubleshooting
Minimap icons are missing, or a layer warning appears
If the console shows Layer "RTS_MinimapIcons" not found. Make sure the layer name is correct., your project is missing the layer the icons live on. Add a layer named exactly RTS_MinimapIcons (layer 12 in the shipped project). Also remember trailer icons only appear while the player truck has no trailer attached.
Name tags do not appear
Check the console for RTS_NameTagSystem is missing references to the Canvas or the nameTagPrefab! or NameTag prefab is missing a TextMeshProUGUI child! — both mean a reference on the RTS_Canvas (ScreenSpace) prefab instance is unassigned or the tag prefab was edited to remove its text. Also confirm you are within maxViewDistance (50 m by default) of the target.
Buttons do not respond
The EventSystem child of RTS_Canvas must be present and enabled — without it, uGUI never receives clicks. If you built your scene manually, make sure only one EventSystem exists.
Notifications never show
RTS_UI_Notification.Instance finds the component in the scene; if you removed Panel_NotificationPanel, calls to ShowNotification have no target. Re-add the panel or disable rather than delete it.
More scene-level problems are covered in Troubleshooting.
Next Steps
- Jobs and Loads — the job flow that the job panel, cards, and notifications surface.
- Locations — the delivery zones and load stations that name tags and indicators point at.
- Settings Reference — every serialized field on the UI components, with defaults.
- Scripting API —
RTS_API,RTS_Events, and the UI singletons for your own integrations.