Setting Up Your Own Scene
This guide takes you from an empty scene (or your own city/highway environment) to a fully playable Realistic Truck Simulator scene. You will add every RTS system with a single menu command, learn what that command actually does behind the curtain, place your own gameplay locations, and bake the navigation data that powers the guide line.
Prerequisites
Before starting, make sure you have:
- RTS imported into your project and the installation completed — see Installation.
- A scene containing your environment: ground, roads, and buildings with colliders so trucks have something to drive on. An empty scene with a flat ground plane works fine for a first test.
- A basic idea of what the RTS systems do — skim Essential Concepts if you have not yet.
If you would rather study a finished example first, open the demo city and compare it with your scene as you go — see Demo Scenes.
Step 1: One-Click Setup — Create and Configure All The Systems
The fastest path is a single menu command that drops every essential system into your scene at once.
- Open your scene and make sure it is the active scene (its name is bold in the Hierarchy).
- Go to Tools → BoneCracker Games → Realistic Truck Simulator → Scene Setup → Create and Configure All The Systems. The same command is also available at GameObject → BoneCracker Games → Realistic Truck Simulator → Create → Create and Configure All The Systems.
- A confirmation dialog titled Creating and Configuring the System appears with the message "This process will create and configure all essential systems in the scene." Click Proceed.
- Save your scene (Ctrl+S) — the new objects are added to it but not saved automatically.
After the command runs, a notification appears in the Scene view for a few seconds:
All essential systems have been created in this scene
You can configure the trailer spawners, load stations, and delivery stations
Refer to the documentation for detailed instructions
What just happened
The command is not magic — it is a scene transplant, handled by RTS_TransferSceneTemplate. Step by step, it:
- Looks up the template scene path stored in the
RTS_Settingsasset (RTSSceneSetupTemplate, which points toAssets/RTS/Scenes/RTS_SceneSetup.unity— see Settings Reference). - Opens that template scene additively — meaning it loads alongside your scene instead of replacing it.
- Moves every root GameObject from the template into your active scene.
- Closes the template scene without saving it, so the template stays intact for next time.
Because the objects come from a pre-configured template scene, everything arrives already wired together — managers, UI, camera, and navigation are ready to talk to each other.
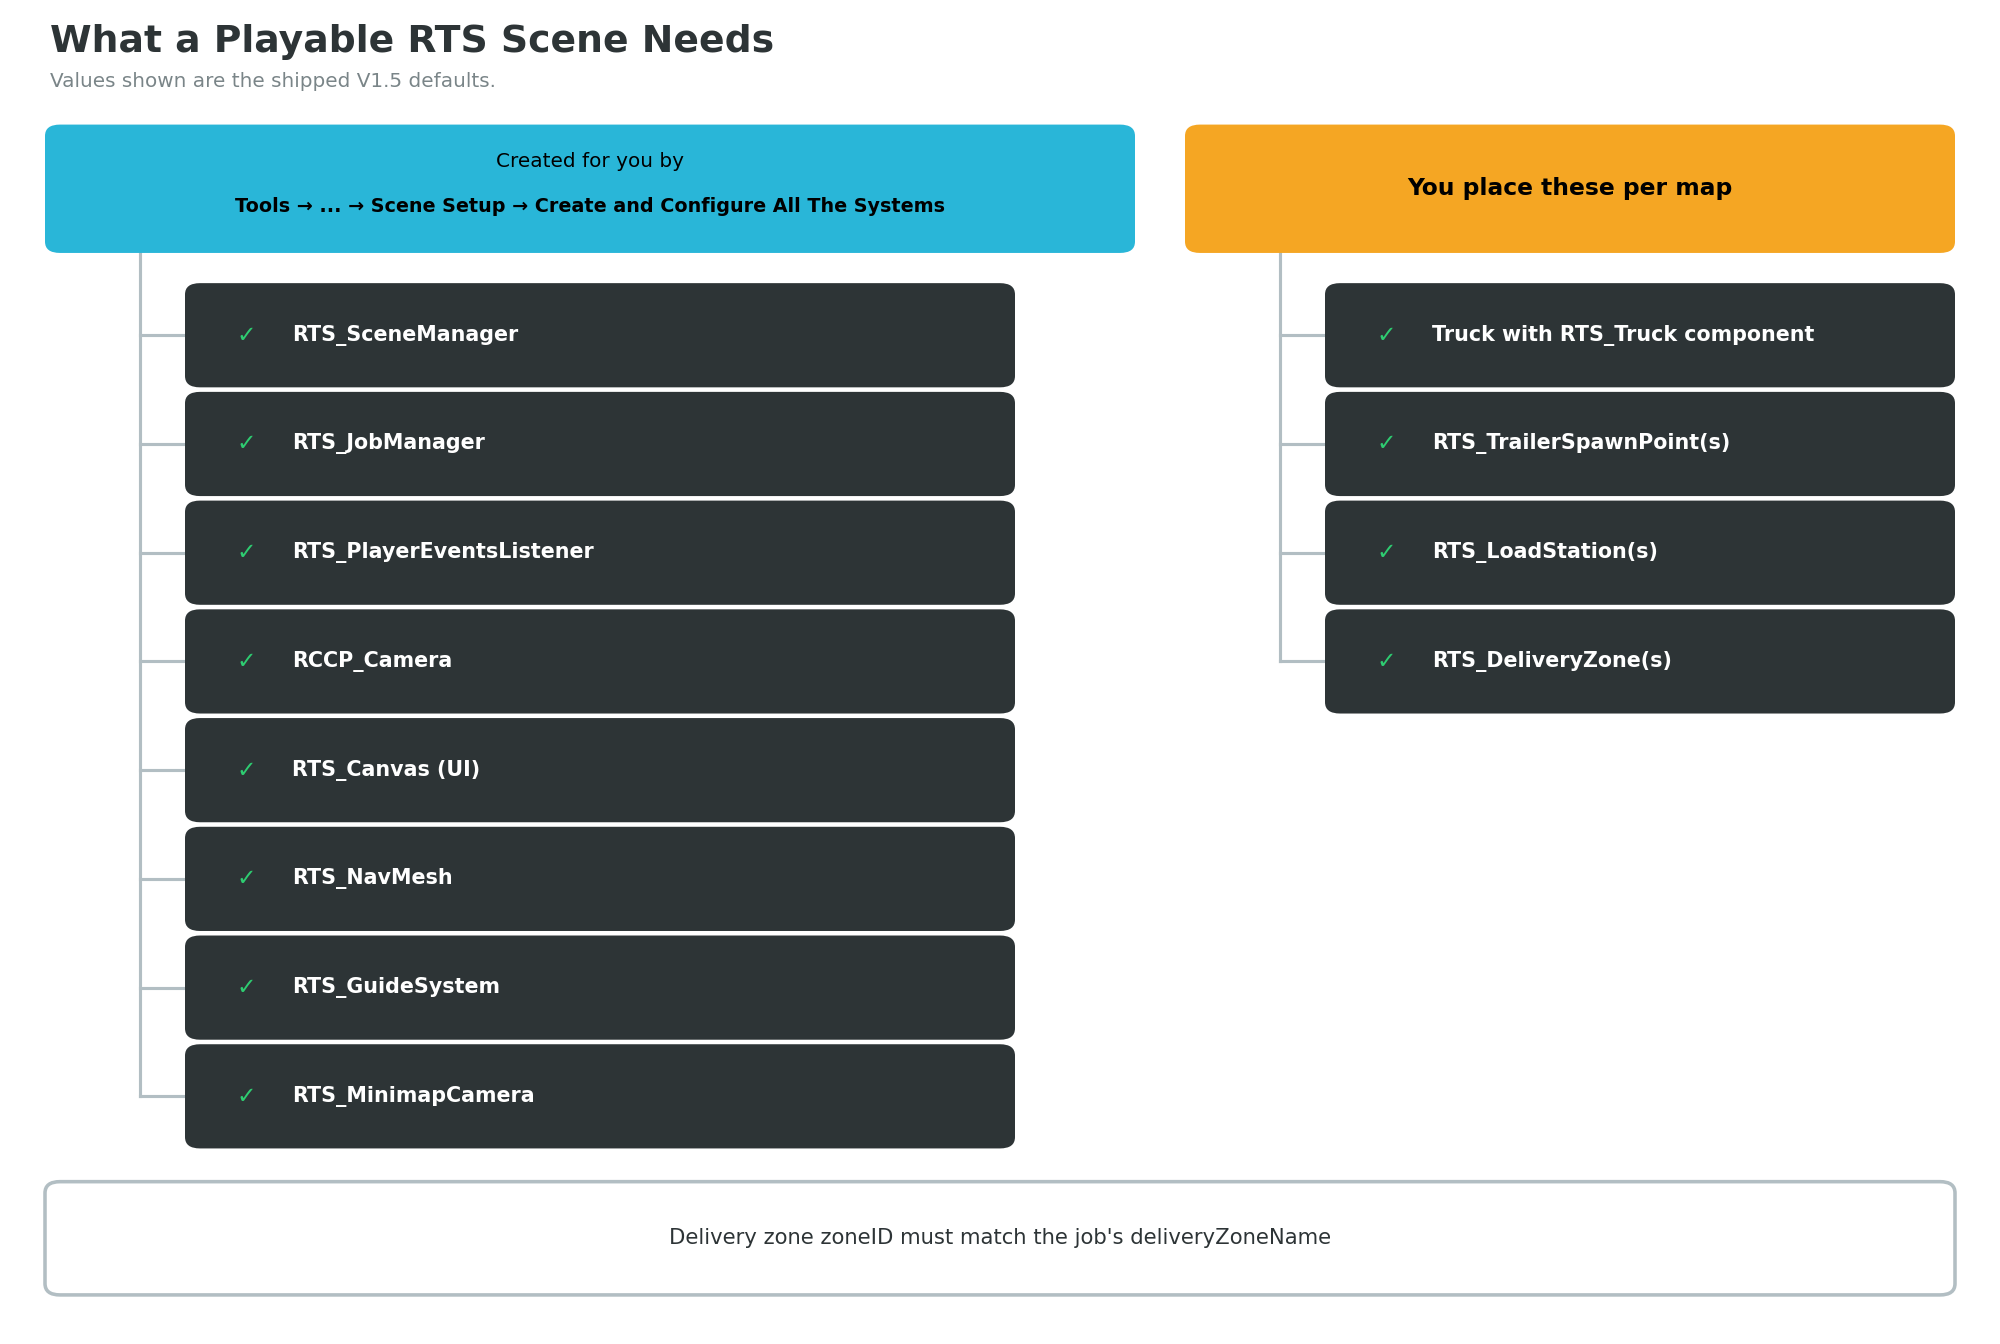
What lands in your scene
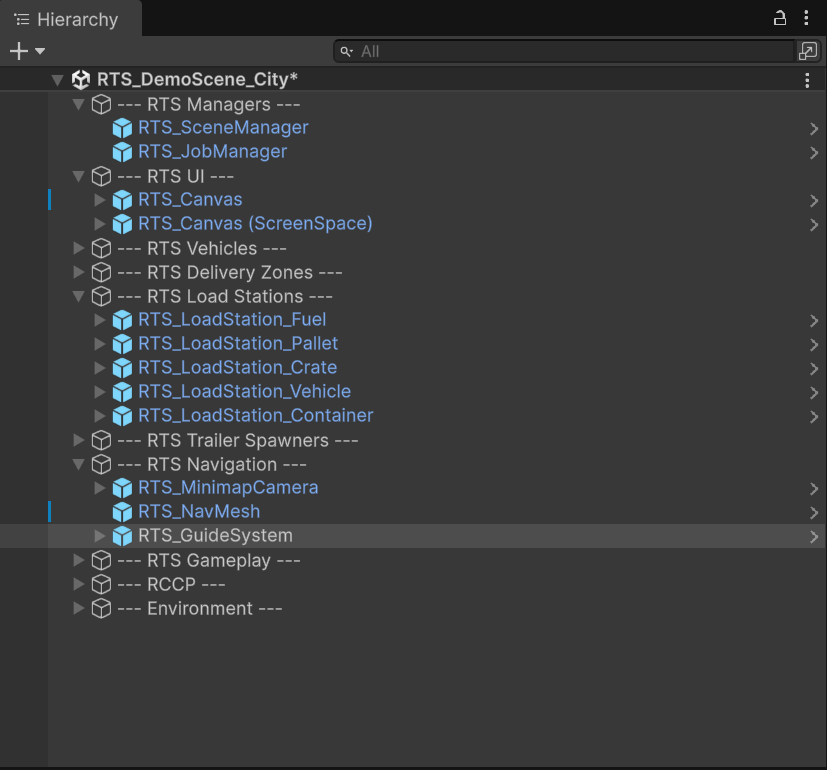
The template's root objects are organized under separator "folder" objects, so your Hierarchy stays readable. This is the complete inventory:
| Hierarchy group | Objects added |
|---|---|
--- RTS Managers --- |
RTS_SceneManager, RTS_JobManager (with all 5 shipped job assets already assigned) |
--- RTS UI --- |
RTS_Canvas (HUD, notifications, job list), RTS_Canvas (ScreenSpace) (off-screen indicator arrows) |
--- RTS Vehicles --- |
RTS_Truck (the shipped player truck) |
--- RTS Delivery Zones --- |
RTS_DeliveryZone_CrateDepot, RTS_DeliveryZone_FuelDepot, RTS_DeliveryZone_VehicleDepot, RTS_DeliveryZone_PalletDepot, RTS_DeliveryZone_ContainerDepot |
--- RTS Load Stations --- |
RTS_LoadStation_Crate, RTS_LoadStation_Vehicle, RTS_LoadStation_Fuel, RTS_LoadStation_Pallet, RTS_LoadStation_Container |
--- RTS Trailer Spawners --- |
RTS_TrailerSpawnPoint_Box, RTS_TrailerSpawnPoint_Flatbed, RTS_TrailerSpawnPoint_Tanker |
--- RTS Navigation --- |
RTS_MinimapCamera, RTS_NavMesh, RTS_GuideSystem |
--- RTS Gameplay --- |
RTS_PlayerEventsListener |
--- RCCP --- |
RCCP_SceneManager, RCCP_Camera, RCCP_FixedCamera, RCCP_CinematicCamera, RCCP_SkidmarksManager, RCCP_Canvas (Realistic Car Controller Pro — the vehicle physics layer) |
Run it only once per scene. The command does not check whether the systems already exist. Running it a second time transplants a second copy of everything. If that happens, delete the duplicate groups manually — the transplant registers no Undo step, so Ctrl+Z cannot revert it.
Step 2 (Alternative): Create Each System Individually
If you prefer full control — or you are adding RTS to a scene that already has some of these systems — every system has its own menu item under Tools → BoneCracker Games → Realistic Truck Simulator → Create → Scene. Each item instantiates a prefab (a saved, reusable GameObject asset) referenced by the RTS_Settings asset, and every creation supports Undo — except Create RTS Scene Manager, which goes through the singleton accessor instead of a prefab and is not undoable.
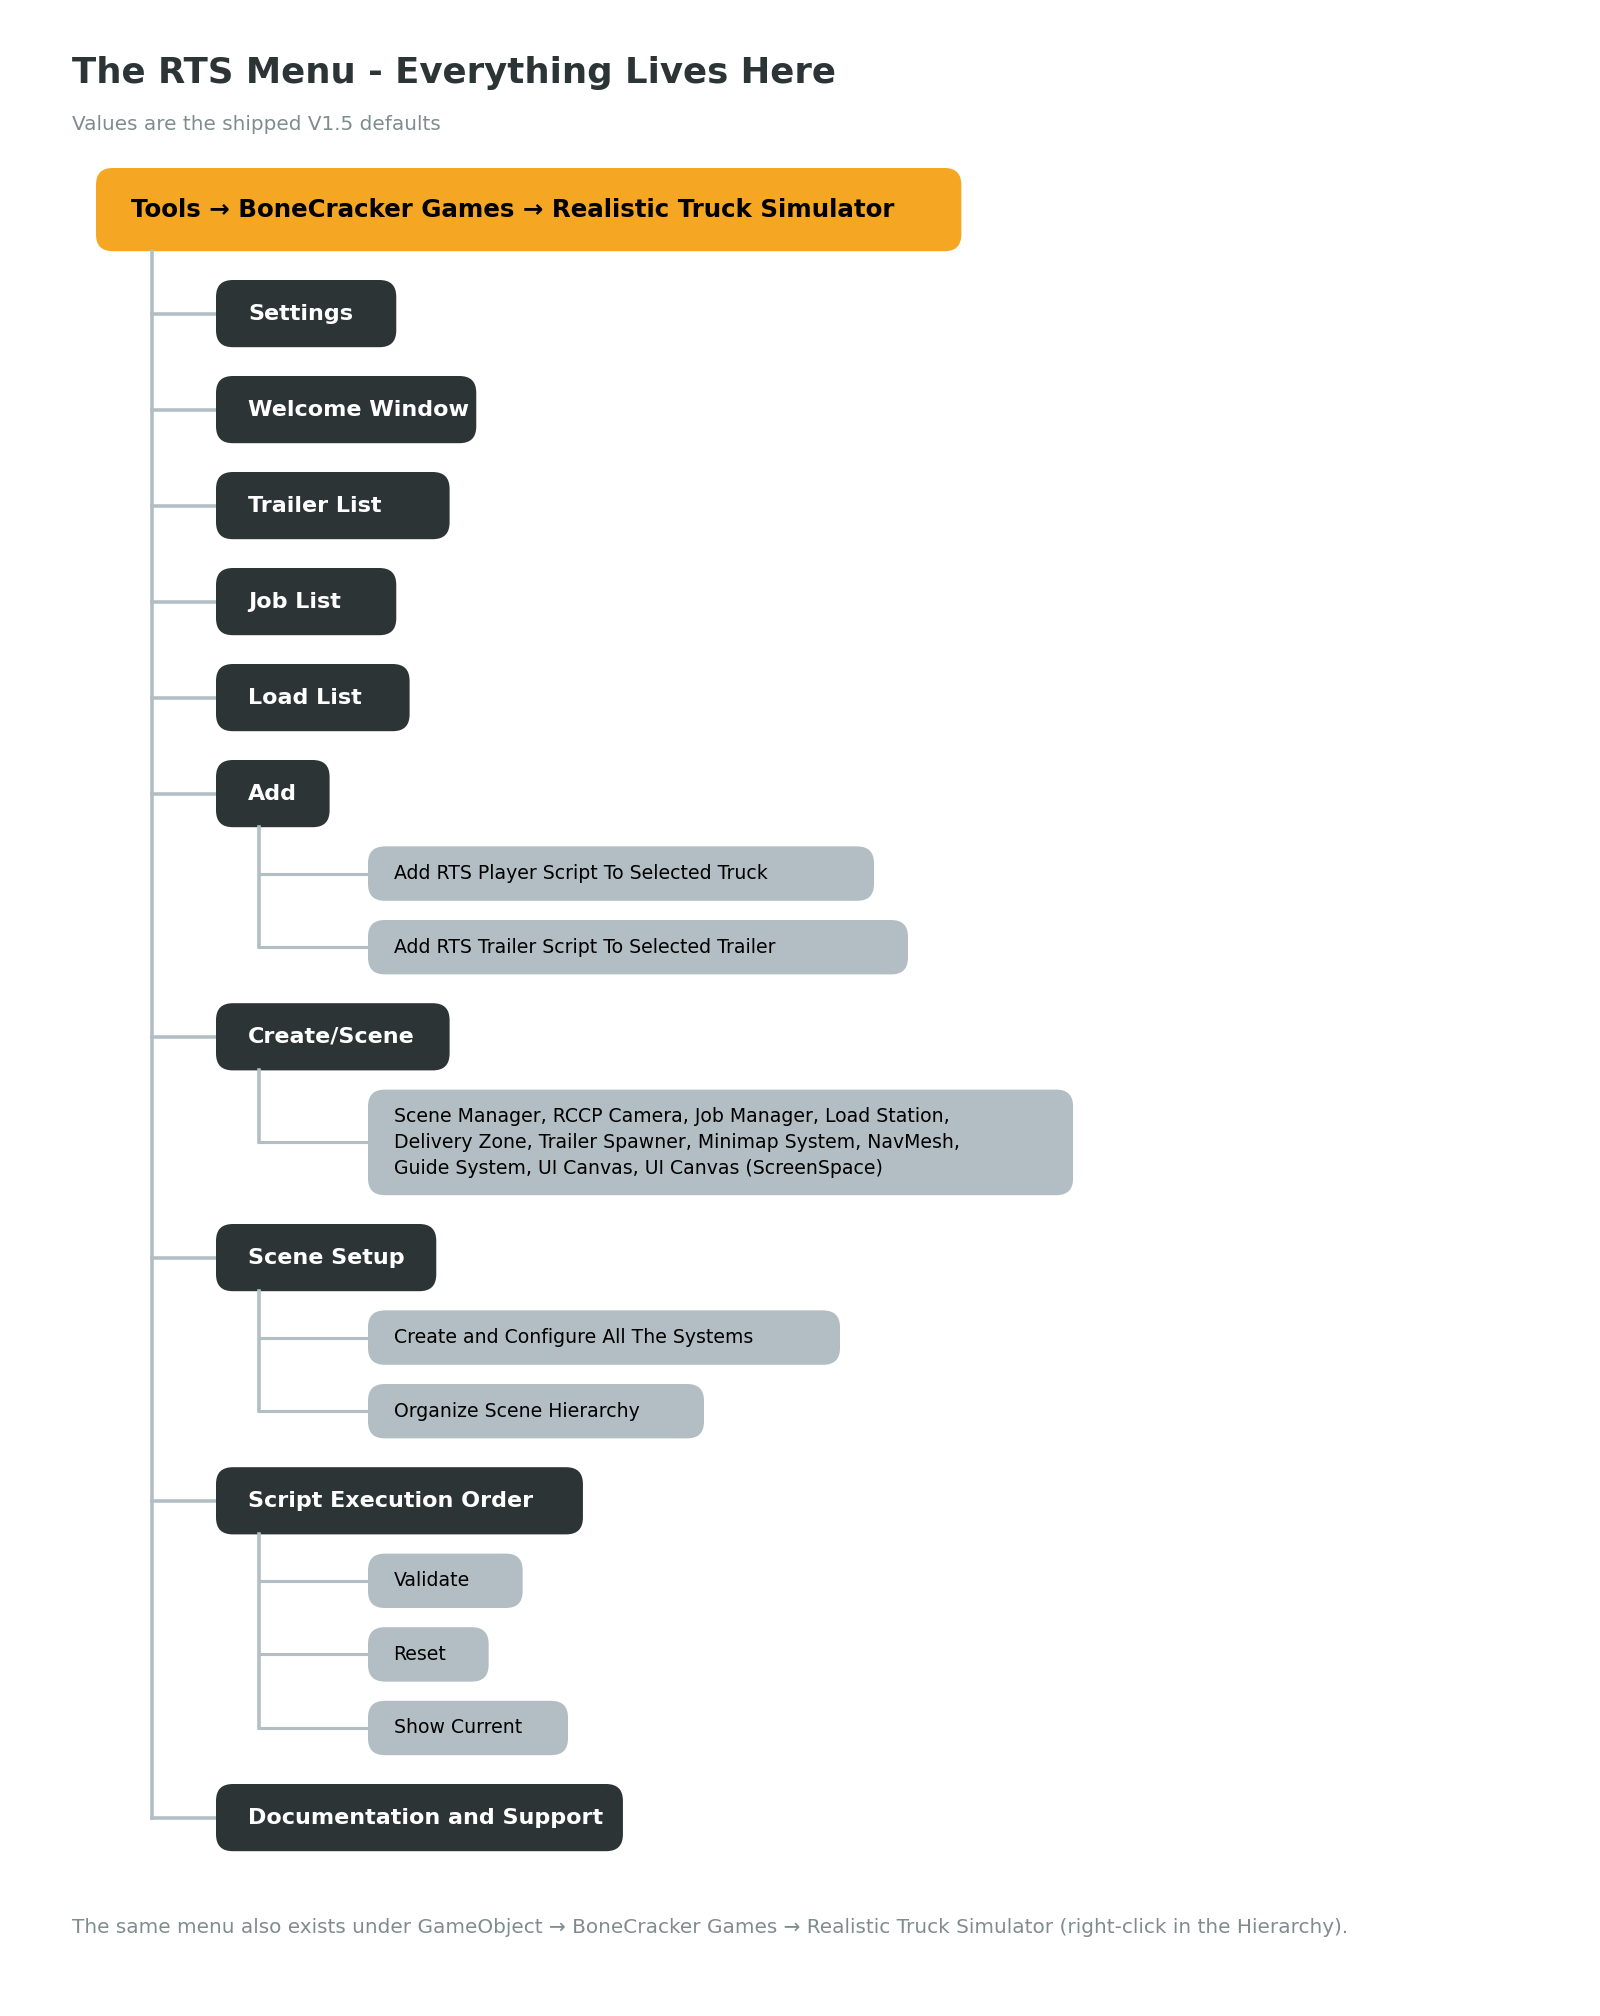
The items differ in one important way: some refuse to create a duplicate (a dialog appears and the existing object is selected instead), while others deliberately allow as many copies as you want, because real maps need many of them.
| Menu item (Create → Scene) | What it adds | If one already exists |
|---|---|---|
| Create RTS Scene Manager | RTS_SceneManager (singleton) |
Never duplicates — selects the existing instance, creating it only if the scene has none |
| Create RCCP Camera | RCCP_Camera prefab |
Dialog: "Scene has RCCP Camera already!" — existing camera is selected |
| Create RTS Job Manager | RTS_JobManager prefab |
Dialog: "Scene has RTS Job Manager already!" |
| Create RTS Load Station | RTS_LoadStation_Crate prefab |
No check — multiples allowed |
| Create RTS Delivery Zone | RTS_DeliveryZone_FuelDepot prefab |
No check — multiples allowed |
| Create RTS Trailer Spawner | RTS_TrailerSpawnPoint_Box prefab |
No check — multiples allowed |
| Create RTS Minimap System | RTS_MinimapCamera prefab |
Dialog: "Scene has RTS Minimap System already!" (checks for RTS_UI_Minimap) |
| Create RTS NavMesh | RTS_NavMesh prefab |
Dialog: "Scene has RTS NavMesh System already!" (checks for any NavMeshSurface) |
| Create RTS Guide System | RTS_GuideSystem prefab |
Dialog: "Scene has RTS Guide System already!" |
| Create RTS UI Canvas | RTS_Canvas prefab |
Dialog: "Scene has RTS UI Canvas already!" (checks for RTS_UI_Manager) |
| Create RTS UI Canvas (ScreenSpace) | RTS_Canvas (ScreenSpace) prefab |
Dialog: "Scene has RTS UI Canvas (ScreenSpace) already!" (checks for RTS_UI_OffsetIndicatorManager) |
Note that the duplicate-allowed items always spawn one specific default prefab (Crate load station, FuelDepot delivery zone, Box trailer spawner). After creating one, change its type or zone ID in the Inspector — or drag in one of the other shipped prefabs directly from Assets/RTS/Prefabs/LoadStations, Assets/RTS/Prefabs/DeliveryStations, and Assets/RTS/Prefabs/TrailerSpawners.
A Job Manager created this way already has the five shipped job assets assigned to its availableJobs list. To build your own delivery missions, see Jobs and Loads.
Step 3: Place Your Map Content
The one-click setup puts working systems into your scene, but their positions come from the template — they know nothing about your map. Now move the gameplay pieces to where they belong:
- Player truck — the template includes the shipped
RTS_Truck. Move it to your starting position, slightly above the ground. To use your own truck model instead, see Creating Trucks. - Trailer spawners — place each
RTS_TrailerSpawnPointwhere a trailer should wait to be picked up (a depot yard, a parking strip). The spawner instantiates its assigned trailer prefab slightly above its own position (1.5 m vertical offset) when the scene starts, after its optional spawn delay. - Load stations — place each
RTS_LoadStationwhere cargo gets loaded onto trailers. The station is a trigger volume — a collider that detects objects entering it without physically blocking them — so the player must be able to drive the trailer inside it. - Delivery zones — place each
RTS_DeliveryZoneat the drop-off destination. ItszoneIDmust match thedeliveryZoneNameof the job that ends there.
Zones and stations show colored gizmos in the Scene view so you can see their trigger areas while placing them, plus a text label above each one (the label can be turned off with Draw Label On Stations in the RTS_Settings asset).
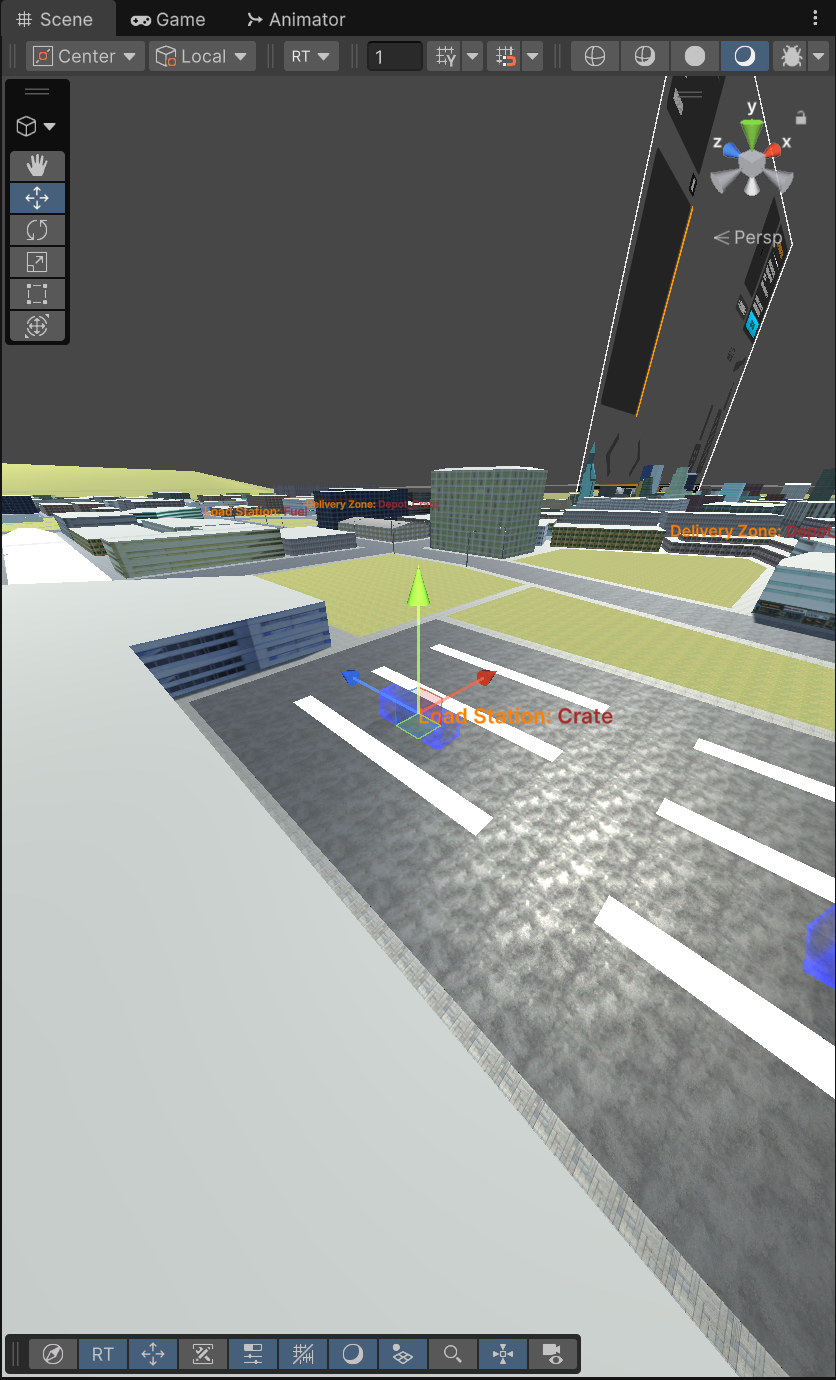
Positioning rules, sizing tips, and the full field reference for spawners, stations, and zones are covered in Locations.
Step 4: Bake the NavMesh
The guide line — the glowing path that leads the player to trailers, stations, and zones — is calculated on a NavMesh, an invisible walkable-surface map that Unity generates from your scene geometry. Without a baked NavMesh covering your roads, the guide system has nothing to draw the path on.
The RTS_NavMesh object added in Step 1 carries Unity's NavMeshSurface component (from the AI Navigation package). Baking it is standard Unity procedure:
- Finish placing your environment first — the bake captures whatever geometry exists at that moment.
- Select the
RTS_NavMeshobject in the Hierarchy. - In the Inspector, on the NavMeshSurface component, click Bake.
- A blue overlay appears in the Scene view showing the walkable area. Check that it covers every road the player can drive on, including the approaches to your load stations and delivery zones.
If you later move buildings or add roads, simply select RTS_NavMesh and bake again.
Optional: Organize Scene Hierarchy
If your Hierarchy gets messy while building — objects scattered at the root level, groups deleted or renamed — RTS can tidy it up for you.
Go to Tools → BoneCracker Games → Realistic Truck Simulator → Scene Setup → Organize Scene Hierarchy (also at GameObject → BoneCracker Games → Realistic Truck Simulator → Create → Organize Scene Hierarchy). A dialog explains: "This will group root-level GameObjects under descriptive parent folders. This operation is fully undoable (Ctrl+Z)." Click Proceed.
The organizer groups root-level objects by name into ten separator folders: RTS Managers, RTS UI, RTS Vehicles, RTS Delivery Zones, RTS Load Stations, RTS Trailer Spawners, RTS Navigation, RTS Gameplay, RCCP, and Environment. Matching is name-based — for example, anything starting with RTS_DeliveryZone goes into the Delivery Zones folder, anything starting with RCCP_ goes into the RCCP folder (except RCCP_City, which counts as Environment), and known environment objects like Directional Light and Reflection Probe go into Environment. It also removes leftover separator objects whose names are made only of dashes and spaces.
The operation is safe to run repeatedly (already-grouped objects stay put), it is a single undo step, and it logs a summary to the Console, e.g. [RTS] Scene hierarchy organized: 12 objects grouped into 10 categories.
Verification
To confirm your scene works, press Play and check the following:
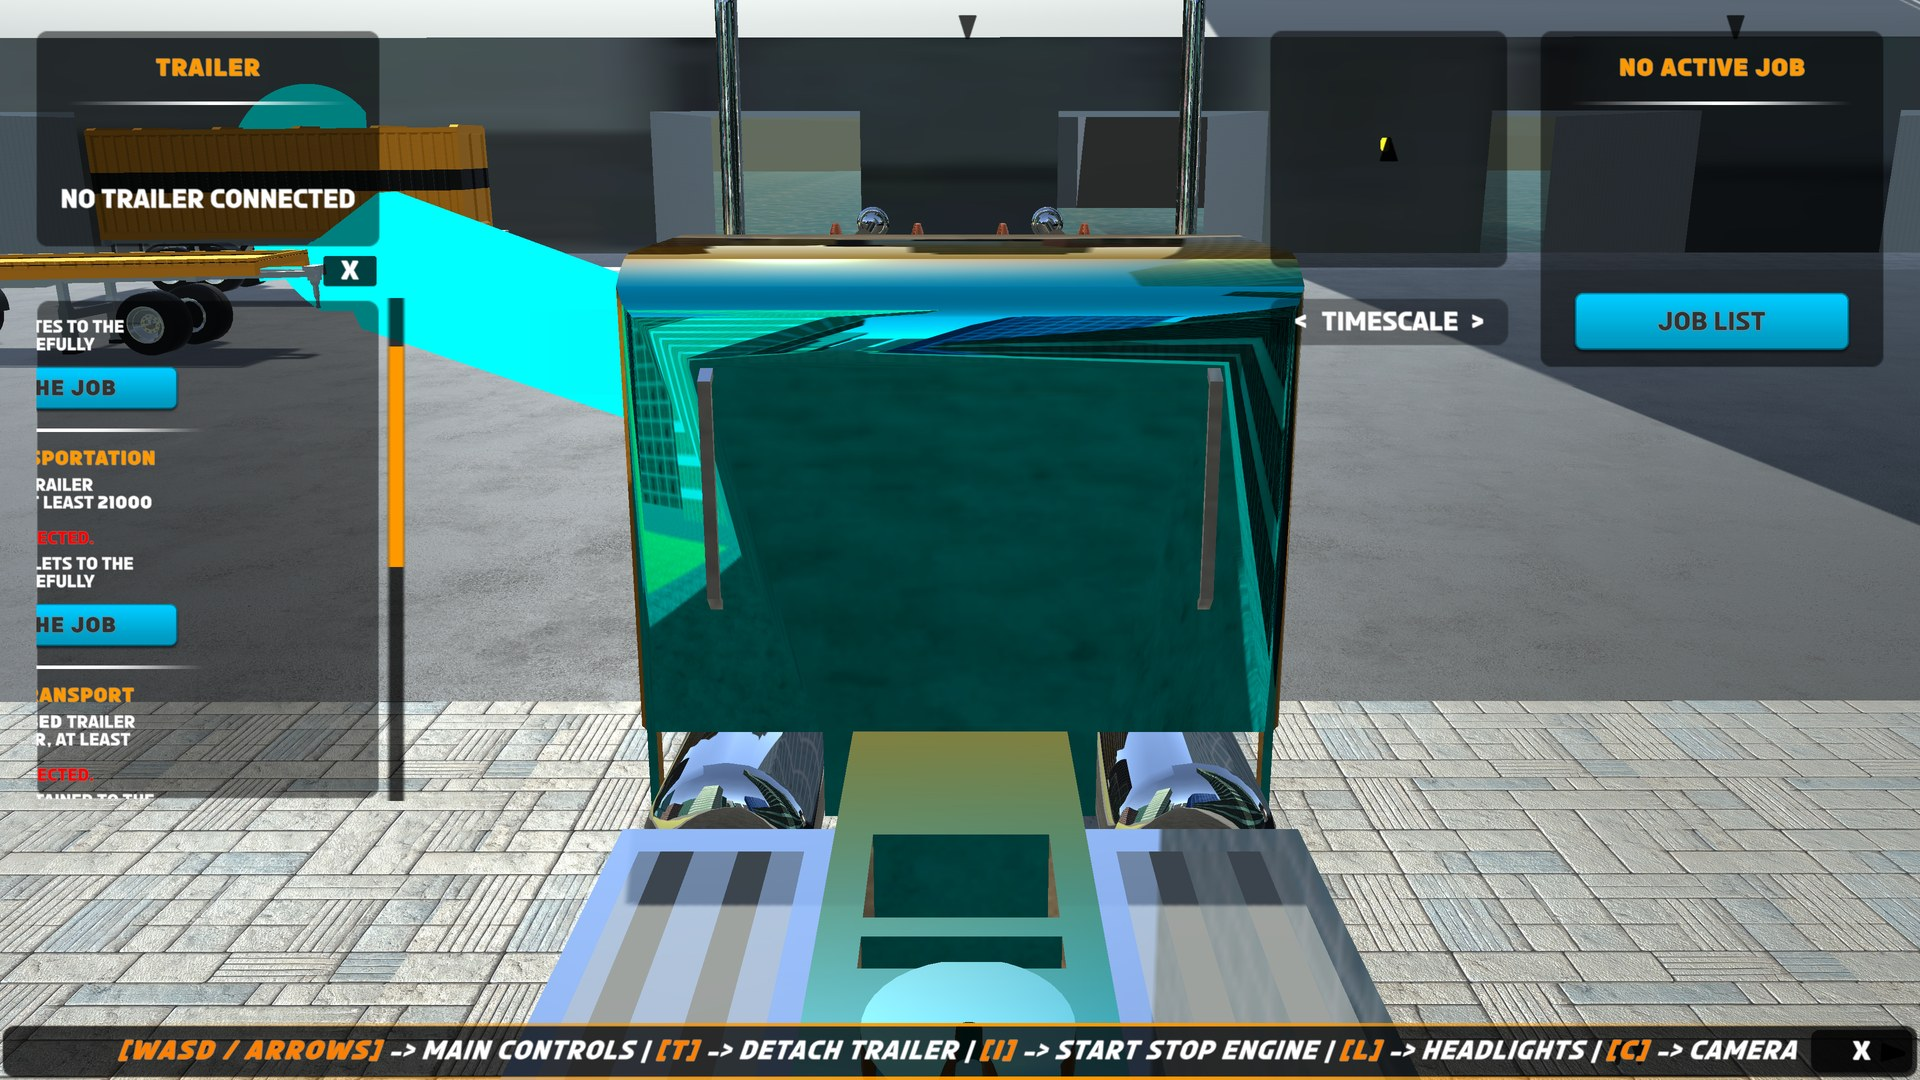
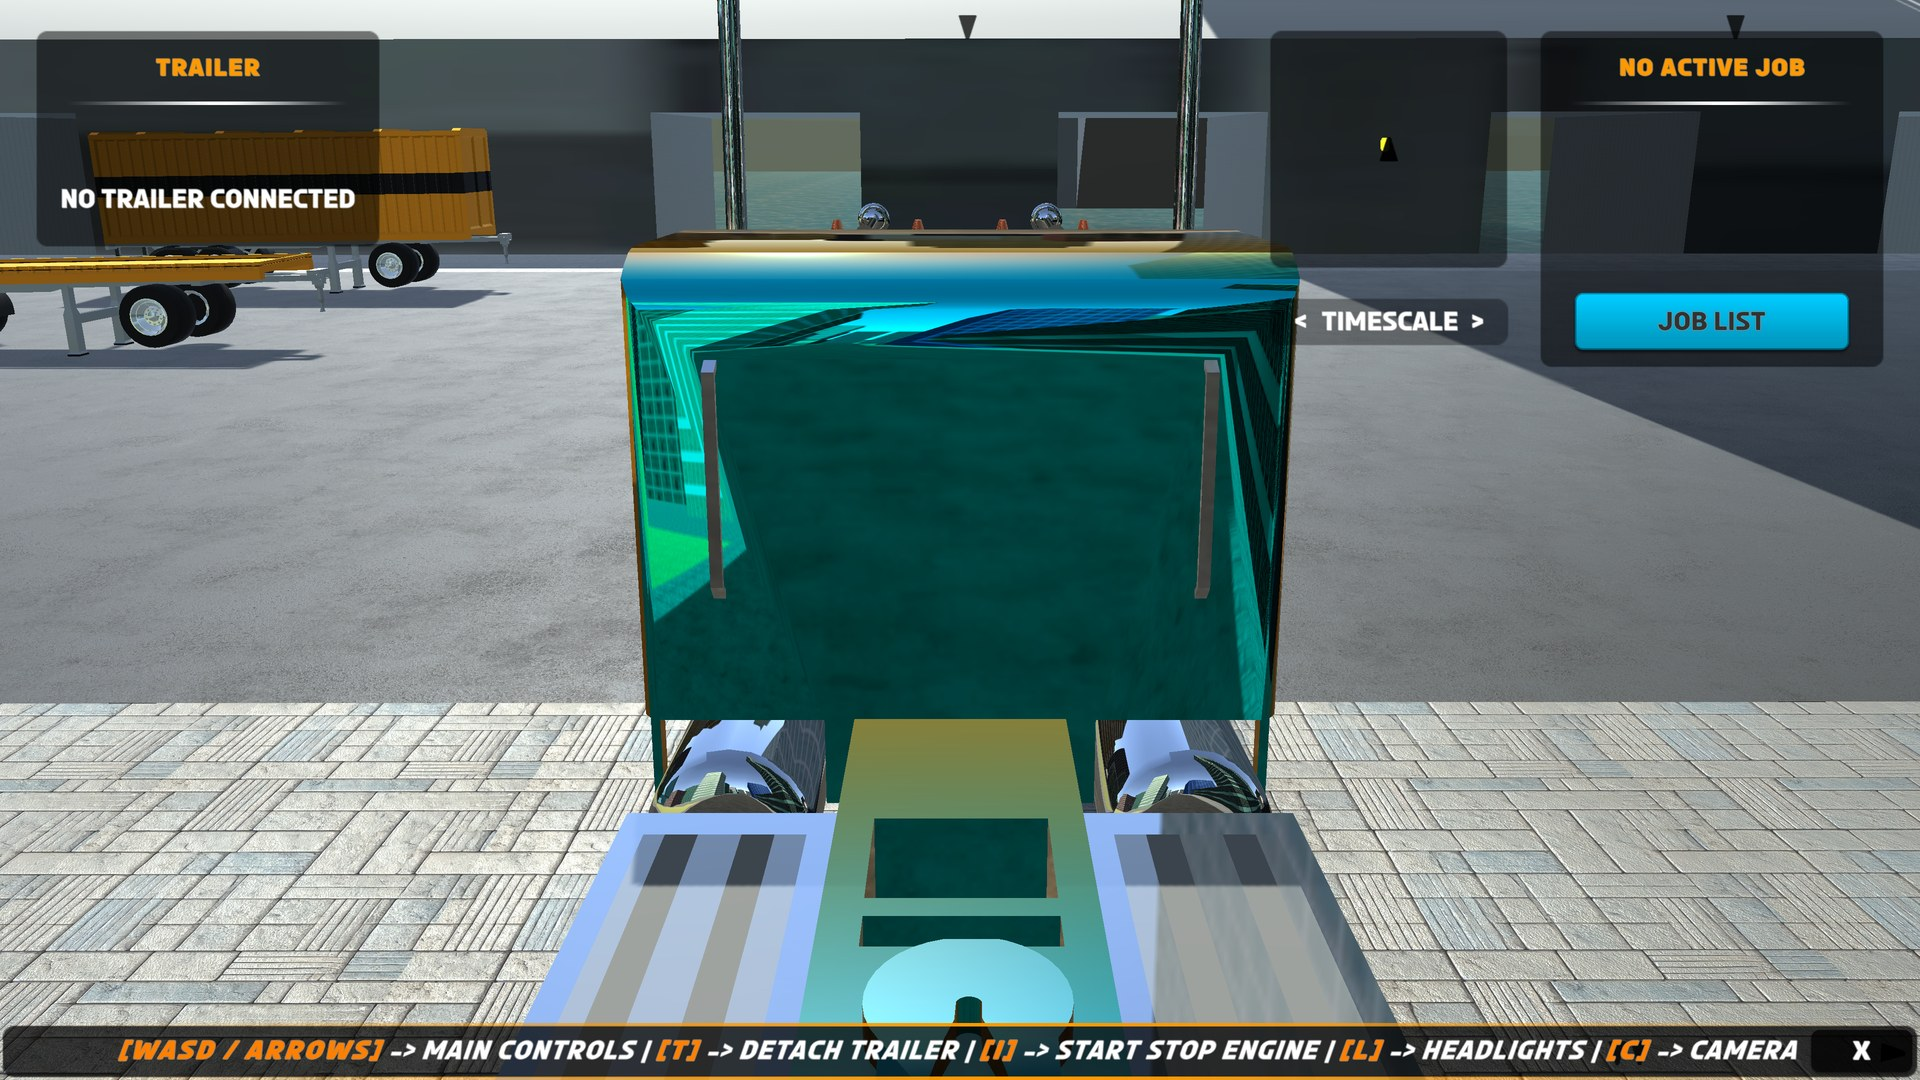
- The HUD appears — dashboard gauge, minimap, and the keyboard controls info panel are visible, and you can drive the truck with W / A / S / D or the arrow keys.
- The Console is clean — no yellow warnings. Watch especially for
Layer "RTS_MinimapIcons" not found. Make sure the layer name is correct.(the minimap needs a layer namedRTS_MinimapIcons; the shipped project defines it as layer 12) andNo trailer prefab assigned to spawn point ...(a spawner with an empty Trailer Prefab field). - The job list has entries — open the job panel and confirm your jobs appear as cards. The list is populated from the Job Manager's availableJobs list, so it only has entries if an
RTS_JobManagerexists in the scene with job assets assigned. The template's Job Manager arrives pre-filled with the five shipped jobs. - The guide line draws — start a job and confirm the glowing path appears on your roads. If it does not, the NavMesh bake from Step 4 is the first thing to re-check.
If something misbehaves, the Troubleshooting guide maps every warning and notification message to its cause and fix.
Next Steps
Your scene now runs the complete RTS loop with the shipped content. To make it your own:
- Creating Trucks — turn your own truck model into a drivable RTS player vehicle.
- Creating Trailers — build custom trailers with their own types and load grids.
- Jobs and Loads — author your own delivery jobs and cargo types.
- Locations — the full reference for trailer spawners, load stations, and delivery zones.