Creating a New Truck
This guide shows you how to get a drivable, job-ready truck into your scene. It covers two paths: dropping in the shipped truck prefab (fastest), and converting any vehicle built with Realistic Car Controller Pro (RCCP) into an RTS truck. It also explains the one step people forget most often — registering the truck as the player truck so the camera, the guide system, and the job system all know which vehicle to work with.
Prerequisites
Before starting, ensure you have:
- RTS imported and installed — see Installation.
- A scene with the RTS systems in place (scene manager, camera, UI, and so on) — see Scene Setup. The fastest way is Tools → BoneCracker Games → Realistic Truck Simulator → Scene Setup → Create and Configure All The Systems.
- Basic familiarity with prefabs. A prefab is a saved, reusable GameObject stored in your Project window — you drag it into a scene to create a copy of it.
Option A: Use the Shipped Truck
RTS ships with one ready-to-drive truck prefab:
Assets/RTS/Prefabs/Trucks/RTS_Truck.prefab
This prefab is a complete vehicle: it contains the full RCCP vehicle setup (RCCP_CarController plus its drivetrain, wheels, lights, and audio) and the RTS_Truck component on its root. Nothing needs to be configured on it.
- In the Project window, navigate to
Assets/RTS/Prefabs/Trucks/. - Drag
RTS_Truck.prefabinto the Scene view or the Hierarchy. - Position it on your road, slightly above the ground so the wheels settle naturally on Play.
- Register it as the player truck — see Registering the Player Truck below. This step is required; placing the prefab alone is not enough for jobs to work.
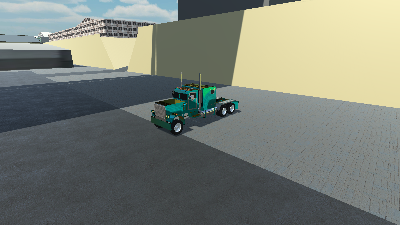
This is the same truck used in the RTS_DemoScene_City demo scene, so you can open that scene at any time to see a known-good reference setup — see Demo Scenes.
Option B: Turn Any RCCP Vehicle into an RTS Truck
Any vehicle powered by RCCP can become an RTS truck. RTS does not care what the vehicle looks like — a semi cab, a rigid box truck, even a pickup — as long as it has a working RCCP_CarController on its root.
Step 1: Build the vehicle with RCCP first
The vehicle itself (engine, gearbox, wheels, physics) is entirely RCCP's job. RTS only adds the simulation layer on top. So before touching anything RTS-related, create and test-drive your vehicle using RCCP.
The full RCCP documentation is bundled with RTS at Assets/RTS/Realistic Car Controller Pro/Documentation/ — start with the index at MD/00_index.md. For creating a vehicle from your own model, follow Vehicle Setup (MD/03_vehicle_setup.md), which walks through the RCCP Setup Wizard as well as manual vehicle setup.
Drive the vehicle on its own and confirm it accelerates, brakes, and steers correctly before moving to Step 2. If the vehicle misbehaves later, the cause is almost always on the RCCP side, and it is much easier to diagnose before RTS is involved.
Step 2: Select the vehicle root in the scene
In the Hierarchy, click the root GameObject of your vehicle — the topmost object that carries the RCCP_CarController component — so it is the only thing selected.
The menu command in Step 3 enforces three rules, and shows a dialog if any of them is broken:
| Rule | Why |
|---|---|
| Select exactly one object | The command adds the component to a single vehicle at a time. |
| The object must be in the scene, not a prefab asset in the Project window | The component is added to the live scene object (with Undo support). |
| Select the root of the vehicle | RTS_Truck finds the car controller with GetComponent, so it must sit on the same GameObject as RCCP_CarController. |
If you select multiple objects or a Project-window asset, this dialog appears:
"Please select only one vehicle in the scene. Be sure to select root of the vehicle gameobject before adding the player script."
If nothing at all is selected, the command simply does nothing.
Step 3: Add the RTS Player Script
With the root selected, choose:
Tools → BoneCracker Games → Realistic Truck Simulator → Add → Add RTS Player Script To Selected Truck
The same command is also available under GameObject → BoneCracker Games → Realistic Truck Simulator → Add → Add RTS Player Script To Selected Truck, which you can reach by right-clicking in the Hierarchy.
This adds one component — RTS_Truck — to the selected GameObject. The action supports Edit → Undo. If the vehicle already has the component, nothing is added and you get this dialog instead:
"Selected vehicle already has an RTS_Truck component."
That's the entire conversion. There is no wizard and no follow-up configuration on the vehicle itself.
What RTS_Truck Actually Is
If you select the truck and look at the Inspector, you may be surprised: the RTS_Truck component has no settings at all — no fields, no toggles, nothing to fill in.
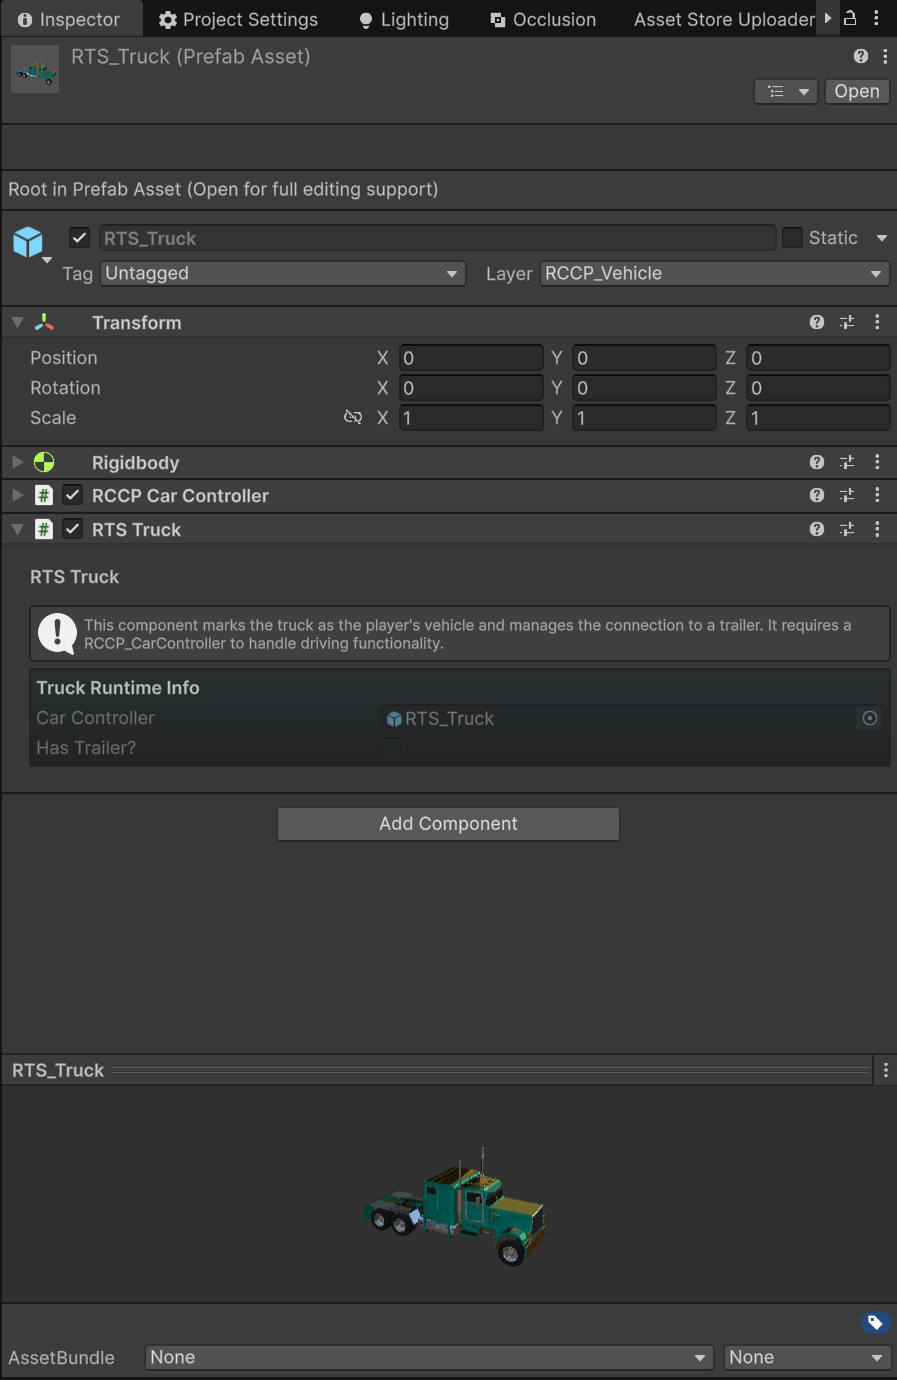
That is by design. RTS_Truck is a marker and bridge component:
- Marker — its presence tells RTS "this vehicle is a truck".
RTS_SceneManagerscans the scene forRTS_Truckcomponents to build its truck lists, and it is the type the player-registration system works with. - Bridge — every frame it polls
RCCP_CarController.ConnectedTrailerand, when the connection state changes, firesRTS_Events.OnTrailerAttachedorRTS_Events.OnTrailerDetached. The job system, UI, and guide system all react to those events. It also firesOnTruckSpawnedwhen enabled andOnTruckDespawnedwhen disabled; the scene manager rescans on the spawn event (and on trailer spawn/attach/detach) to keep its lists current, while the despawn event is consumed by other systems such as the job list panel.
For scripting, it offers two helpers: HasTrailer() returns whether a trailer is currently attached, and GetConnectedTrailer() returns the attached RTS_Trailer (or null). See Scripting API for the full API surface.
Because all the driving logic lives in RCCP_CarController, anything about how the truck drives — engine power, gearbox, steering, suspension — is configured on the RCCP components, not on RTS_Truck.
Registering the Player Truck
Having an RTS_Truck in the scene is not enough. RTS needs to know which truck is the player's truck: RTS_SceneManager.playerTruck must reference it. The job system starts jobs against this truck, the guide system draws its route from it, and the trailer distance optimization measures from its position. There are three ways to set it.
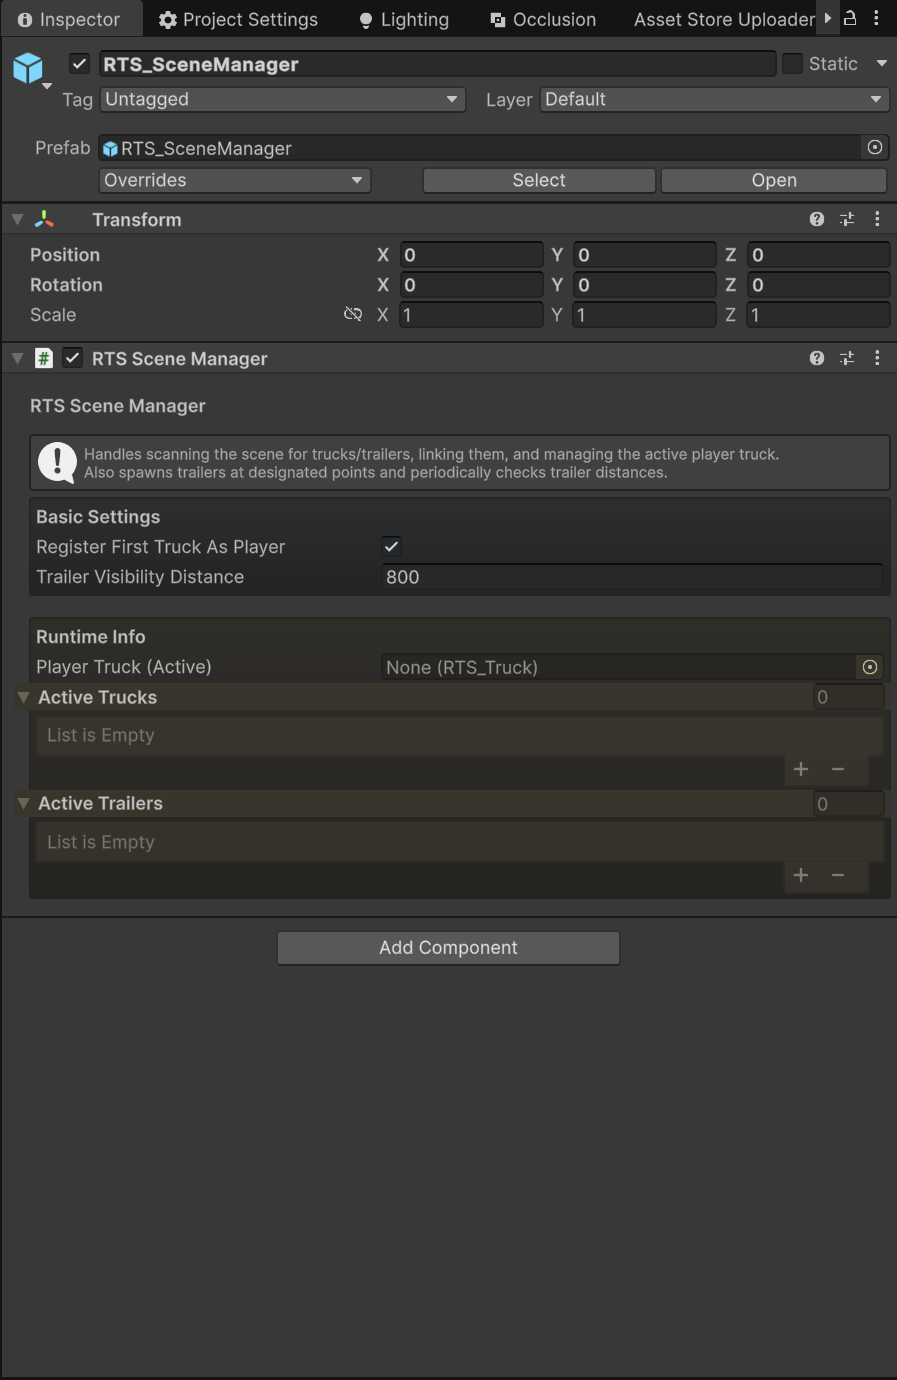
Way 1: Assign it in the Inspector
Select the RTS_SceneManager object in your scene and drag your truck from the Hierarchy into the Player Truck (Active) field, found under the Runtime Info section of the inspector. This is the simplest option when your scene always starts with the same truck.
Way 2: Enable Register First Truck As Player
On the same component, tick Register First Truck As Player (registerFirstTruckAsPlayer, default: false). When the scene manager scans the scene and finds no player truck assigned, it automatically registers the first active truck it finds. This is convenient for quick prototypes with a single truck; with multiple trucks in the scene, which one is "first" is not guaranteed, so prefer Way 1 or Way 3 in that case.
Way 3: Register from code
Use this when trucks are spawned or switched at runtime:
// Register an existing vehicle in the scene as the player truck.
RTS_SceneManager.Instance.RegisterPlayerTruck(myTruck);

// Spawn a truck prefab and register it as the player in one call.
RTS_Truck spawned = RTS_API.SpawnTruck(truckPrefab, position, rotation,
    registerAsPlayerVehicle: true, isControllable: true, isEngineRunning: true);

// Read back the current player truck (null if none is registered).
RTS_Truck player = RTS_API.GetPlayer();
RegisterPlayerTruck is forgiving: it first unregisters any existing player truck, then checks that the GameObject actually has an RTS_Truck component and adds one automatically if it is missing. On success the Console logs:
[RTS SceneManager] Registered {name} as the new player truck.
Passing null does nothing except log the warning [RTS SceneManager] Attempted to register a null truck as player truck.
The camera follows the RCCP player
There is a second, separate registration on the RCCP side: RCCP_SceneManager tracks its own player vehicle, and the RCCP_Camera follows whichever vehicle is registered there. By default this takes care of itself — RCCP's registerLastVehicleAsPlayer option (default: true) automatically registers the last spawned RCCP vehicle as the RCCP player, and registering also points the camera at it.
If you manage vehicles manually or have several in the scene, keep both registrations pointing at the same truck. RTS_API.RegisterPlayerVehicle(truck) handles the RCCP side (it forwards to RCCP_SceneManager.RegisterPlayer, which also retargets the camera), while RTS_SceneManager.Instance.RegisterPlayerTruck(truck) handles the RTS side. See the bundled RCCP docs (MD/09_camera_system.md and MD/15_scene_manager.md) for the camera and RCCP scene-manager details.
Verification
To confirm your truck works end to end:
- Enter Play mode.
- Check the Console — you should see
[RTS SceneManager] Registered {name} as the new player truck.(when using Way 2 or Way 3), and no errors. - The camera should sit behind your truck and follow it. Drive with W A S D (or the arrow keys); Space is the handbrake.
- Select the RTS_SceneManager object while still in Play mode — the Player Truck (Active) field should show your truck, and it should appear in the Active Trucks list.
- Reverse up to a trailer until it connects, and watch the trailer info panel appear in the UI. That confirms the
RTS_Truckpolling-and-events bridge is working. (T detaches the trailer.)
Common Pitfalls
The script is on a child object instead of the root
RTS_Truck looks up RCCP_CarController on its own GameObject via GetComponent. If you add it to a child (for example the cab mesh), it never finds the controller and trailer detection cannot work. The menu command's dialog reminds you of this — always select the root of the vehicle, the object that carries RCCP_CarController, before running Add RTS Player Script To Selected Truck.
The truck was never registered as the player
Symptoms: jobs will not start, no guide path is drawn, and the trailer/job UI stays inert. The cause is that RTS_API.GetPlayer() returns null — the job manager aborts StartJob when there is no player truck. Fix it with any of the three registration ways above. Separately, if the camera is not following the truck, that is the RCCP-side registration — make sure an RCCP player is registered (automatic with registerLastVehicleAsPlayer, or explicit via RTS_API.RegisterPlayerVehicle).
Expecting settings on RTS_Truck
There is nothing to configure on RTS_Truck, so do not go looking for a "player" checkbox on the component. Being the player is a property of the scene manager's reference, not of the truck itself — which is also why you can switch the player truck at runtime with a single RegisterPlayerTruck call.
Next Steps
Now that your truck is in the scene and registered:
- Creating a New Trailer — give your truck something to tow, using the matching Add RTS Trailer Script To Selected Trailer workflow.
- Jobs and Loads — create delivery jobs for your truck to complete.
- How It Works — the event flow your new truck now participates in.
- Troubleshooting — if something in this guide did not behave as described.