Exploring the Demo Scenes
Realistic Truck Simulator ships with three ready-made scenes, and the fastest way to understand the toolkit is to play one of them. This guide walks you through the city demo — the HUD, the controls, and your first complete delivery — and then explains how the scene is put together so you can build your own later. Read it right after finishing the Installation guide.
What You'll Learn
- What each of the three shipped scenes is for
- How to open and play
RTS_DemoScene_City, and what every HUD panel means - The full keyboard control map (plus where gamepad and wheel bindings live)
- How to complete a delivery job from start to finish
- How the demo scene hierarchy is organized, and which parts are demo-only helpers
Before You Begin
- Import the asset and complete the steps in the Installation guide.
- No extra setup is needed for the demos — everything they use is included in the package.
The Three Scenes
All three scenes live in Assets/RTS/Scenes/. A scene is a Unity level file — a saved arrangement of objects you can open and play.
| Scene | File | Purpose |
|---|---|---|
| City demo | RTS_DemoScene_City.unity |
The full playable demo: a city with a truck, trailers, load stations, delivery zones, and five jobs. This is the only scene enabled in Build Settings. |
| Template | RTS_DemoScene_Template.unity |
A minimal demo scene — a stripped-down starting point with the RTS systems already in place. |
| Scene setup template | RTS_SceneSetup.unity |
A system template used by the scene setup menu command. It is not meant to be played directly. |
RTS_DemoScene_City is where you should start. It contains everything the toolkit offers, wired together and working.
RTS_DemoScene_Template is the same idea with the city stripped away — useful as a clean base when you want to study the setup without the environment around it.
RTS_SceneSetup exists for one job: when you run Tools → BoneCracker Games → Realistic Truck Simulator → Scene Setup → Create and Configure All The Systems, the toolkit opens this scene in the background, moves all of its root objects into your active scene, and closes it again. That is how RTS installs its managers, UI, and navigation systems into a scene of your own — see Scene Setup. Don't press Play in it; there is nothing to drive.
The paths to all three scenes are stored in the RTS_Settings asset so the menu commands can find them — see the Settings Reference.
Part 1: Open and Play the City Scene
- In the Project window, navigate to
Assets/RTS/Scenes. - Double-click
RTS_DemoScene_Cityto open it. - Press Play at the top of the editor.
- Drive around with W / A / S / D or the arrow keys. If the engine is off, press I to start it.
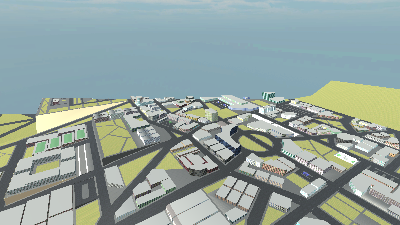
The very first time you enter Play Mode, a one-time tutorial popup appears with the basics. It only ever shows once (tracked in PlayerPrefs, so once per user profile) — see Demo-Only Helpers below for how it works and how to bring it back.
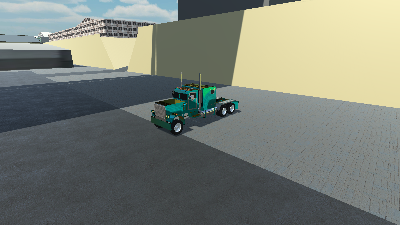
What just happened: when the scene started, RTS_SceneManager scanned it and registered every truck and trailer, RTS_JobManager made its five assigned jobs available, and each trailer spawn point spawned its trailer. One performance detail worth knowing: trailers farther than 800 m from the player are automatically deactivated (checked once per second), so don't be surprised if distant trailers "disappear" until you get closer.
Part 2: A Tour of the HUD
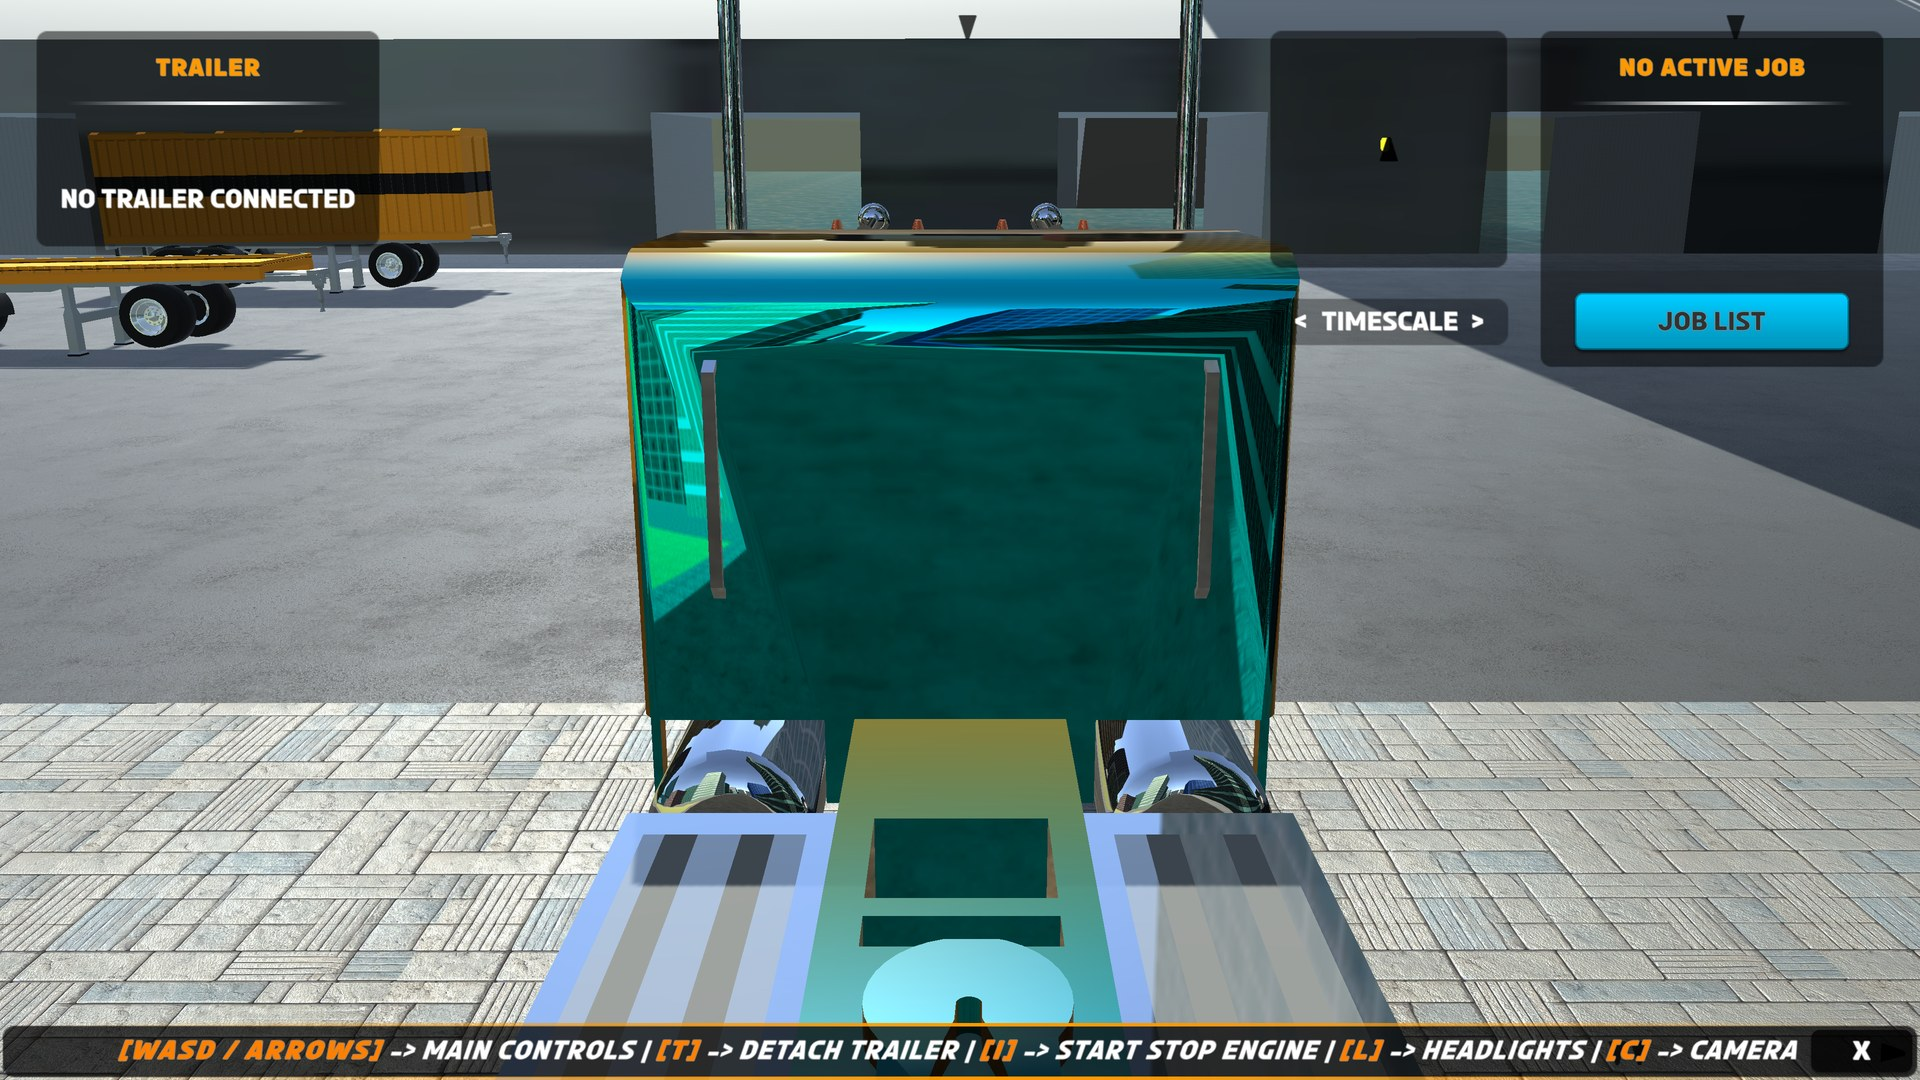
- Trailer panel (top left). Headed TRAILER. It reads NO TRAILER CONNECTED until you couple a trailer; after that it shows the trailer's type, its current load, and its weight, refreshed live.
- Job panel (top right). Headed NO ACTIVE JOB when you are idle. The blue JOB LIST button below it opens the job list. While a job is active, the panel shows the job's name, description, requirements, and status — and the same button becomes a red terminate button that abandons the current job (and clears the trailer's cargo), so click it carefully mid-job.
- TIMESCALE control (right, next to the job panel). A slider that sets Unity's
Time.timeScale. Use it to fast-forward long hauls or slow the simulation down. - Keyboard controls bar (bottom). Shows
[WASD / ARROWS] -> MAIN CONTROLS | [T] -> DETACH TRAILER | [I] -> START STOP ENGINE | [L] -> HEADLIGHTS | [C] -> CAMERA. Close it with the X at its right end. It only appears when mobile controls are disabled. - Minimap. A top-down view rendered by a camera that follows your truck from 100 m above. Delivery zones, load stations, and trailers get minimap icons; trailer icons are only shown while you have no trailer attached, so you can find one.
- Notifications. Status messages ("job started", "cargo loaded", errors) pop up on screen for 2.5 seconds by default.
- Off-screen indicator arrows. Small arrows at the screen edges point toward nearby targets (within 100 m): green for delivery zones, blue for load stations, white for trailers.
The gauge cluster (speed, RPM, gear) at the bottom of the screen comes from Realistic Car Controller Pro, the vehicle physics package bundled with RTS.
Driving Controls
| Action | Keyboard |
|---|---|
| Throttle | W or ↑ |
| Brake / reverse | S or ↓ |
| Steering | A / D or ← / → |
| Handbrake | Space |
| Start / stop engine | I |
| Detach trailer | T |
| Change camera | C |
| Look back | B |
| Low beam headlights | L |
| High beam headlights | K |
| Indicator left / right / hazard | Q / E / Z |
| Gear shift up / down | Shift / Ctrl |
| Neutral gear | N |
| Select gear directly | 1 – 6 |
| Clutch (manual) | M |
| NOS | F |
| Record gameplay | R |
| Replay recording | P |
| Camera zoom | Mouse scroll |
Gamepads, the Logitech G920 racing wheel, and Oculus Touch controllers are also bound out of the box. All bindings live in one input asset: Assets/RTS/Realistic Car Controller Pro/InputActions/RCCP_InputActions.inputactions.
Part 3: Your First Delivery
Time to earn your stripes. The city offers five jobs; here is what each one asks for:
| Job | Required trailer | Load | Amount | Delivery zone |
|---|---|---|---|---|
| Crate Transportation | Box | Crate | 18,000 kg | Depot_Crate |
| Pallet Transportation | Box | Pallet | 21,000 kg | Depot_Pallet |
| Container Transport | Flatbed | Container | 20,000 kg | Depot_Container |
| Fuel Transportation | Tanker | Fuel | 22,500 kg | Depot_Fuel |
| Vehicle Transportation | Flatbed | Vehicle | 10,000 kg | Depot_Vehicle |
We'll do Crate Transportation. The same steps apply to every job.
Step 1: Open the Job List
Click the JOB LIST button in the top right. A scrollable panel opens with a card for each job.
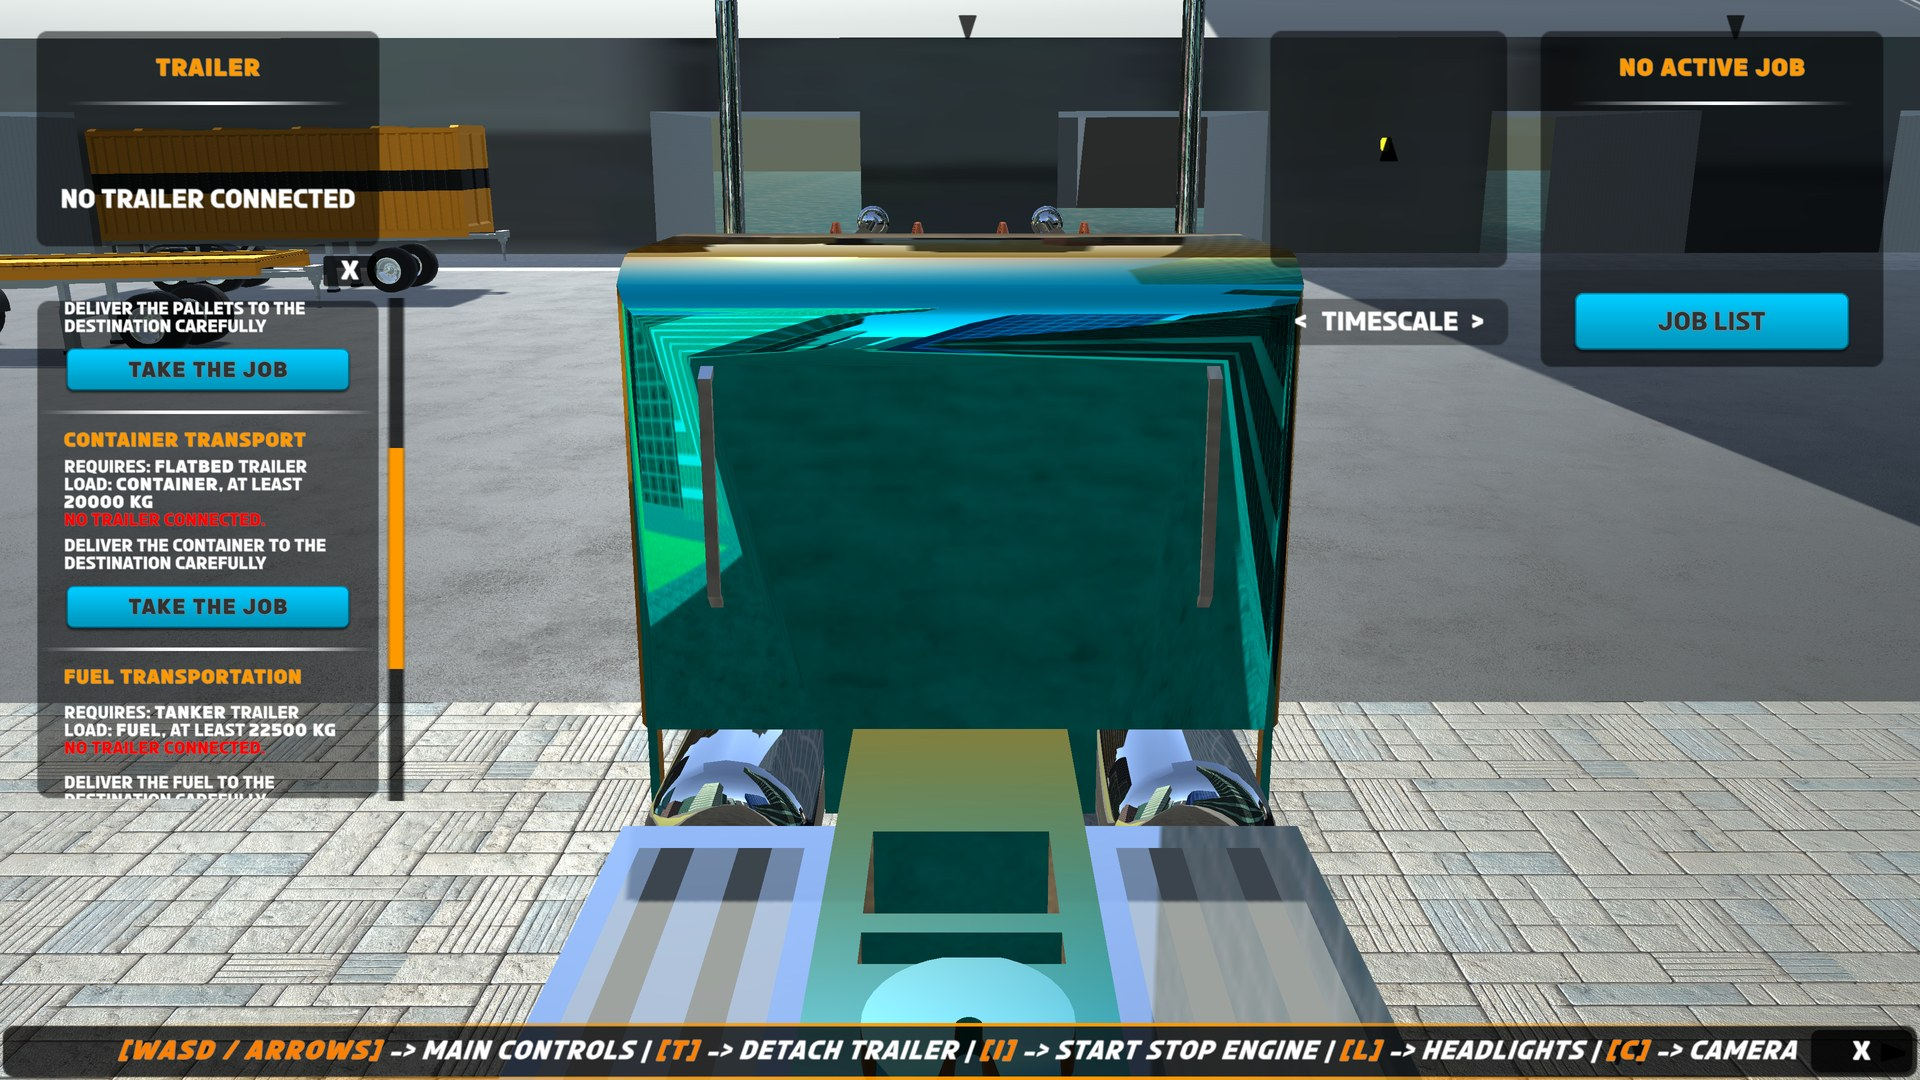
Each card shows the job name, its requirements (trailer type, load type, and amount), a colored status line, and a TAKE THE JOB button. The status line tells you at a glance whether you can start: "No trailer connected." (red), "Current trailer is incompatible." (orange), or "Trailer compatible. Ready to start." (green). Close the list any time with its X button.
Step 2: Take the Job — and Get Sent to a Trailer
Click TAKE THE JOB on the Crate Transportation card. Since you have no trailer connected yet, the job does not start. Instead, a notification says "Box trailer is located on your map", and a cyan guide line appears on the road, leading to the closest Box trailer. This is the toolkit's way of solving your missing prerequisite first.
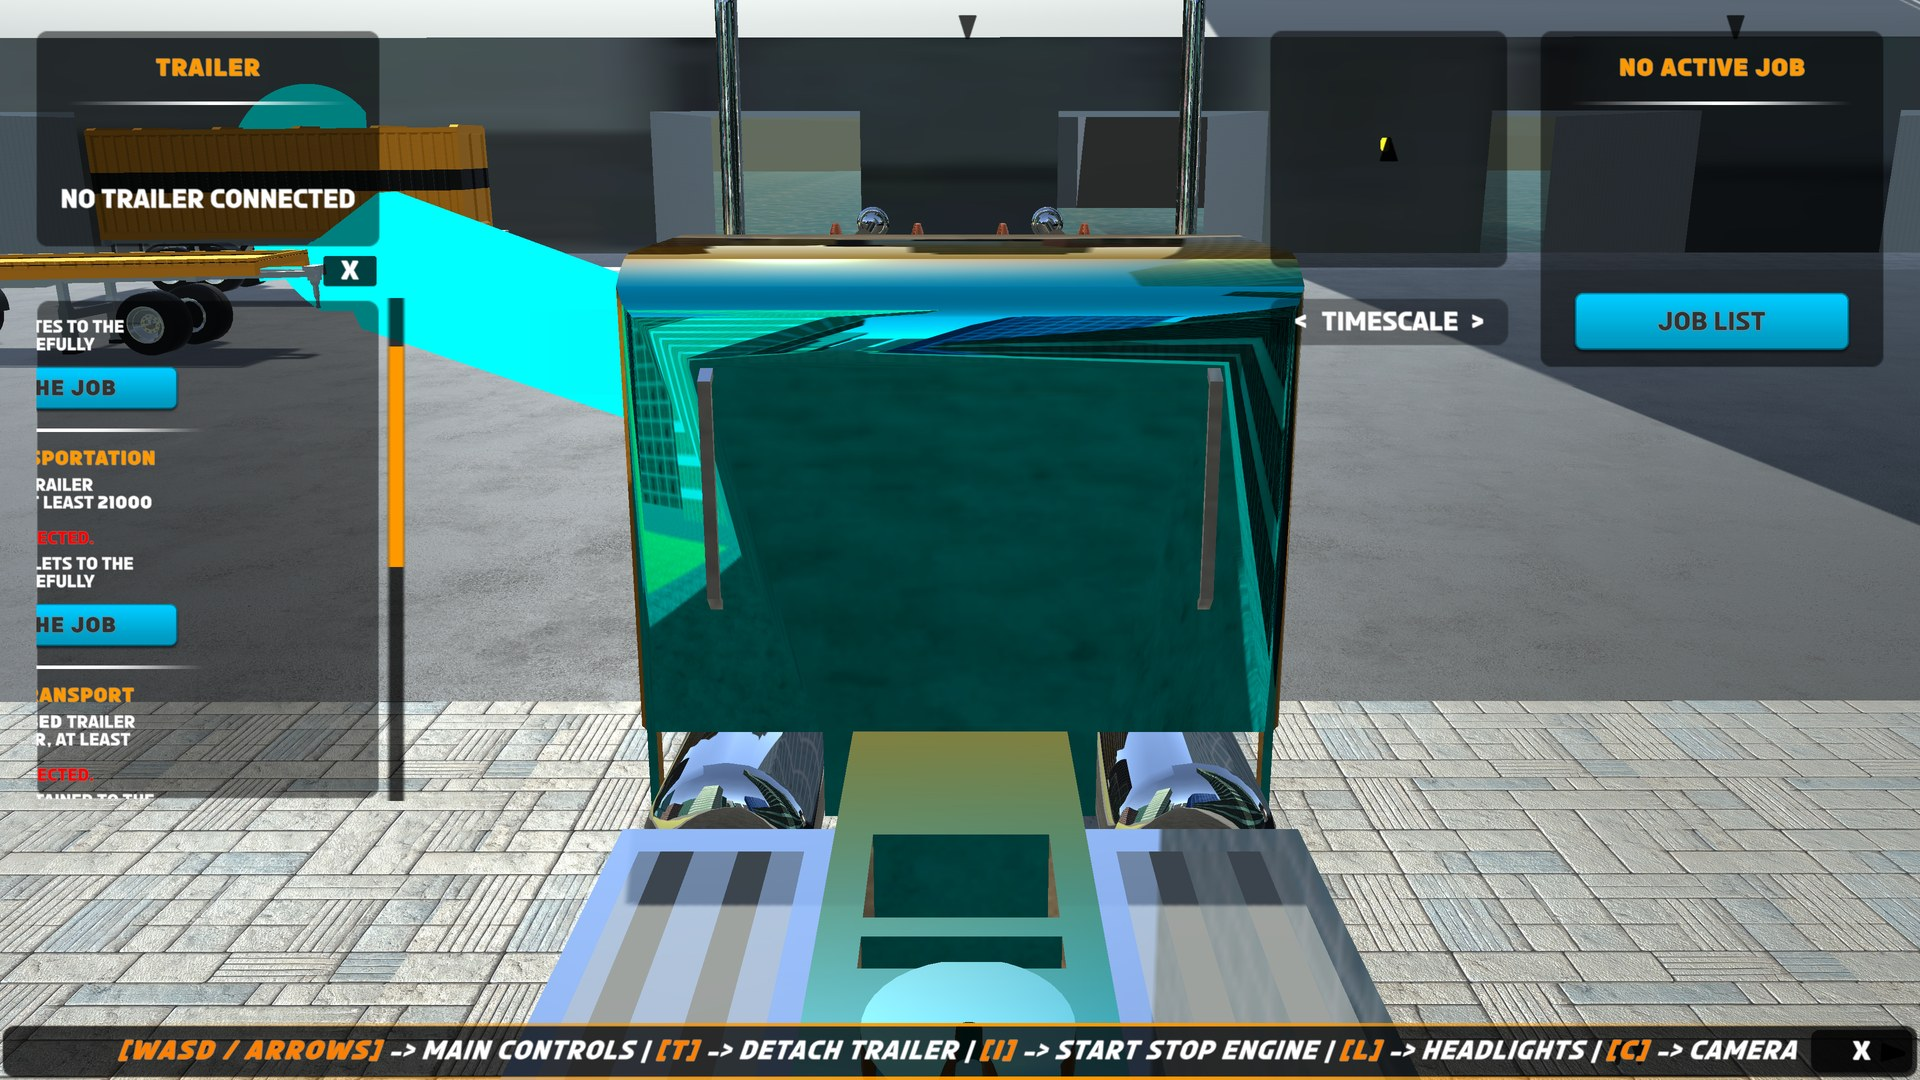
The line is drawn by RTS_GuideSystem, which calculates a driving path over the scene's NavMesh — a walkable/drivable surface map Unity uses for pathfinding. As you get near the trailer you will also see its floating name tag, showing its type and current load (tags are visible within 180 m in the demo — the component's maxViewDistance).
Step 3: Attach the Trailer
Drive to the trailer, then couple it:
- Pull past the trailer and line your truck up straight in front of it.
- Reverse slowly, backing the fifth wheel — the coupling plate above your truck's rear axles — under the front of the trailer.
- Keep reversing gently until it locks. Attachment is handled automatically by Realistic Car Controller Pro's trailer coupling.
The trailer panel in the top left now shows the connected trailer's details. If you ever need to unhitch, press T.
Step 4: Take the Job Again
With the Box trailer connected, open the JOB LIST again. The Crate Transportation card now reads "Trailer compatible. Ready to start." — click TAKE THE JOB once more. This time the job starts: you get the notification "Crate Transportation started! Deliver the Crate to the Depot_Crate", and the guide line re-targets the nearest Crate load station.
Step 5: Load the Cargo
Follow the line to the load station — the blue volume at the depot. A trigger volume is a collider that detects objects entering it instead of physically blocking them; the station uses one to notice your trailer.
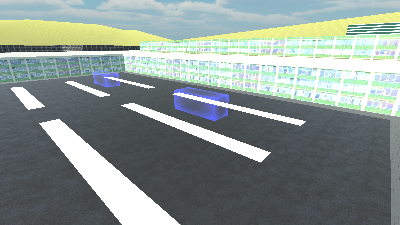
Drive your trailer into the volume and stop. Cargo is added in timed cycles while the trailer sits inside — this Crate station loads 3,000 kg per cycle every 1.6 seconds — and each cycle pops a notification like "Loaded 3000 kg of Crate". The per-cycle amount is set per station (the shipped stations range from 1,000 kg for Fuel to 20,000 kg for Container; the 1.6-second cooldown is the same everywhere). Two rules to know:
- Loading only works while a matching job is active. Without one you'll see "You're not permitted to load this trailer unless you take the job".
- The station stops when you have enough for the job ("Trailer is loaded") or when the trailer hits its physical maximum ("Trailer is full").
The moment the cargo is sufficient, a notification says "Trailer load is enough to complete the job" and the guide line switches to the delivery zone.
Step 6: Deliver
Follow the line across the city to the delivery zone — the green trigger volume on the road at the destination depot.
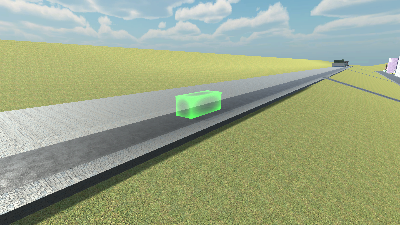
Drive your loaded trailer into it. The zone validates your cargo and the job completes: "Crate Transportation completed". The trailer's loads are cleared, the guide line disappears, and the job list is ready for your next contract.
What just happened: starting the job validated your trailer type; the load station checked load-type compatibility through RTS_API.IsLoadTypeCompatibleWithThisTrailer() and metered cargo into the trailer; and the delivery zone — whose zoneID is Depot_Crate, matching the job's delivery zone name — asked the job manager to verify you carried at least 18,000 kg of Crate before completing. Every step fired events other systems listened to (guide line re-targeting, UI refreshes, notifications). The full mechanics are covered in How It Works and Jobs and Loads.
How the City Scene Is Organized
Stop Play Mode and look at the Hierarchy window. The city scene groups everything under labeled separator objects, so you always know where to find (or where to put) each kind of object.
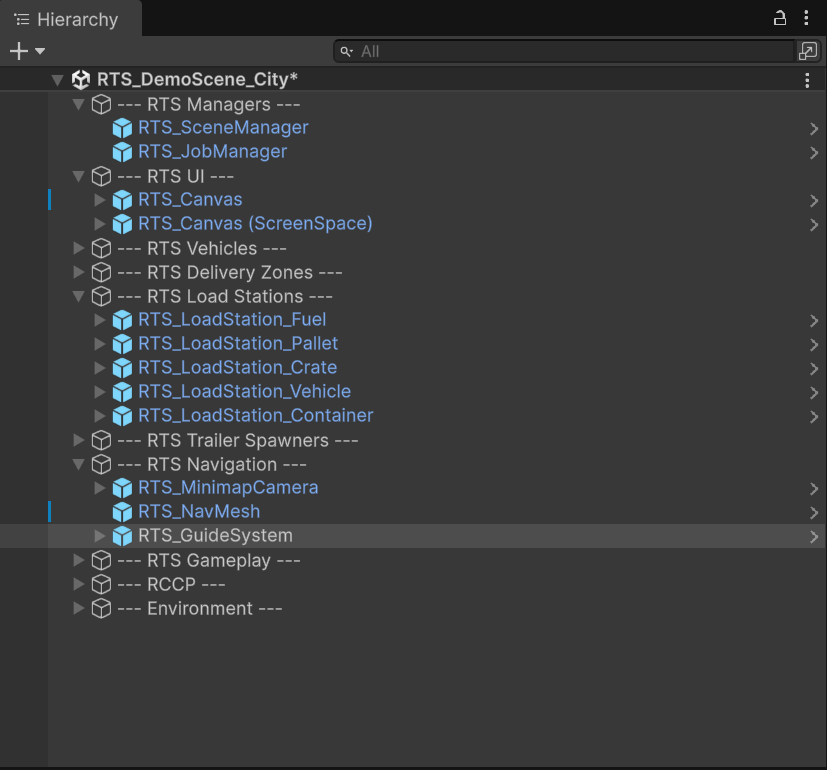
| Separator | What lives there |
|---|---|
--- RTS Managers --- |
RTS_SceneManager and RTS_JobManager — the brains of the scene |
--- RTS UI --- |
RTS_Canvas (the HUD) and RTS_Canvas (ScreenSpace) (the off-screen indicator arrows) |
--- RTS Vehicles --- |
The drivable demo truck |
--- RTS Delivery Zones --- |
Five delivery zones: Vehicle, Fuel, Pallet, Container, and Crate depots |
--- RTS Load Stations --- |
Five load stations: Fuel, Pallet, Crate, Vehicle, and Container |
--- RTS Trailer Spawners --- |
Three trailer spawn points: Box, Flatbed, and Tanker |
--- RTS Navigation --- |
RTS_MinimapCamera, RTS_NavMesh, and RTS_GuideSystem |
--- RTS Gameplay --- |
RTS_PlayerEventsListener (core event coordinator — required) and the RTS_Tutorial popup (demo-only) |
--- RCCP --- |
Realistic Car Controller Pro scene systems (camera and friends) |
--- Environment --- |
The city model, lighting, and surroundings |
Each zone and station is an instance of a prefab — a reusable, pre-configured object saved as an asset (you'll find them under Assets/RTS/Prefabs/). You can apply this same separator structure to your own scenes with Tools → BoneCracker Games → Realistic Truck Simulator → Scene Setup → Organize Scene Hierarchy.
Demo-Only Helpers
Two pieces of the demo exist purely for demonstration and testing. Neither is required in your own game.
The One-Time Tutorial Popup
The tutorial popup you saw on first play comes from the RTS_Tutorial prefab (Assets/RTS/Prefabs/RTS_Tutorial.prefab), which is placed in both demo scenes and carries the RTS_TutorialGuide component. On Awake it checks PlayerPrefs — Unity's small key-value store for saving simple data between sessions — for the key RTS_Tutorial. If the key exists, the popup destroys itself immediately; if not, it shows once and writes the key.
To see the tutorial again, delete that key from any script:
PlayerPrefs.DeleteKey("RTS_Tutorial");
Clearing all PlayerPrefs (PlayerPrefs.DeleteAll()) works too, but wipes every saved preference, so prefer deleting just the one key.
RTS_DemoManager and the Test Buttons
RTS_DemoManager is a testing utility component (Component menu: Realistic Truck Simulator → Demo → RTS Demo Manager) that exposes one-click methods for exercising the load and job systems. It is not pre-placed in any shipped scene or prefab — add it to a GameObject yourself when you want its methods available. Every method silently does nothing unless a trailer is connected to the player truck.
| Method | What it does |
|---|---|
AddCrate() |
Adds a 500 kg Crate load to the connected trailer |
AddFuel() |
Adds an 800 kg Fuel load |
RemoveSomeLoad() |
Removes 500 kg of load |
ClearAllLoads() |
Clears every load from the trailer |
AddRandomLoad() |
Adds a random load type (never None) weighing 300–1200 kg |
DamageTrailer() |
Applies an impact impulse to the trailer, for damage testing |
StartDemoMission() |
Starts the job assigned to its demoJob field via RTS_API.StartJob() |
CompleteDemoMission() |
Force-completes the current job via RTS_API.CompleteJob() |
Related is RTS_TestUIBehavior: the RTS_Canvas prefab contains a test panel (Panel_Test, disabled by default) with AddCrate, AddFuel, RemoveLoad, ClearLoads, and CompleteJob buttons whose click handlers call the matching RTS_DemoManager methods — so they only function when an RTS_DemoManager exists in the scene. The TIMESCALE slider you saw in the HUD is driven by the same script's OnTimescaleChanged() method, which simply assigns the slider's value to Time.timeScale and needs no demo manager.
When you build your own scenes, you can leave all of this out — or keep it around as a handy cheat panel during development.
Next Steps
- Essentials — the core components you just watched in action, one by one.
- Scene Setup — add the RTS systems to your own scene with one menu command.
- Jobs and Loads — create your own jobs, cargo types, and rewards.
- Locations — place your own load stations, delivery zones, and trailer spawn points.
- UI System — every HUD panel from this tour, in depth.