Your First Drive
Goal: drive the included car, change the camera, then stop the game. This confirms you are ready to start using RCCP.
Before you start
Complete Installation, including the Input System and text resources. Use the included prototype for this tutorial; you can add your own model afterward.
These are the Unity panels you will use:
| Panel | What it is for |
|---|---|
| Project | Files in your project, including scenes and car models. |
| Hierarchy | Objects in the scene you currently have open. |
| Scene | Arranging and editing those objects. |
| Game | Seeing and controlling the game while it runs. |
| Inspector | Settings for the object or file you selected. |
1. Open the prototype scene
If you opened it at the end of Installation, continue to step 2.
Otherwise:
- Open Tools > BoneCracker Games > Realistic Car Controller Pro > Welcome Window.
- On the Welcome tab, find Open Prototype Scene and click Open Scene.
- Save any unsaved work if Unity prompts you before switching scenes.
You can also open it from the Project window: expand Assets > Realistic Car Controller Pro > Scenes, then double-click RCCP_Scene_Blank_Prototype.unity.
Check: the prototype scene is open. Its car and test ground are already set up for you.
2. Press Play and drive
- Click the triangular Play button in Unity's top toolbar. This starts Play Mode, where you can test the game.
- Select the Game tab and click inside the driving view so it receives your keyboard input.
- Hold W to move forward. While moving, press A or D to steer.
- Release W and hold S to brake.
| Key | What it does |
|---|---|
| W / S | Accelerate / brake. With automatic reverse enabled, keep holding S after stopping to reverse. |
| A / D | Steer left / right. |
| Space | Hold the handbrake. |
| C | Change camera view. |
Check: the car moves, turns and slows down. The speedometer changes as you drive.
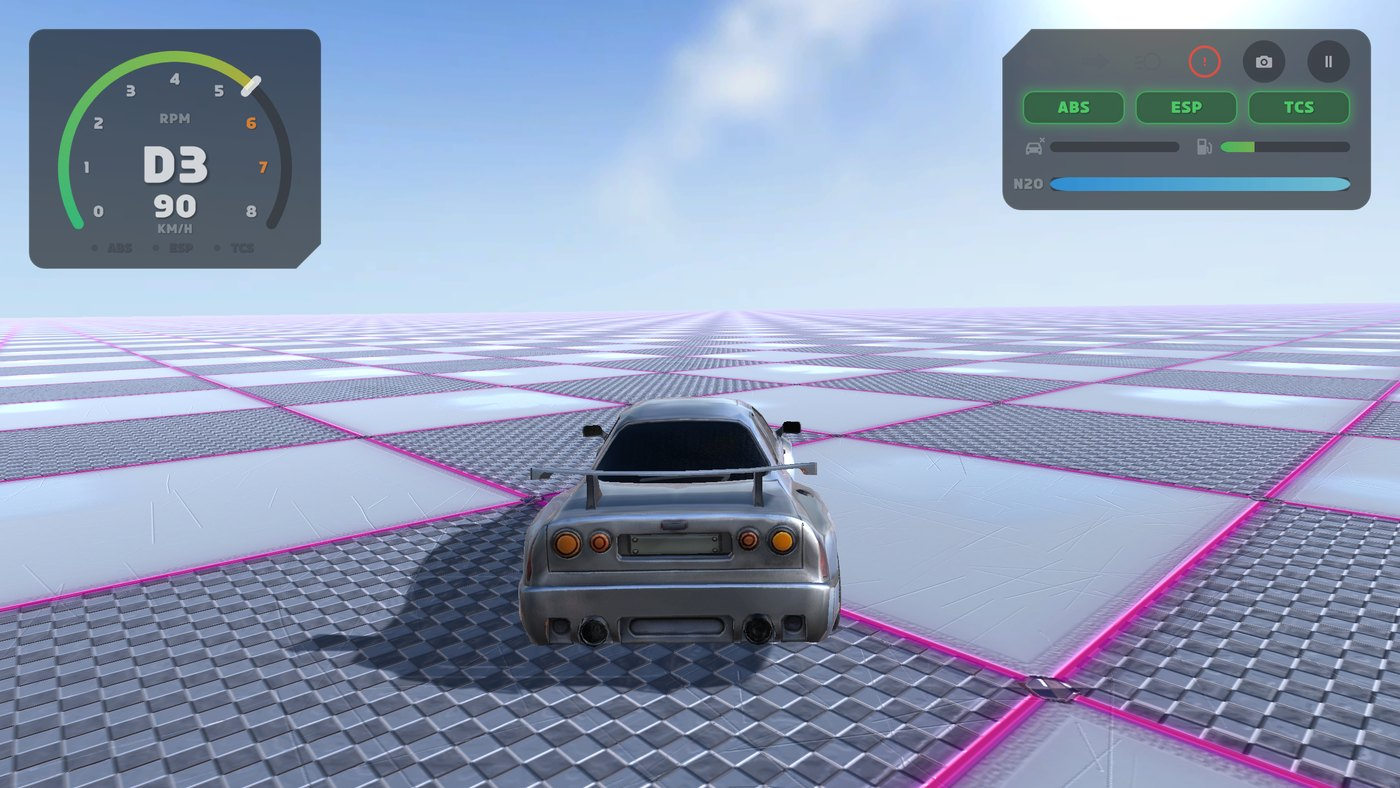
The speed number tells you how fast you are traveling. The gear display shows a forward gear, N for neutral, or R for reverse. You can leave the other dashboard indicators alone for this first drive; UI and HUD explains them.
3. Try another camera
Press C once to switch views. Press it again to continue through the available views.
Check: your view of the car changes. Available views depend on the camera setup; Cameras explains how to add and adjust them.
4. Stop the game
Click Unity's Play button again to leave Play Mode. To start another drive from the scene's starting setup, click Play again.
Check: the game stops running and you can edit the scene again.
Before you start editing: changes to scene objects during Play Mode normally disappear when you stop. For a change you want to keep, stop Play Mode first, make the edit, and save the scene. Shared settings assets can behave differently; Assists and Presets explains RCCP's handling settings.
If the car does not respond
Work through these checks in order. Once it drives, return to step 3.
- Check Play Mode and keyboard focus. Make sure Play Mode is running, then click inside the Game view away from buttons and text fields.
- Check the engine. If it is stopped, press I once to start it, then try W again. I toggles the engine, so repeated presses turn it on and off.
- Check the input mode. If touch pedals are displayed, stop Play Mode. Open Tools > BoneCracker Games > Realistic Car Controller Pro > RCCP Settings and turn off Use mobile controller for this keyboard tutorial. Press Play again.
- Check the Console. Open Window > General > Console and read the first red error. For Input System errors, return to Installation.
If the car still will not move, or the camera and dashboard do not follow it, use Troubleshooting.
Next step
You have completed the first drive when you can accelerate, steer, brake, change camera and stop Play Mode.
Set up your own vehicle → — turn your model into a drivable car.
Or choose what you want to explore:
- Demo Content — import the city and additional example scenes.
- Controls — all keys, gamepads, steering wheels and rebinding.
- UI and HUD — understand and customize the dashboard.