Cameras
Goal: make the camera follow your car, adjust the chase view, and add a hood or wheel view.
Before you start
Use a working player vehicle. Stop Play Mode before editing the scene.
RCCP uses one scene camera to handle several views. A camera mount is a small object on the vehicle that marks where a hood or wheel view should sit.
1. Check the scene camera
- Look for the RCCP camera in the Hierarchy. If you are using the prototype scene, use its existing camera.
- If your scene has none, open Tools > BoneCracker Games > Realistic Car Controller Pro > Add to Scene > RCCP Camera.
- Press Play, click inside the Game view and drive.
Check: the view follows the player car. If it follows nothing or the wrong car, fix player registration using Scenes and Spawning.
For the normal player-spawning workflow, RCCP assigns Vehicle to follow for you. Leave Camera pivot under the camera system's control.
2. Frame the chase camera
- Stop Play Mode and select the RCCP camera.
- Open Chase camera (TPS) in its Inspector. TPS means the view follows behind the vehicle.
- For manual framing, turn off Frame the car automatically.
- Adjust Distance behind the car and Height above the car.
- Press Play and test both a straight and a corner.
Check: the whole car is visible and enough road ahead is in view. If the distance changes back when the camera picks up the vehicle, automatic framing is still on.
Automatic framing is useful when the player can switch between vehicles of different sizes. It measures each vehicle and chooses distance and height for it.
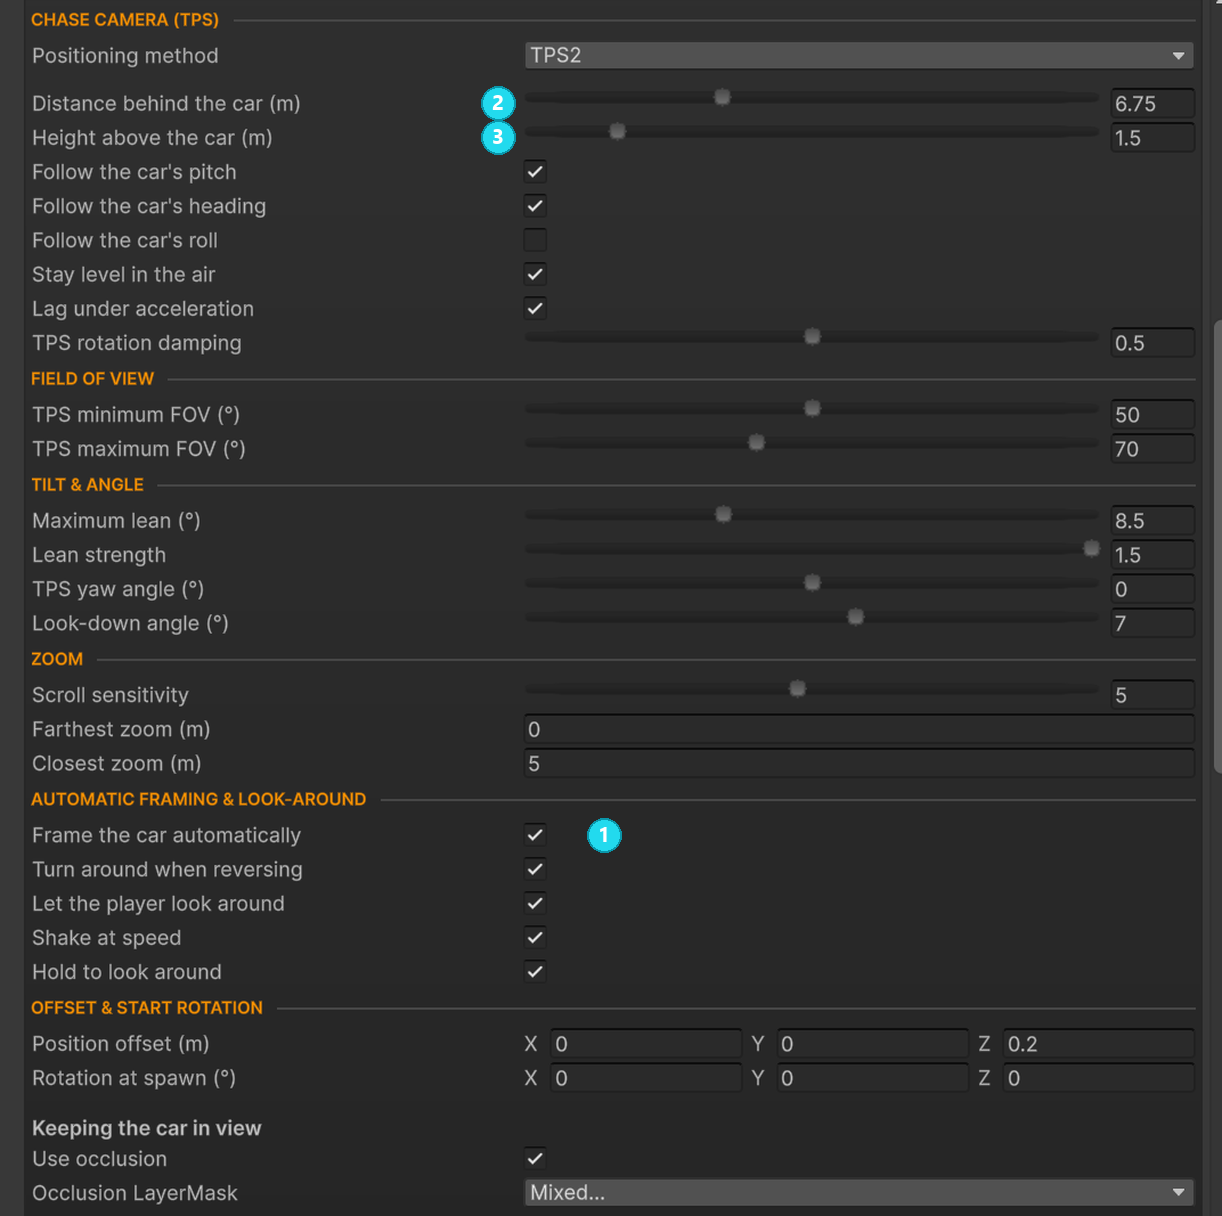
Open the screenshot at full size. Scroll through the chase settings to find 1 Frame the car automatically; the example shows it enabled. Turn it off for manual framing, then adjust 2 Distance and 3 Height near the top. The shown values belong to this example vehicle.
Framing the chase camera
| Setting | Use it to |
|---|---|
| Look-down angle | Aim further down toward the road |
| Position offset | Move the framing sideways, up or forward |
| TPS rotation damping | Change how quickly the view comes around behind the car |
| Aim at the middle of the car | Frame the body instead of an awkward model origin |
| TPS minimum FOV / TPS maximum FOV | Control how much the field of view widens with speed |
Field of view means how wide the camera can see. Equal standstill and top-speed values remove the speed-based widening.
For a calmer view, try reducing Maximum lean, turning off Shake at speed, or changing whether the camera follows the car's pitch and roll. Test one change at a time.
3. Add a hood or wheel view
- Stop Play Mode and select the vehicle root.
- In Presentation, add or open Cameras.
- Click Add Hood / Cockpit Camera or Add Wheel Camera.
- Select the created mount and use the Scene view's Move and Rotate tools to position it. Put a cockpit mount near the driver's eye position, facing forward.
- Select the scene's RCCP camera. In the matching view section, enable Include in the camera cycle.
- Press Play, click inside Game view and press C to cycle views.
Check: the new view appears and looks along the road. If it is inside a panel, stop Play Mode and reposition the mount.
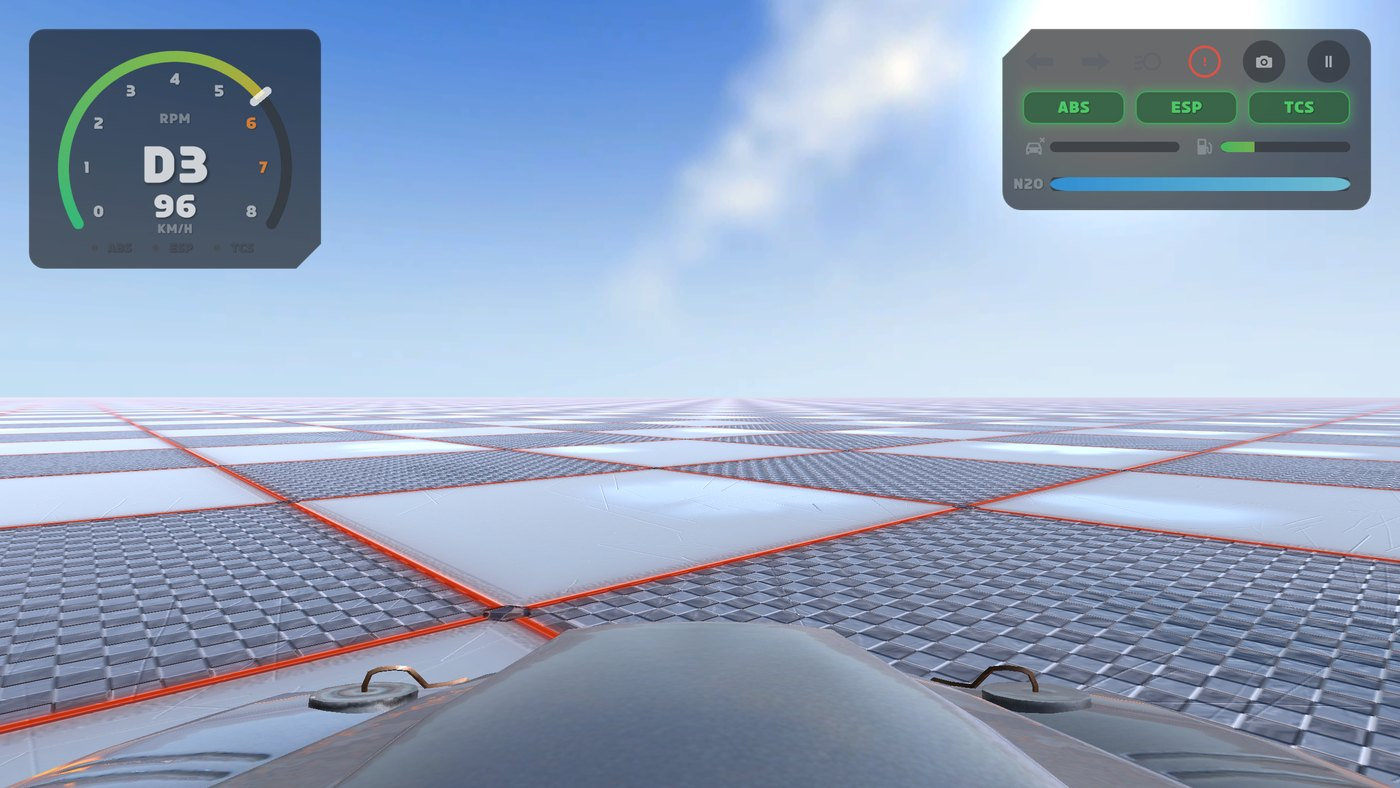
Changing the view
| View | Needs |
|---|---|
| TPS — chase | A registered player vehicle |
| FPS — hood or cockpit | A hood/cockpit mount on that vehicle |
| WHEEL | A wheel mount on that vehicle |
| FIXED — roadside | A Fixed Camera System in the scene |
| CINEMATIC | A Cinematic Camera System in the scene |
| TOP — overhead | Its camera-cycle option enabled |
Unavailable or excluded views are skipped. The truck-and-trailer view takes over from chase when an active trailer is attached.
For roadside or cinematic views, use Create Fixed Camera System or Create Cinematic Camera System in the RCCP camera Inspector, then enable the corresponding cycle option.
4. Test looking around and obstructions
With Play Mode stopped, inspect:
| Setting | Meaning |
|---|---|
| Let the player look around | Enables orbiting in the chase or hood view |
| Hold to look around | Uses the RCCP canvas drag interaction; turn it off for direct mouse look-around |
| Return to the normal view | Returns behind the moving car after look-around input ends |
| Use occlusion | Pulls the chase camera closer when scenery blocks the shot |
| Occlusion LayerMask | Chooses which scene objects count as obstructions |
Then drive near a wall and try looking around.
Check: the camera responds to the intended control and avoids hiding the car behind scenery. If an invisible object keeps pulling the camera inward, check its layer.
The mouse wheel zooms the chase view. Farthest zoom and Closest zoom are offsets from the normal chase distance; zoom resets when changing view or vehicle.
Hold B to look back with the standard keyboard bindings. Controls covers rebinding and other devices.
Optional: other camera features
| Feature | Where to start |
|---|---|
| Automatic camera changes for a display or menu scene | Change camera by itself and Time on each view |
| Top-down driving | TOP, Overhead height and Viewing angle |
| A flat, perspective-free overhead view | Use ortho mode |
| Softer impact movement | Shake the camera on impact, Spring stiffness and Spring damping |
| Enclosed cockpit sound | Muffle audio inside the car, then choose the views that count as inside |
| Crash camera takeover | Let a crash take this camera and the crash system's settings |
| Replay camera work | Replay and Recording |
| Photo mode and saved screenshots | Camera and photo mode API |
Crash and replay camera modes belong to their systems. Do not select those modes manually as ordinary views.
If the camera does not work
| What you see | What to check |
|---|---|
| Nothing follows the car | Player vehicle registration and the existing scene camera |
| Hood or wheel view is skipped | Both its vehicle mount and its cycle option must exist. |
| Mouse look-around does nothing | Game-view focus, Let the player look around, and Hold to look around |
| Camera distance keeps resetting | Frame the car automatically |
| The camera shakes too much | Shake at speed, roll-following and impact-shake settings |
| Jitter remains after camera tuning | Check physics and performance in Performance and Platforms. |
Stop Play Mode and save the scene after making the final settings.
Read next
- Controls — camera input and rebinding.
- Scenes and Spawning — which vehicle the camera follows.
- Field Reference — all camera fields.